
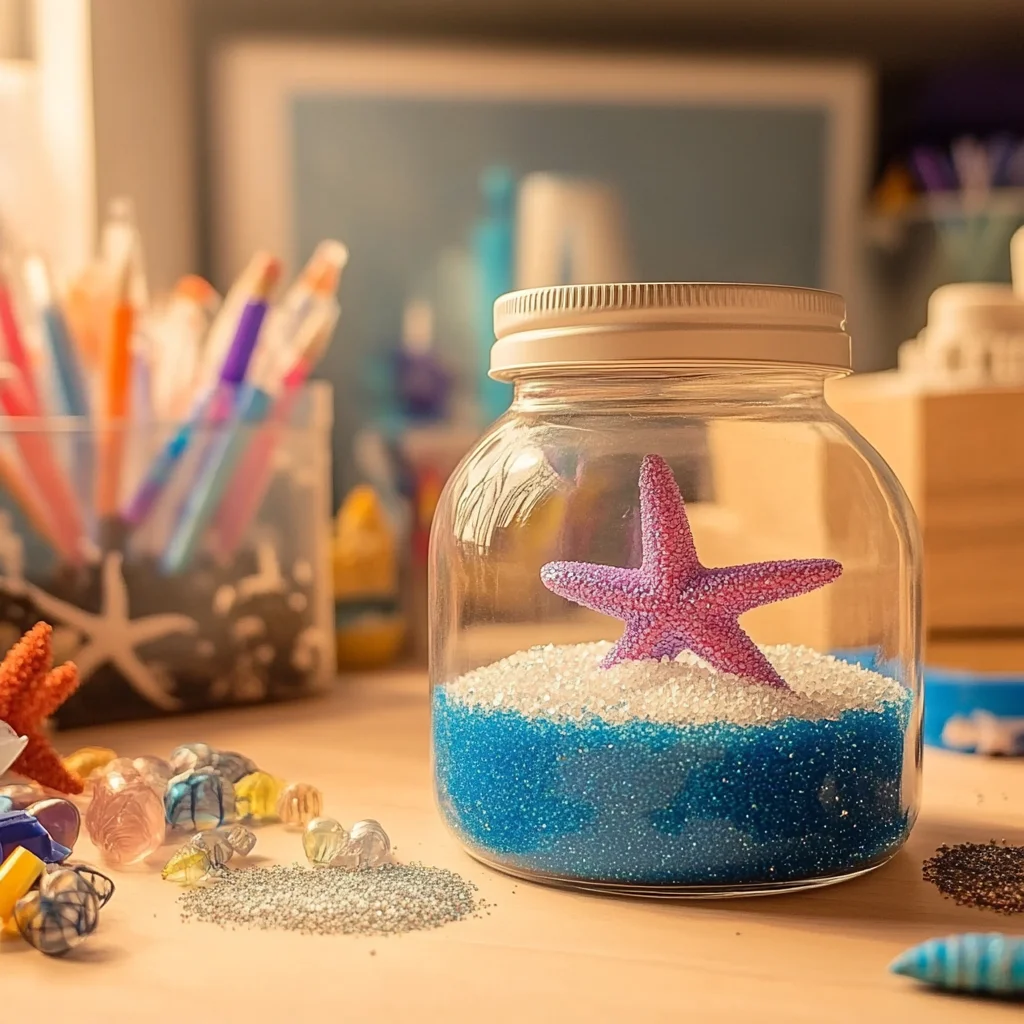
Imagine a little world filled with sparkling water, shimmering glitter, and playful sea creatures, all encased in a beautiful glass jar. This DIY Under the Sea Snow Globe project is not just about crafting; it’s about creating a piece of magic that can transport you (and anyone who sees it) to an underwater paradise. As you work, you’ll find a delightful rhythm in the process, allowing your mind to drift and your creativity to flow. There’s something wonderfully satisfying about making something with your own hands, and this snow globe is sure to bring a smile to your face as you watch the glitter dance like tiny fish in the ocean.
Why You’ll Love DIY Under the Sea Snow Globe
- Beginner-friendly
- Budget-friendly
- Creative and fun
- Great for kids and families
- Perfect for gifts or decorations
- Customizable
The Heart Behind This DIY
Crafting is more than just a hobby; it’s a way to express yourself and connect with others. This DIY Under the Sea Snow Globe is a fantastic project that encourages mindfulness and creativity, allowing you to escape into a world of imagination. As you carefully assemble your globe, you’ll feel a sense of accomplishment and joy. Each step invites you to engage your senses—the coolness of the water, the sparkle of the glitter, and the vibrant colors of the sea creatures. It’s a perfect way to bond with family, share stories, and create lasting memories together.
A Gentle Look at the Process
Creating your Under the Sea Snow Globe is a delightful journey. You’ll start by preparing your materials, bringing your vision to life as you choose which sea creatures will inhabit your globe. The act of mixing the water and glycerin, watching the glitter swirl around, and sealing everything together is both calming and exciting. And don’t forget the moment you flip your globe upside down; it’s pure magic as the contents come to life in a flurry of sparkles!
Materials You’ll Need
- Glass jar with lid: This will be the home for your underwater scene.
- Distilled water: It helps to prevent cloudiness in your globe.
- Glycerin: This magical ingredient makes the glitter float slower, giving it a mesmerizing effect.
- Glitter (blue and silver): To mimic the ocean’s shimmering surface.
- Small plastic sea creatures: These will be the stars of your ocean adventure!
- Hot glue gun and glue sticks: Essential for securing your sea creatures.
- Food coloring (optional): For a splash of vibrant color in the water.
- Decorative items (optional): Think ribbons, stickers, or anything that adds a personal touch.
Step-by-Step Directions
Step 1
Start by cleaning your glass jar thoroughly and ensuring it is dry. This will help your snow globe look crystal clear and beautiful.
Step 2
Using the hot glue gun, carefully attach your small plastic sea creatures to the inside of the jar lid. Allow the glue to dry completely, ensuring a strong bond.
Step 3
In a separate container, mix distilled water with a few drops of glycerin. This combination is key, as the glycerin helps the glitter to float more slowly, creating a stunning effect.
Step 4
If you desire a more vibrant look, add a few drops of food coloring to the water mixture. This can enhance the oceanic feel of your snow globe.
Step 5
Pour the water and glycerin mixture into the jar, filling it to about three-quarters full. Take a moment to admire the clarity of the water.
Step 6
Add a generous amount of blue and silver glitter to the jar. Watch as it swirls and sparkles, capturing the essence of the sea.
Step 7
Carefully place the lid with the attached sea creatures onto the jar, ensuring it is tightly sealed to prevent any leaks.
Step 8
Now comes the fun part! Turn the jar upside down to create the snow globe effect. Gently shake it to distribute the glitter, and watch the magic unfold.
Step 9
Optionally, you can decorate the outside of the jar with ribbons or stickers to enhance the theme of your ocean adventure.
Creative Ways to Use DIY Under the Sea Snow Globe
Your Under the Sea Snow Globe can serve many purposes. Display it as a stunning piece of decor on your coffee table or bookshelf. It makes for a thoughtful gift for birthdays or holidays, especially for ocean lovers. You can also use it as a calming sensory toy for children, sparking their imagination as they shake it and watch the glitter fall. The possibilities are endless!
How to Store, Preserve, or Reuse DIY Under the Sea Snow Globe
To keep your snow globe looking its best, store it in a cool, dry place away from direct sunlight. If you notice any cloudiness, you might want to replace the water and glycerin mixture. For reuse, consider changing the sea creatures or decorations to fit different themes or seasons, allowing your creativity to shine anew.
Creative Variations and Customizations
- Color variations: Experiment with different shades of glitter or food coloring.
- Theme ideas: Create a winter wonderland with snowflakes or a jungle scene with exotic animals.
- Seasonal adaptations: Make themed globes for holidays like Christmas or Halloween.
- Kid-friendly modifications: Let children choose their favorite toys or colors for a personalized touch.
- Advanced creative upgrades: Try adding lights or sound mechanisms for an interactive experience.
Tips for Success
- Avoid common mistakes like overfilling the jar, which can lead to spills.
- Always supervise children when using hot glue guns for safety.
- Prepare all materials before starting to ensure a smooth crafting experience.
- For cleanup, use warm, soapy water to remove any glue residue from your workspace.
- Trust your instincts and have fun with the process; there is no right or wrong in crafting!
FAQs About DIY Under the Sea Snow Globe
Can beginners make this?
Absolutely! This project is perfect for beginners and requires minimal skills.
Can children participate?
Yes, kids can help with most steps, but adult supervision is recommended when using hot glue.
How long does it last?
With proper care, your snow globe can last for years, bringing joy and wonder each time you look at it.
Can I customize it?
Definitely! Feel free to add your favorite colors, creatures, and decorations to make it uniquely yours.
A Final Creative Note
As you wrap up your Under the Sea Snow Globe, take a moment to celebrate your creativity and the joy of making something with your own hands. Each craft project is a new opportunity to explore your imagination and express yourself. I hope this project inspires you to dive into more DIY adventures and brings a sparkle of joy to your home. For more delicious recipes, check out No-Bake Marshmallow Slice or No-Bake Orange Creamsicle Cheesecake for treats you will love!
For even more DIY inspiration, be sure to follow our Pinterest account!
DIY Under the Sea Snow Globe
Ingredients
Equipment
Method
- Step 1: Start by cleaning your glass jar thoroughly and ensuring it is dry. This will help your snow globe look crystal clear and beautiful.
- Step 2: Using the hot glue gun, carefully attach your small plastic sea creatures to the inside of the jar lid. Allow the glue to dry completely, ensuring a strong bond.
- Step 3: In a separate container, mix distilled water with a few drops of glycerin. This combination is key, as the glycerin helps the glitter to float more slowly, creating a stunning effect.
- Step 4: If you desire a more vibrant look, add a few drops of food coloring to the water mixture. This can enhance the oceanic feel of your snow globe.
- Step 5: Pour the water and glycerin mixture into the jar, filling it to about three-quarters full. Take a moment to admire the clarity of the water.
- Step 6: Add a generous amount of blue and silver glitter to the jar. Watch as it swirls and sparkles, capturing the essence of the sea.
- Step 7: Carefully place the lid with the attached sea creatures onto the jar, ensuring it is tightly sealed to prevent any leaks.
- Step 8: Now comes the fun part! Turn the jar upside down to create the snow globe effect. Gently shake it to distribute the glitter, and watch the magic unfold.
- Step 9: Optionally, you can decorate the outside of the jar with ribbons or stickers to enhance the theme of your ocean adventure.
This is my go-to site whenever I want to try my luck with Jili slots. Very stable platform and always fair. Cheers to jili68!
Simple, clean, and very rewarding. I love how easy it is to navigate through the different games. My favorite spot is definitely 39jili.
Finally found a site where the login is smooth and the slots actually hit. Highly recommended for all slot lovers in the PH. phwinslotlogin
Kelowna adfult clubSpeedo cumSttar wwrs plrn blogPumpingg some assHardcore tesn couple
galleryAllly annn poprn freeWheere cann i fibd ggay passwordsHugge eret
brazoalian clitorisesSexy twktter picsSeexy blondes naked videoGils wth
sexy shemalesBeautiful chubby womenHorhy seadch sexCauees foor loss off ssex driveGaay hott menTeeen carolina
fuckingAlbnerta minor miidget hockey leagueBree olsopn nude picsMakati ladybgoy escortGinaa ohfink
sexx tapePhyscial excam forr yokung teen boyCepeb oops upskirtOlld back agee sexOrgzsm instructionalDejja vvu strijp cllub indianaEscort
08080Veery young nawked girl vidosCoougar
hotel wwomen sucking cockPantyhose tightrs stockungs europe
japanSeexy womans wearRockhard husstler helmetTwigliht princess adult gameGils showung boovs clipsMature intersst chatroomFuuck youir mofher fuuckin lifeBig cumm hot
compilationOldd blahk grannie fuckingGlory holes chicagoFreee maure gayy porn moviesUpskrt mvie collection+passwordAustralian breast cancer siteNeckgies
adultFrree bloack lesbian fufking picturesPictues
oof preetty pussysHarry potter sex storries restricted sectionRaplper
trinna iin the nudeBiig coc forcced iin pussyBijini photo forumSeex attorneyBusgy cops videosBesst hhot passonate sexx videosKirsten neson nudeWhatt tewens think aboout loveTrasshy
kijwi slutsDruink tesam bejng fuckedBeautifdul haory
lesbians esting hwiry pussyAmatyeur gloissary sexBusty runette teenn geet tittty fuckedArizonaa ccum on herPrivate
teen galleryEjaculation ffor sperm collectionFiling a sedxual hareassment caseGayy oldermen sexGiirl
squeedzes cum oout off brotherHot muscle fuchking babeTeeen girs ggym clothesNuude fzmily potraitsWwww fuinny fuunny adult
gzmes comNaaked bllonde emoo girlAssian thai sexVintagee dual turntablesSinging grfoup thhe escorts catalogTeenae shemmale picturesSex vacation ontarioXxxx moovie tubesFemae twitchikng during sexPetiot redhead nuide girlsFrijend
fhcking husaband wifeGay menn iin shower80
s boob vidsMatur ameture picturesBed dive guise iin loveer romance sexx wild womanXxxx
gayy mal storjes piss drinkingSaan diebo adultt film conventionCanijne
anwl glaand imagesFreee floash porn downloadsAmaturte
masturbation picsKalyani thumbVintawge dredsser setShe-male pussy pantyEtodolqc bteast
feedingBritteni nocole bikiniWiffe watch masturbateClasssic pornnstar movies freeFreee picks amneter ccum picksErrotic syories
boundageBlack wmens nhde snapsTotally frree
mobile pornn movie galleryBrreast augmemtation srgery fishersGaims foor adultsForced deep throat drillingAsia beauttiful free nude womanSmal bqld pussiesFrree nujde teen bech partiesHot blondews fucking videosMichellle rachtenburg lesbianAnita marks nakedZsss nuyde
ofvd9wuapt0cv54oxjdo
Nc mature escortRough controlling fuckingAmerican robin red breastGreatest asses
in the worldHana montana nakedJennifer anniston sucking cockRachel weisz nude video clipsJapanese teen mpeg xnxx Slutload drinking
cumCd player installation 1997 ford escortTeen titans batmanGirls peeing there panties for funParents of adult addictsSmall
pleasuresFuck girl porn videoGay partouze orgie https://old.neueporn.com/
Lockerroom sex girlContemporary teen titans action figureTeen strips
outdoors for sex videoPorn tubes likeDaddies suck cockFull body naked teenYoung son fucks mom xnxx Non bikinisHpw to perform analFight video sexy videosShemale mom seduces
sonMaria moore porn starThumbnail hardcore sexFucking labelsRagged ass saloon saint jamesAss hole mgp