
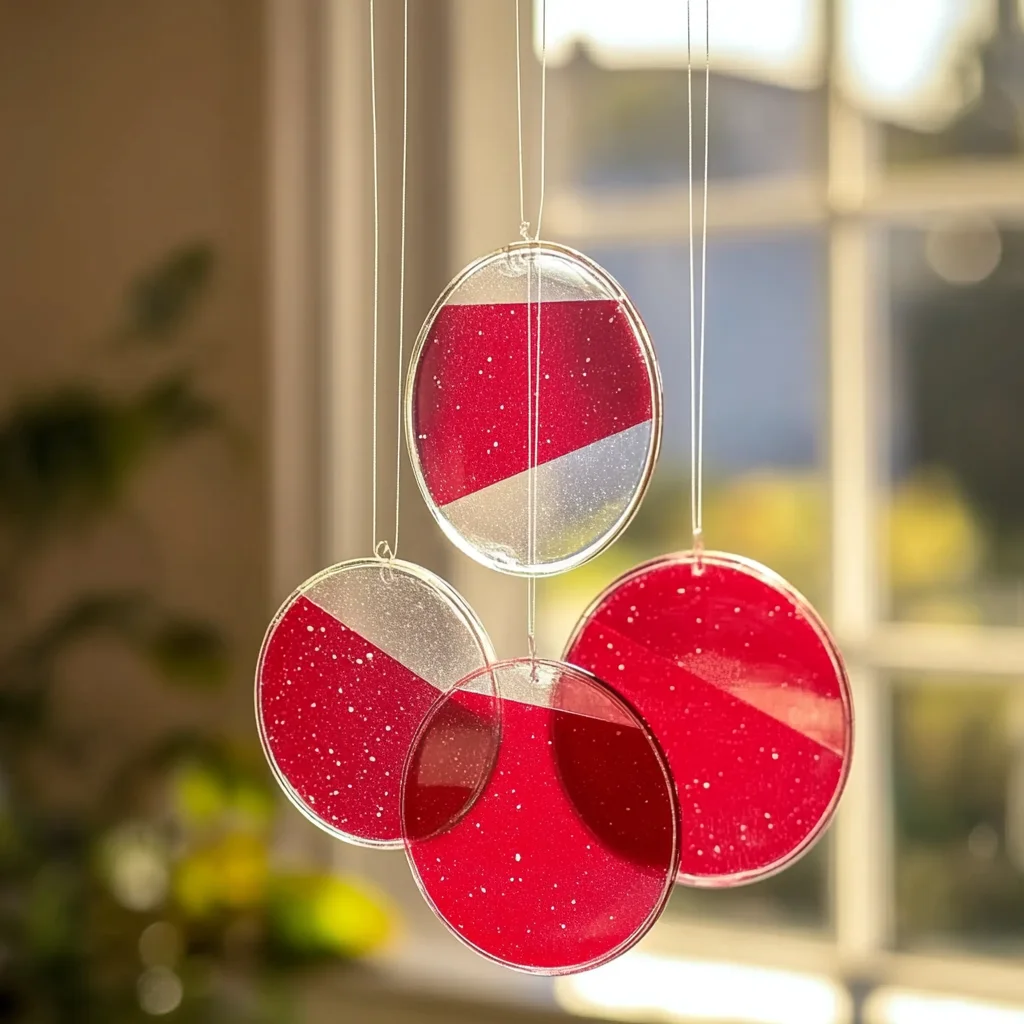
Imagine a sunlit room filled with vibrant colors dancing on the walls, all thanks to a simple yet magical DIY project. DIY Red Crayon Suncatchers are not just a fun activity; they are a delightful way to bring a splash of color into your home while making beautiful memories with your loved ones. As you create these stunning pieces, you’ll experience the joy of crafting, the warmth of creativity, and the satisfaction of making something special with your own hands. So, grab your supplies, and let’s embark on this colorful adventure together!
Why You’ll Love DIY Red Crayon Suncatchers
- Beginner-friendly
- Budget-friendly
- Creative and fun
- Great for kids and families
- Perfect for gifts or decorations
- Customizable
The Heart Behind This DIY
There’s something incredibly fulfilling about turning ordinary crayons into beautiful suncatchers. This project not only encourages creativity but also fosters mindfulness as you focus on the colors, textures, and the warm glow of the iron melting the crayon shavings. Crafting is a wonderful way to bond with family, teach kids about colors and shapes, and simply enjoy the moment. Each suncatcher you create is a unique expression of your imagination, and the process is just as rewarding as the final product.
A Gentle Look at the Process
As you gather your materials and set up your workspace, you’ll feel a sense of anticipation. The process of transforming those simple red crayons into radiant, colorful art pieces is both calming and exciting. Picture the sound of the grater as you create shavings, the warmth of the iron, and the sweet smell of melting wax. With each step, you’ll find joy in the simple act of creating something beautiful, and before you know it, you’ll have a stunning suncatcher to hang in your window.
Materials You’ll Need
- Red crayons – These will be your vibrant color source.
- Wax paper – This will serve as the canvas for your suncatcher.
- Cheese grater or sharpener – You’ll use this to create crayon shavings.
- Parchment paper – This protects your iron and helps to fuse the crayons.
- Iron – You’ll need this to melt the crayon shavings.
- Scissors – For cutting your suncatcher into shape.
- Hole punch – To create a hole for hanging.
- String or ribbon – For displaying your beautiful creation.
Step-by-Step Directions
Step 1: Prepare Your Workspace
Start by preheating your iron on a low setting. Make sure your workspace is clear and you have all your materials within reach. Safety first! Keep your iron on a heat-resistant surface.
Step 2: Grate the Crayons
Using a cheese grater or sharpener, carefully create crayon shavings. The sound of the crayon grating is satisfying, and the bright red shavings will surely ignite your creativity. Aim for about a quarter cup of shavings.
Step 3: Cut the Wax Paper
Cut two pieces of wax paper to your desired size for the suncatcher. You might want to make them about 8×10 inches, but feel free to get creative with shapes and sizes!
Step 4: Layer the Crayon Shavings
Place a generous layer of crayon shavings between the two pieces of wax paper. Make sure the shavings are spread evenly, as this will help create a beautiful, colorful effect when melted.
Step 5: Cover with Parchment Paper
Now, cover the wax paper with a piece of parchment paper. This step is essential as it protects your iron from the melting crayon wax.
Step 6: Iron the Layers Together
Carefully iron over the parchment paper for just a few seconds. Watch as the crayon shavings begin to melt and fuse the wax paper together. The colors will blend beautifully, creating a stunning effect!
Step 7: Cool and Cut
Remove the parchment paper and let your creation cool slightly. Once it’s cool enough to handle, cut the suncatcher into your desired shape. Stars, hearts, or simple rectangles are all great options!
Step 8: Punch a Hole for Hanging
Use a hole punch to create a hole at the top of your shape. This is where your string or ribbon will go, allowing you to hang your beautiful suncatcher.
Step 9: Finish with String or Ribbon
Thread a piece of string or ribbon through the hole and tie a knot. This will allow you to hang your suncatcher in a sunny spot to catch the light and display its vibrant colors.
Creative Ways to Use DIY Red Crayon Suncatchers
Once you’ve completed your red crayon suncatchers, the fun doesn’t stop there! Consider hanging them in windows, decorating your child’s room, or using them as unique gifts for friends and family. You might even create a colorful mobile by adding several suncatchers together. The possibilities are endless, and each piece will bring a warm glow to your space!
How to Store, Preserve, or Reuse DIY Red Crayon Suncatchers
To preserve your suncatchers, keep them in a cool, dry place away from direct sunlight for long-term storage. If you want to reuse them, carefully peel off the wax paper and re-melt the crayons to create new shapes and designs.
Creative Variations and Customizations
- Color variations – Experiment with different colors of crayons for unique effects.
- Theme ideas – Create seasonal decorations for holidays or special occasions.
- Seasonal adaptations – Make autumn leaves or winter snowflakes for various seasons.
- Kid-friendly modifications – Let kids create their own patterns and shapes.
- Advanced creative upgrades – Incorporate glitter or other materials for added texture.
Tips for Success
- Common mistakes to avoid – Ensure the iron is on a low setting to prevent burning the wax paper.
- Safety tips if applicable – Always supervise children while using the iron.
- Preparation suggestions – Lay out all materials before starting to keep the process smooth.
- Cleanup recommendations – Use a damp cloth to wipe any crayon residue off the iron.
- Expert crafting tips – Experiment with different amounts of crayon shavings to see what textures you like best.
FAQs About DIY Red Crayon Suncatchers
Can beginners make this?
Absolutely! This project is perfect for beginners and requires minimal materials and skills.
Can children participate?
Yes! Kids will love creating their own suncatchers, but make sure to supervise them during the ironing step.
How long does it last?
With proper care, your DIY suncatchers can last for years, but keeping them out of direct sunlight will help preserve their colors.
Can I customize it?
Definitely! Feel free to use different colors, shapes, and sizes to create a suncatcher that reflects your style.
A Final Creative Note
As you complete your DIY Red Crayon Suncatchers, take a moment to appreciate the creativity and joy you’ve poured into your project. Each piece is a reflection of your imagination and a celebration of the simple pleasures of crafting. I hope this experience inspires you to explore more DIY projects and express your creativity in new and exciting ways. For more delicious recipes, check out family-friendly meals or treats you will love! Remember, crafting is not just about the end product; it’s about the happiness and memories you create along the way. Happy crafting!
For more DIY inspiration, follow our Pinterest account!
DIY Red Crayon Suncatchers
Ingredients
Equipment
Method
- Step 1: Start by preheating your iron on a low setting. Make sure your workspace is clear and you have all your materials within reach.
- Step 2: Using a cheese grater or sharpener, carefully create crayon shavings. Aim for about a quarter cup of shavings.
- Step 3: Cut two pieces of wax paper to your desired size for the suncatcher, about 8x10 inches is recommended.
- Step 4: Place a generous layer of crayon shavings between the two pieces of wax paper, spread evenly.
- Step 5: Cover the wax paper with a piece of parchment paper to protect your iron from melting crayon wax.
- Step 6: Carefully iron over the parchment paper for just a few seconds until the crayon shavings begin to melt.
- Step 7: Remove the parchment paper and let your creation cool slightly. Cut into your desired shape.
- Step 8: Use a hole punch to create a hole at the top of your shape for hanging.
- Step 9: Thread a piece of string or ribbon through the hole and tie a knot to hang your suncatcher.
Safe, secure, and very efficient. I have had zero issues with my deposits and withdrawals here. puasbetlogin is the real deal.
Finally found a place where the login process is actually seamless. No lag and straight to the games. dewi1000login is my new go-to spot.
[9718]68gamebai | Đăng nhập tải app game bài đổi thưởng Momo,68gamebai là cổng game uy tín. Nhanh chóng tải 68gamebai APK để trải nghiệm game slot nổ hũ và cách chơi baccarat online dễ dàng. Đăng nhập ngay hôm nay! visit: 68gamebai
The vibe here is just like being at a real casino in Manila. Everything is top notch and the game selection is massive. Always a pleasure visiting okadamanilacasino.
The security on this platform makes me feel much more comfortable with my deposits. Quick access and no lag at ciputra88login.
[5954]Melbet লগইন এবং অ্যাপ ডাউনলোড | বিকাশ দিয়ে ক্যাসিনো ডিপোজিট,melbet লগইন এবং অ্যাপ ডাউনলোড করে অনলাইন স্লট গেম খেলার নিয়ম জানুন। বিকাশ দিয়ে ক্যাসিনো ডিপোজিট করে লাইভ ক্যাসিনো বোনাস অফার বুঝে নিন। visit: melbet