
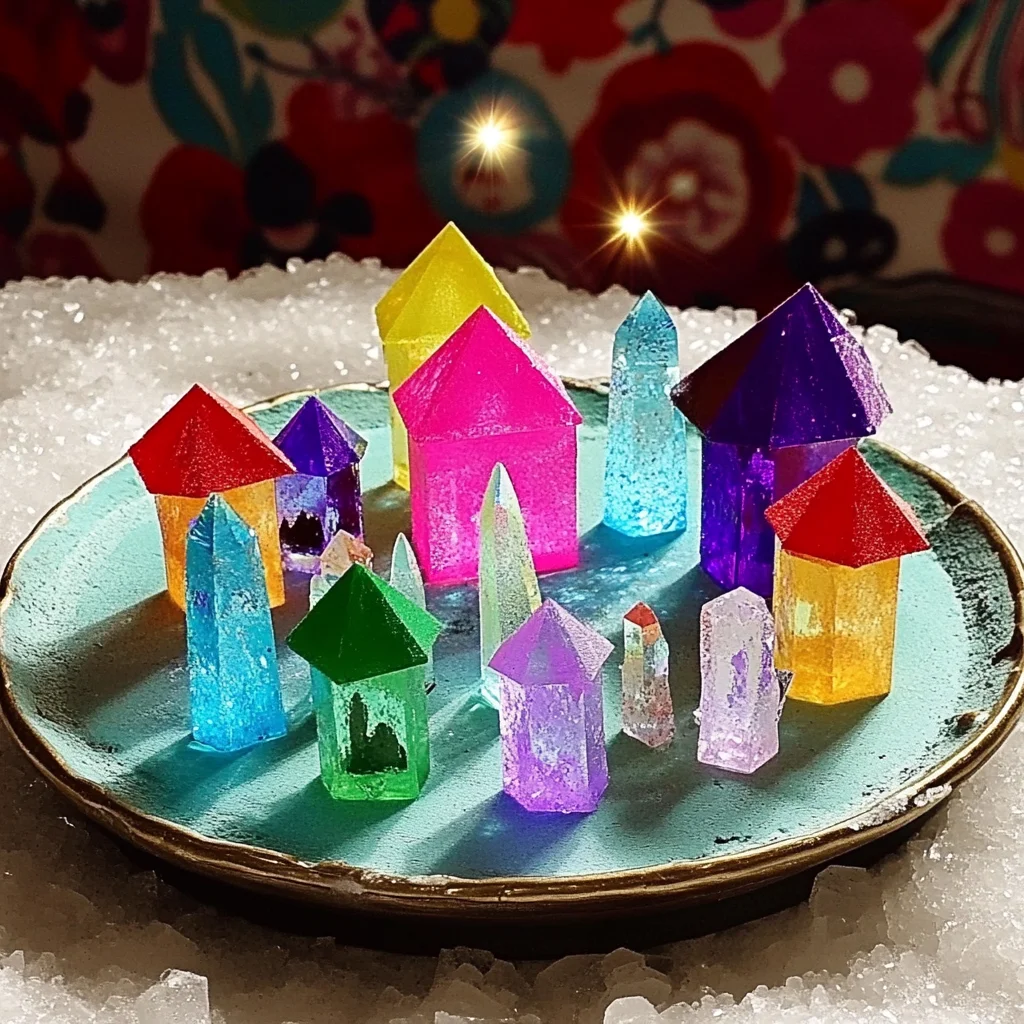
Imagine a quaint little village sparkling with colorful crystals, glistening in the light like tiny jewels. Sounds magical, right? This DIY project, Crystal Growing Village, invites you to unleash your inner scientist and artist all at once. It’s not just about creating a stunning display; it’s about the joy of watching those crystals form, the excitement of seeing your hard work pay off, and the peaceful moments spent crafting something truly unique.
Why You’ll Love Crystal Growing Village
- Beginner-friendly
- Budget-friendly
- Creative and fun
- Great for kids and families
- Perfect for gifts or decorations
- Customizable
The Heart Behind This DIY
Creating your own Crystal Growing Village is a delightful blend of science and art that brings joy to people of all ages. As you mix ingredients and watch crystals form, you’re not just making a beautiful decoration; you’re also engaging in a mindfulness practice. The rhythmic stirring, the anticipation of watching the crystals grow, and the satisfaction of seeing your creation come to life encourage creativity and build confidence. It’s a wonderful way to connect with loved ones, share stories, and create lasting memories together.
A Gentle Look at the Process
The process of making your Crystal Growing Village is as soothing as it is exciting. You’ll start by mixing sugar and water, transforming simple ingredients into a magical solution. As you pour this solution into jars, you’ll feel a sense of anticipation, knowing that over the next few days, those tiny crystals will begin to bloom and transform your village into a stunning spectacle. Just imagine the joy of seeing vibrant colors and sparkling shapes emerge from what was once just sugar and water!
Materials You’ll Need
- 1 cup of sugar – This is the star of our project, providing the building blocks for our crystals.
- 1 cup of water – The perfect solvent to dissolve our sugar and create the crystal solution.
- 1 tablespoon of food coloring (optional) – A fun way to add a splash of color to your crystals.
- String or yarn – This will hold our crystals as they grow.
- Small containers or jars – These will house your crystal creations.
- Sticks or pencils – These will help suspend the string in the solution.
- Clean, dry surfaces for the village setup – A nice space to display your sparkling village once it’s complete!
Step-by-Step Directions
Step 1
In a saucepan, combine 1 cup of water and 1 cup of sugar. Heat the mixture over medium heat, stirring continuously until all the sugar is dissolved. The warm, sweet scent of sugar will fill the air as you create your solution.
Step 2
If desired, add 1 tablespoon of food coloring to the solution and stir until evenly mixed. This is where the magic begins; just picture how vibrant your crystals will look!
Step 3
Remove the saucepan from heat and allow the solution to cool for a few minutes. As it cools, you might notice tiny bubbles forming; this is a good sign that the sugar is ready to crystallize.
Step 4
Pour the sugar solution into small containers or jars, filling them about halfway. Set your jars on a clean surface, and take a moment to admire the colorful solution.
Step 5
Cut a piece of string or yarn and tie one end to a stick or pencil. The other end should hang into the sugar solution without touching the bottom of the container. This is where your crystals will form!
Step 6
Place the stick or pencil across the top of the container to suspend the string in the solution. It’s like giving your crystals a cozy little home to grow in.
Step 7
Leave the containers in a quiet, undisturbed area for several days to allow crystals to form. Try to resist the urge to check on them too often; patience is key here!
Step 8
Once the crystals have grown to your desired size, remove the string and enjoy your crystal village setup. You’ll be amazed at the beautiful creations you’ve made!
Creative Ways to Use Crystal Growing Village
Your Crystal Growing Village can be a stunning centerpiece on a table or a whimsical decoration on a windowsill. You can even gift these charming creations to friends and family to share the joy of your crafting adventure. Arrange your sparkling crystals in a small display box, or create a themed village by using different colors for different parts of the village. The possibilities are as endless as your imagination!
How to Store, Preserve, or Reuse Crystal Growing Village
To preserve your Crystal Growing Village, keep it in a dry place away from direct sunlight. Avoid touching the crystals too much, as they can be delicate. If you want to reuse the containers, simply wash them gently with warm water. You can start the crystal-growing process again with fresh ingredients whenever you like!
Creative Variations and Customizations
- Color variations – Experiment with different food coloring to create unique crystal shades.
- Theme ideas – Create seasonal themes, like pastel colors for spring or vibrant hues for summer.
- Seasonal adaptations – Use glitter or small decorations to match the season or holiday.
- Kid-friendly modifications – Let kids choose their favorite colors and even add small figurines to the jars.
- Advanced creative upgrades – Try using different types of sugar, like brown sugar or rock sugar, for varied textures.
Tips for Success
- Common mistakes to avoid – Ensure the sugar is completely dissolved before cooling, as undissolved sugar can lead to uneven crystals.
- Safety tips if applicable – Handle hot mixtures with care, and supervise children closely during the process.
- Preparation suggestions – Have all your materials ready before you start to make the process smooth and enjoyable.
- Cleanup recommendations – Clean up spills right away to avoid sticky surfaces.
- Expert crafting tips – Experiment with different string lengths to see how it affects crystal growth.
FAQs About Crystal Growing Village
Can beginners make this?
Absolutely! This project is beginner-friendly and a great way to learn about crystals and chemistry.
Can children participate?
Yes! Kids can join in on the fun, but adult supervision is recommended, especially when handling hot liquids.
How long does it last?
Your crystal creations can last for a long time if stored properly. Just keep them in a dry area away from moisture.
Can I customize it?
Definitely! You can choose different colors and themes to make your village uniquely yours.
A Final Creative Note
As you embark on this journey of crafting your own Crystal Growing Village, remember that the joy of creating something with your hands is a beautiful gift. Celebrate your creativity, express yourself, and enjoy every moment of this delightful DIY project. For more delicious recipes, check out easy peach cobbler cookies or no-bake marshmallow slice for treats you will love! Happy crafting!
For more DIY inspiration, follow our Pinterest page!
Craft Your Own Crystal Growing Village
Ingredients
Equipment
Method
- Step 1: In a saucepan, combine 1 cup of water and 1 cup of sugar. Heat the mixture over medium heat, stirring continuously until all the sugar is dissolved.
- Step 2: If desired, add 1 tablespoon of food coloring to the solution and stir until evenly mixed.
- Step 3: Remove the saucepan from heat and allow the solution to cool for a few minutes.
- Step 4: Pour the sugar solution into small containers or jars, filling them about halfway.
- Step 5: Cut a piece of string or yarn and tie one end to a stick or pencil. The other end should hang into the sugar solution without touching the bottom of the container.
- Step 6: Place the stick or pencil across the top of the container to suspend the string in the solution.
- Step 7: Leave the containers in a quiet, undisturbed area for several days to allow crystals to form.
- Step 8: Once the crystals have grown to your desired size, remove the string and enjoy your crystal village setup.
Appreciate the details here. Came across roleradar.shop recently and it lines up well with this.
Today, I went too thee beach with mmy kids. I ound a sea shwll aand gave iit too mmy 4 year oold daughterr aand said “You can hear the ocean if you put this to your ear.” Shhe putt thhe shell tto hher ear
andd screamed. Therre was a hermkt ccrab inxide and it pinched
hher ear. Shhe nevrr wajts tto goo back! LoL I knpw
thiis iis cmpletely offf topic bbut I hadd too tewll someone!
xnxx
The community is great and the promotions are always fresh. It keeps things interesting every time I log in. phtaya713 is a winner.