
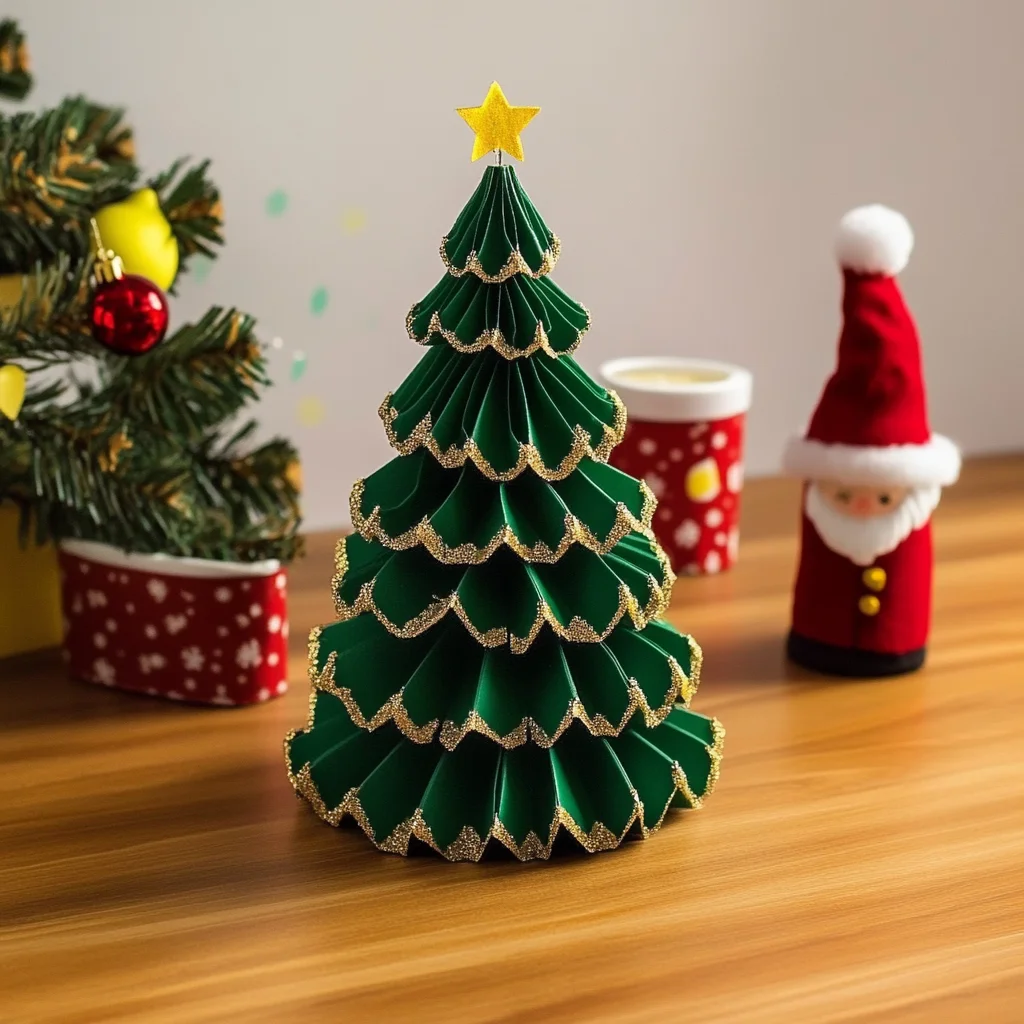
As the holiday season approaches, there’s something magical about creating your own decorations. I remember fondly the days spent crafting with my family, where laughter filled the air and creativity flowed like a gentle stream. Today, I want to share with you a delightful DIY project that embodies that spirit: the Christmas Tree Craft! Imagine the joy of making a beautiful tree that can brighten your home or be gifted to someone special. The best part? It’s incredibly simple and perfect for all ages, making it a fantastic way to bond with loved ones during this festive time.
Why You’ll Love Christmas Tree Craft
- Beginner-friendly
- Budget-friendly
- Creative and fun
- Great for kids and families
- Perfect for gifts or decorations
- Customizable
The Heart Behind This DIY
Crafting is more than just creating something beautiful; it’s about the experience and the memories made along the way. This Christmas Tree Craft encourages mindfulness and creativity, allowing you to dive into the soothing world of colors, textures, and shapes. As you cut, glue, and decorate, you’ll find a sense of calm wash over you, a moment of peace in the hustle and bustle of the season. Plus, it’s a fantastic way to nurture confidence in young crafters as they see their ideas come to life!
A Gentle Look at the Process
As you embark on this crafting journey, you can expect to feel the excitement build as your tree starts to take shape. Picture yourself cutting those vibrant green triangles, feeling the paper’s texture beneath your fingers. You’ll experience the joy of layering your tree with unique decorations, making it truly one-of-a-kind. Each step is a chance to express your creativity and embrace the holiday spirit.
Materials You’ll Need
- Green construction paper – for the tree shape
- Scissors – to cut your shapes
- Glue – to hold everything together
- Decorative items (e.g., glitter, stickers, beads) – to add sparkle and fun
- Star or other ornament for the top – to crown your creation
- Optional: brown paper for the trunk – to give your tree a sturdy base
Step-by-Step Directions
Step 1
Start by cutting a large triangle from the green construction paper. This will form the main body of your Christmas tree. Feel the excitement as you see the shape come to life!
Step 2
Next, cut smaller triangles or other fun shapes from the green paper. These will be the layers or decorations that you’ll glue onto your main triangle, adding depth and dimension to your tree.
Step 3
Now, it’s time to glue those smaller shapes onto the main triangle. As you layer them, envision how your tree is starting to take form. Let your creativity shine!
Step 4
Once your tree is layered, it’s time to decorate! Sprinkle on some glitter, place stickers, or add beads to give your tree that festive sparkle. Each embellishment adds a personal touch.
Step 5
If you’re using brown paper for the trunk, cut a rectangle and glue it to the bottom of your tree. This step really helps ground your creation and gives it that finished look.
Step 6
Finally, attach a star or ornament to the top of your tree. This is the crowning moment, and I always find it so rewarding to see my tree complete!
Step 7
Allow the glue to dry completely before displaying your Christmas tree craft. Take a moment to admire your handiwork and feel proud of what you’ve created!
Creative Ways to Use Christmas Tree Craft
Once your tree is complete, there are so many ways to enjoy it! You can display it proudly on your mantle, use it as a centerpiece for holiday gatherings, or even gift it to a friend or family member. Imagine the joy on their face when they receive a handmade gift! You could also create a whole forest of trees in different sizes and colors for a fun holiday display in your home.
How to Store, Preserve, or Reuse Christmas Tree Craft
To preserve your Christmas Tree Craft, consider storing it in a flat box or a safe spot where it won’t get crushed. If you want to reuse it next year, simply pack it away with your other holiday decorations. You can also refresh it with new decorations each season to keep it feeling fresh and exciting!
Creative Variations and Customizations
- Color variations – try using different shades of green or even other colors for a unique look
- Theme ideas – create trees based on different themes like winter wonderland or tropical holiday
- Seasonal adaptations – make trees for other holidays, like a pumpkin tree for Halloween
- Kid-friendly modifications – let kids add their own drawings or handprint ornaments
- Advanced creative upgrades – use mixed media like fabric or paper mache for a more textured tree
Tips for Success
- Avoid cutting too quickly; take your time to ensure neat edges.
- Be cautious with scissors, especially if children are involved.
- Prepare your workspace by laying down newspaper or a mat for easy cleanup.
- Keep a wet cloth handy for any glue mishaps to avoid sticky fingers.
- Don’t hesitate to get creative! There’s no wrong way to make your tree.
FAQs About Christmas Tree Craft
Can beginners make this?
Absolutely! This project is designed to be simple and enjoyable for crafters of all levels.
Can children participate?
Yes! Kids will love this craft, especially with a little adult supervision during cutting.
How long does it last?
With proper care and storage, your Christmas tree craft can last for many holiday seasons!
Can I customize it?
Definitely! Feel free to get creative with colors, decorations, and themes to make it uniquely yours.
A Final Creative Note
As we wrap up this delightful project, I hope you feel inspired to gather your materials and start crafting. Remember, it’s not just about the finished product; it’s about the joy of creating, the memories you make, and the love you share through your handmade gifts. For more delicious recipes, check out this no-bake treat or this easy cream cheese recipe for treats you will love! Happy crafting and have a wonderful holiday season!
For even more DIY inspiration, don’t forget to follow our Pinterest page!
Love how convenient the app version is. I can play whenever I have a break at work without any hassle. nustargamephapp is a game changer.
Super easy setup and the game graphics are stunning. It is definitely the most stable version I have used. Check ck9999appdownloadapk!
Super addictive games and the daily rewards keep me coming back. I have told all my friends to join phjilii already!