Do you remember those magical moments around the holidays? The twinkle of lights, the scent of pine, and the pure joy of a treat that just feels like Christmas? For me, nothing quite captures that whimsical spirit like a homemade candy. And this Grinch Fudge? Oh honey, it’s not just a recipe; it’s a little slice of holiday cheer that’s so ridiculously easy, quick, and utterly memorable, you’ll be making it year after year. Forget complicated desserts; this festive green fudge with bright red hearts is here to steal (and then perfectly re-gift!) the show. It’s the perfect treat to whip up for a holiday party, a sweet gift for neighbors, or just a fun activity with the kids. Get ready to embrace your inner Grinch – in the best way possible!
Why You’ll Love Grinch Fudge
- Fast: Seriously, this comes together in minutes on the stovetop!
- Easy: No baking, no candy thermometer, just simple steps.
- Giftable: Perfect for holiday platters, cookie exchanges, or teacher gifts.
- Crowd-pleasing: Who can resist a festive, creamy fudge?
Ingredients
- 3 cups white chocolate chips: I find good quality chips melt more smoothly. You can use white chocolate bars too, just chop them finely!
- 1 (14-ounce) can sweetened condensed milk: This is our magic ingredient for that creamy, dreamy texture. Make sure it’s sweetened condensed milk, not evaporated milk!
- 4 tablespoons salted butter, chilled and cubed: A little butter adds richness and helps with the texture. Chilled and cubed helps it melt evenly.
- ¾ teaspoon clear vanilla extract: Clear vanilla keeps our green vibrant! Regular vanilla might tint it slightly brown, which we don’t want for our Grinchy color.
- ¼ – ½ teaspoon gel green food coloring: Gel food coloring gives you a much richer color without thinning out your fudge. Start with ¼ teaspoon and add more until you get that perfect Grinch green!
- 25 extra-large red heart candy sprinkles: These are the iconic touch! Look for larger, flat hearts that will stand out.
How to Make Grinch Fudge
Alright, grab your apron, friend! We’re about to make some holiday magic. This is where the fun begins, and trust me, it’s going to be so much easier than you think. If you love quick, delightful treats, you might also enjoy whipping up some no-bake cookie bars for another effortless dessert!
- Prep Your Pan: First things first, get an 8×8-inch pan ready. Line it with aluminum foil, making sure you leave a little overhang on the sides. This foil will be your best friend when it’s time to lift the fudge out later. Give that foil a light spray with non-stick spray, just to be extra careful, and set it aside.
- Melt the Good Stuff: In a medium saucepan, over a gentle medium-low heat, combine your white chocolate chips, sweetened condensed milk, and those lovely chilled, cubed pieces of salted butter. Now, the key here is patience and stirring. Stir often to prevent anything from sticking or burning on the bottom. In about 5-6 minutes, you’ll see it transform into this beautiful, smooth, melted dream.
- Color It Grinchy: Take your glorious mixture off the heat. Immediately stir in your clear vanilla extract. Then, add your gel green food coloring. Start with a quarter teaspoon and add more if needed, mixing until the fudge is a perfectly uniform Grinch green, with no pesky streaks. This is the moment your fudge really comes to life!
- Spread the Love: Working quickly (fudge sets fast!), pour and spread your vibrant green fudge evenly into your prepared pan. Use an offset spatula or the back of a spoon to get it nice and smooth on top.
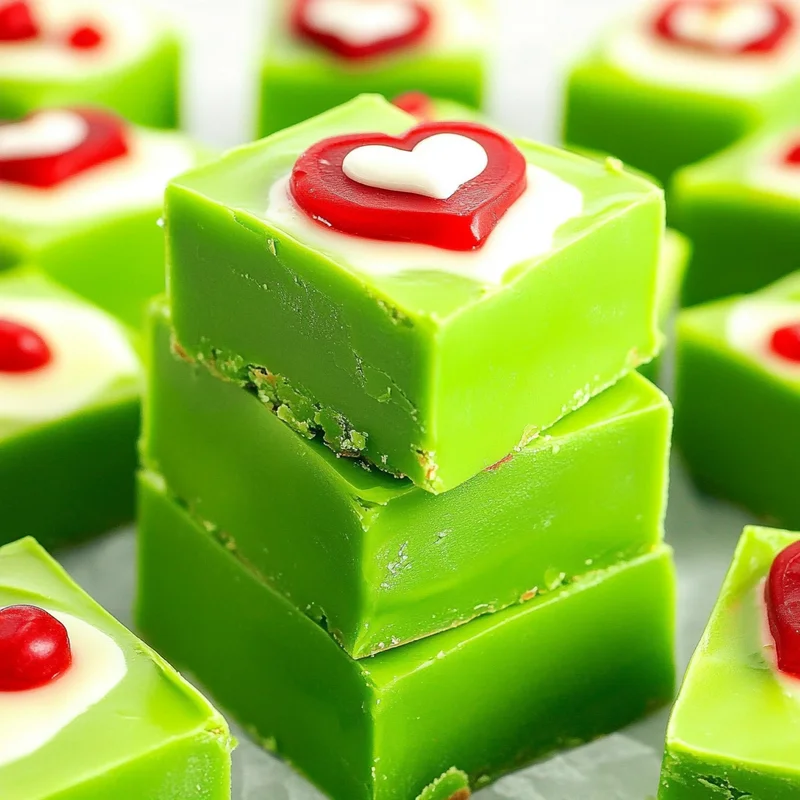
- Add the Hearts: This is my favorite part! Carefully arrange your 25 extra-large red heart candy sprinkles on top of the warm fudge. I like to do five rows of five, spacing them about ½-¾ inches apart. This way, every single piece you slice later will have its very own little Grinch heart. Such a thoughtful touch, right?
- Chill Out: Let your fudge cool down completely at room temperature first. This helps it set properly. Once it’s cool, pop it in the refrigerator to fully set and chill. This usually takes a couple of hours.
- Slice & Serve: Once the fudge is wonderfully firm, use those overhanging aluminum foil edges to gently lift the whole block of fudge out of the pan. Place it on a cutting board and slice it into 25 perfect pieces. Voila! You’ve made the most adorable and delicious Grinch Fudge. For anyone who loves making bar-style desserts, mastering the art of cutting perfect squares is key, and you can find even more fantastic ideas and tips in the ultimate guide to baking perfect bar cookies. If you’re keen on exploring more delightful fudge recipes, you might find some inspiration in how simple it is to make easy Meyer lemon fudge, showcasing the versatility of this sweet treat.
Substitutions & Additions
Part of the fun of cooking is making a recipe your own! Here are a few ideas to shake things up:
- Chocolate Chips: While white chocolate is traditional for the Grinchy green, you could try using milk chocolate chips for a different flavor profile, though your green will be darker!
- Extracts: Not a huge vanilla fan? A tiny dash of peppermint extract (about ¼ teaspoon) would make this a delicious holiday mint fudge! Almond extract is another great option.
- Sprinkles: If you can’t find large heart sprinkles, small red nonpareils or even tiny red M&Ms would work beautifully. You could even crush up some red peppermints for a festive crunch!
- Mix-ins: Fold in ½ cup of chopped pistachios or mini marshmallows right after you remove the fudge from the heat for added texture and flavor.
- Sparkle: A dusting of edible glitter (gold or silver would be lovely!) over the top of the set fudge adds an extra touch of magic.
Tips for Success
- Don’t Rush the Melt: Keep that heat low when melting the chocolate and butter. High heat will cause the chocolate to seize or burn, and nobody wants grumpy Grinch fudge!
- Gel Food Coloring is Key: Liquid food coloring can thin out your fudge and won’t give you that intense, vibrant green. Gel is concentrated and works wonders.
- Work Quickly: Once you take the fudge off the heat and add the vanilla and coloring, it starts to set pretty fast. Have your pan ready and your sprinkles at hand!
- Even Slicing: For perfectly uniform squares, use a sharp, warm knife. You can run your knife under hot water and wipe it dry between slices. This makes for clean cuts, especially through the chocolate and sprinkles.
- Make Ahead: This fudge is a fantastic make-ahead treat! It stores beautifully, which is perfect for busy holiday schedules.
How to Store Grinch Fudge
Once your Grinch Fudge is perfectly set and sliced, you’ll want to store it correctly to keep it fresh and delicious!
- Countertop: You can store Grinch Fudge at room temperature in an airtight container for up to 3-4 days. If your home is particularly warm, it might get a little softer.
- Refrigerator: For longer storage and a firmer texture, keep it in an airtight container in the refrigerator for up to 2-3 weeks. I like to place parchment paper between layers to prevent sticking.
- Freezer: Yes, you can freeze fudge! Wrap individual pieces or blocks tightly in plastic wrap, then place them in a freezer-safe bag or container. It will keep well for up to 2-3 months. Thaw it in the refrigerator or at room temperature before enjoying.
FAQs
- Q: Can I use different sized pans?
- A: Absolutely! An 8×8-inch pan gives you thicker fudge. If you use a 9×13-inch pan, your fudge will be thinner and might set a little faster. Just adjust your heart sprinkle spacing accordingly!
- Q: Why did my fudge turn out grainy?
- A: Grainy fudge usually happens if the sugar crystals didn’t fully dissolve or if the mixture was overheated. Keep the heat low and stir consistently until everything is perfectly smooth. Using high-quality chocolate chips can also help!
- Q: Can I skip the clear vanilla extract?
- A: You can use regular vanilla extract, but be aware that it might slightly dull the vibrant green color due to its brownish tint. It won’t affect the taste significantly, but for that true Grinch look, clear is best!
- Q: What if my fudge doesn’t set?
- A: This is usually due to incorrect measurements, often not enough sweetened condensed milk or too much added liquid (like liquid food coloring). Ensure precise measurements and use gel food coloring. Chilling thoroughly is also crucial for firming up!
For more festive and delicious recipe inspiration, be sure to follow us on Pinterest!
Easy Grinch Fudge
Ingredients
Equipment
Method
- Step 1: Prep Your Pan. Line an 8×8-inch pan with aluminum foil, leaving an overhang on the sides. Lightly spray the foil with non-stick spray and set aside.
- Step 2: Melt the Good Stuff. In a medium saucepan, over gentle medium-low heat, combine white chocolate chips, sweetened condensed milk, and chilled, cubed salted butter. Stir often for about 5-6 minutes until transformed into a smooth, melted mixture.
- Step 3: Color It Grinchy. Remove the mixture from the heat. Immediately stir in clear vanilla extract. Add gel green food coloring, starting with ¼ teaspoon, and mix until the fudge is a perfectly uniform Grinch green with no streaks.
- Step 4: Spread the Love. Working quickly, pour and spread the vibrant green fudge evenly into your prepared pan. Use an offset spatula or the back of a spoon to smooth the top.
- Step 5: Add the Hearts. Carefully arrange your 25 extra-large red heart candy sprinkles on top of the warm fudge. Aim for five rows of five, spaced about ½-¾ inches apart, so each piece will have a heart.
- Step 6: Chill Out. Let the fudge cool down completely at room temperature first. Once cool, pop it in the refrigerator to fully set and chill, which usually takes a couple of hours.
- Step 7: Slice & Serve. Once the fudge is wonderfully firm, use the overhanging aluminum foil edges to lift the fudge block out of the pan. Place it on a cutting board and slice it into 25 perfect pieces. For uniform squares, use a sharp knife run under hot water and wipe it dry between slices.
Your point of view caught my eye and was very interesting. Thanks. I have a question for you. https://www.brasiliaeuvi.com.br/noticias/extrema-pobreza-aumenta-na-bahia-e-gestao-estadual-culpa-politica-do-governo-bolsonaro/?unapproved=3356&moderation-hash=ddb922fe32039926d593b2ea18fa7f2a#comment-3356