
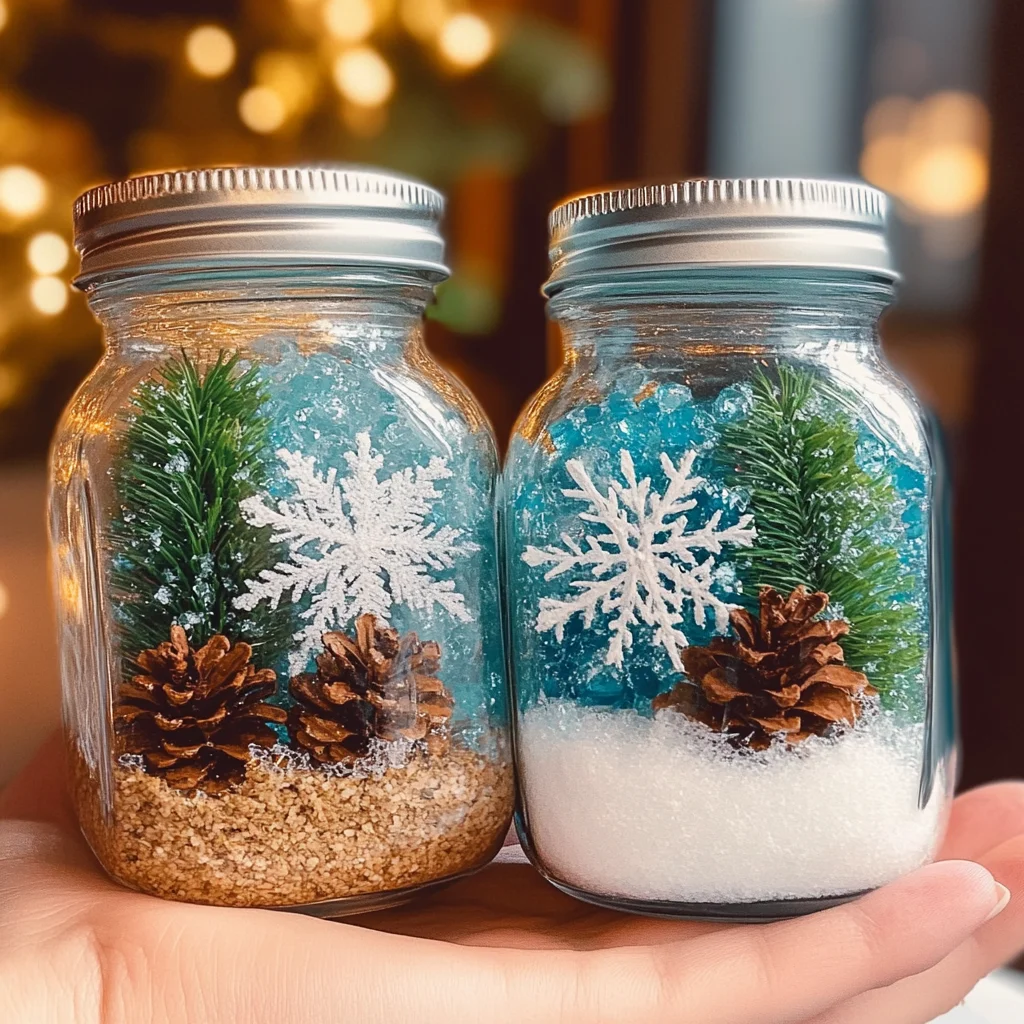
There’s something magical about winter—perhaps it’s the way the world transforms into a snowy wonderland, or the cozy moments spent indoors, wrapped in blankets with a warm drink in hand. Today, I’m thrilled to share a delightful project that captures that magic: DIY Winter Sensory Jars! These enchanting jars are not only beautiful to look at but also provide a wonderful sensory experience, making them perfect for both adults and kids. Imagine the soft shimmer of glitter, the gentle swirling of snowflakes, and the peacefulness that comes with watching these calming jars—it’s a little piece of winter you can create at home.
Why You’ll Love DIY Winter Sensory Jars
- Beginner-friendly
- Budget-friendly
- Creative and fun
- Great for kids and families
- Perfect for gifts or decorations
- Customizable
The Heart Behind This DIY
Crafting has a unique way of bringing us into the moment, allowing us to express our creativity while fostering mindfulness. When you create these winter sensory jars, you’re not just making a decoration; you’re engaging all your senses. The feel of the glitter, the sight of the colors swirled together, and the sound of the jar as you shake it provide a delightful sensory experience. This project is a wonderful way to bond with family, teach kids about winter themes, and inspire imagination, all while enhancing your own sense of calm and creativity.
A Gentle Look at the Process
As you embark on this sensory jar adventure, you can expect a delightful mix of textures and colors. You’ll start by filling the jars with distilled water, creating a clear canvas for your winter-themed masterpieces. The addition of glitter will create a sparkling effect, reminiscent of fresh snow glistening under the sun. Each step invites you to slow down and appreciate the beauty of the season and the joy of crafting something uniquely yours.
Materials You’ll Need
- Clear glass or plastic jars with lids – These will be the perfect containers for your winter wonderland.
- Distilled water – Ensures clarity for your sensory jar and helps the glitter move freely.
- Glitter (silver, white, or blue) – Adds that magical snowy sparkle.
- Epsom salt or fake snow – Gives the effect of snowflakes gently falling.
- Liquid food coloring (optional) – For a splash of color in your winter scene.
- Small winter-themed figurines (e.g., snowflakes, pine trees, animals) – Creates a charming winter landscape in your jar.
- Glycerin (optional) – Slows down the movement of glitter for a mesmerizing effect.
Step-by-Step Directions
Step 1
Begin by filling each jar about three-quarters full with distilled water. This will create a base for your sensory jar, allowing you to see the beautiful mix of ingredients inside.
Step 2
Add a few tablespoons of Epsom salt or fake snow to the water and stir until dissolved. This will give your jar that enchanting snowy texture.
Step 3
If desired, add a few drops of liquid food coloring to achieve your preferred color. Perhaps a soft blue to mimic the winter sky, or a sparkling silver for that frosty touch.
Step 4
Pour in a small amount of glycerin, which will help the glitter move more slowly and gracefully when you shake the jar.
Step 5
Add a generous amount of glitter to the jar. Watch as it dances and twinkles in the water, creating a magical effect.
Step 6
Place the small winter-themed figurines inside the jar. These little accents will bring your winter scene to life!
Step 7
Fill the remaining space in the jar with more distilled water, leaving a little room at the top. This will help prevent spills when you shake the jar.
Step 8
Secure the lid tightly on the jar to keep all your beautiful creations inside.
Step 9
Shake gently to mix the contents and enjoy the sensory experience as the glitter swirls and the ‘snow’ falls.
Creative Ways to Use DIY Winter Sensory Jars
These winter sensory jars can be displayed in your home as lovely decorations, bringing a touch of winter magic to any room. You can use them as calming tools during quiet time, perfect for children who enjoy watching the glitter fall. They also make fantastic gifts for friends and family, especially during the holiday season. Imagine giving a beautifully crafted sensory jar, a piece of your creativity and warmth, to someone you love!
How to Store, Preserve, or Reuse DIY Winter Sensory Jars
To ensure your sensory jars last, keep them in a cool, dry place away from direct sunlight. If you notice any sediment forming at the bottom, simply shake the jar gently to mix it back together. If you ever want to refresh your jar, you can add more glitter or change the figurines to suit the season or occasion.
Creative Variations and Customizations
- Color variations – Experiment with different colors of food coloring for a unique look.
- Theme ideas – Incorporate different themes, like a holiday scene or a cozy cabin in the woods.
- Seasonal adaptations – Create sensory jars for each season using seasonal colors and themes.
- Kid-friendly modifications – Let kids choose their own figurines and colors for a personal touch.
- Advanced creative upgrades – Add essential oils for a sensory experience that smells as delightful as it looks.
Tips for Success
- Common mistakes to avoid – Be careful not to overfill the jar; leave space for the contents to move around.
- Safety tips if applicable – Ensure small figurines are safe for younger children to use.
- Preparation suggestions – Gather all materials beforehand to keep the crafting process smooth.
- Cleanup recommendations – Keep a towel handy for any spills; crafting can get a little messy, but that’s part of the fun!
- Expert crafting tips – Don’t hesitate to experiment with different materials; crafting is all about creativity!
FAQs About DIY Winter Sensory Jars
Can beginners make this?
Absolutely! This project is perfect for beginners, and the steps are simple enough for anyone to follow.
Can children participate?
Yes! This is a great family project, and kids can help with choosing colors and adding materials.
How long does it last?
With proper care, your sensory jar can last for months, providing ongoing enjoyment.
Can I customize it?
Definitely! Feel free to get creative with colors, themes, and decorations.
A Final Creative Note
As you wrap up your sensory jar project, take a moment to appreciate the creativity and effort you’ve put into it. Each jar is not just a beautiful decoration; it’s a reminder of the joy of creating something with your own hands. Celebrate your unique expression and the little moments of happiness that crafting brings. For more delicious recipes, check out these delightful treats or easy snacks you will love! Let’s keep crafting and spreading joy together!
For more DIY inspiration, follow our Pinterest account!
DIY Winter Sensory Jars
Ingredients
Equipment
Method
- Step 1: Wash and dry the glass jar thoroughly. Make sure the container and lid are clean, dry, and free of residue.
- Step 2: Combine approximately 1 cup of distilled water with 2 tablespoons of clear glue or glycerin in a bowl or measuring container. Stir slowly until well combined.
- Step 3: Add 2 to 3 tablespoons of Epsom salt or white glitter to create the snowfall effect. Stir gently and adjust the amount according to the desired appearance.
- Step 4: Carefully place winter-themed decorations inside the clean jar. Arrange them so they have enough room to move naturally without becoming stuck together.
- Step 5: Add a few drops of food coloring or liquid watercolor if desired. Use a small amount at first and add more gradually until you achieve the desired color.
- Step 6: Carefully pour the prepared liquid into the jar, leaving a small amount of space at the top. Wipe the rim clean and secure the lid tightly. Check for leaks before use.
- Step 7: Gently shake the sealed jar and watch the sparkling particles swirl through the winter scene. Set it down and observe as the snow slowly settles.