
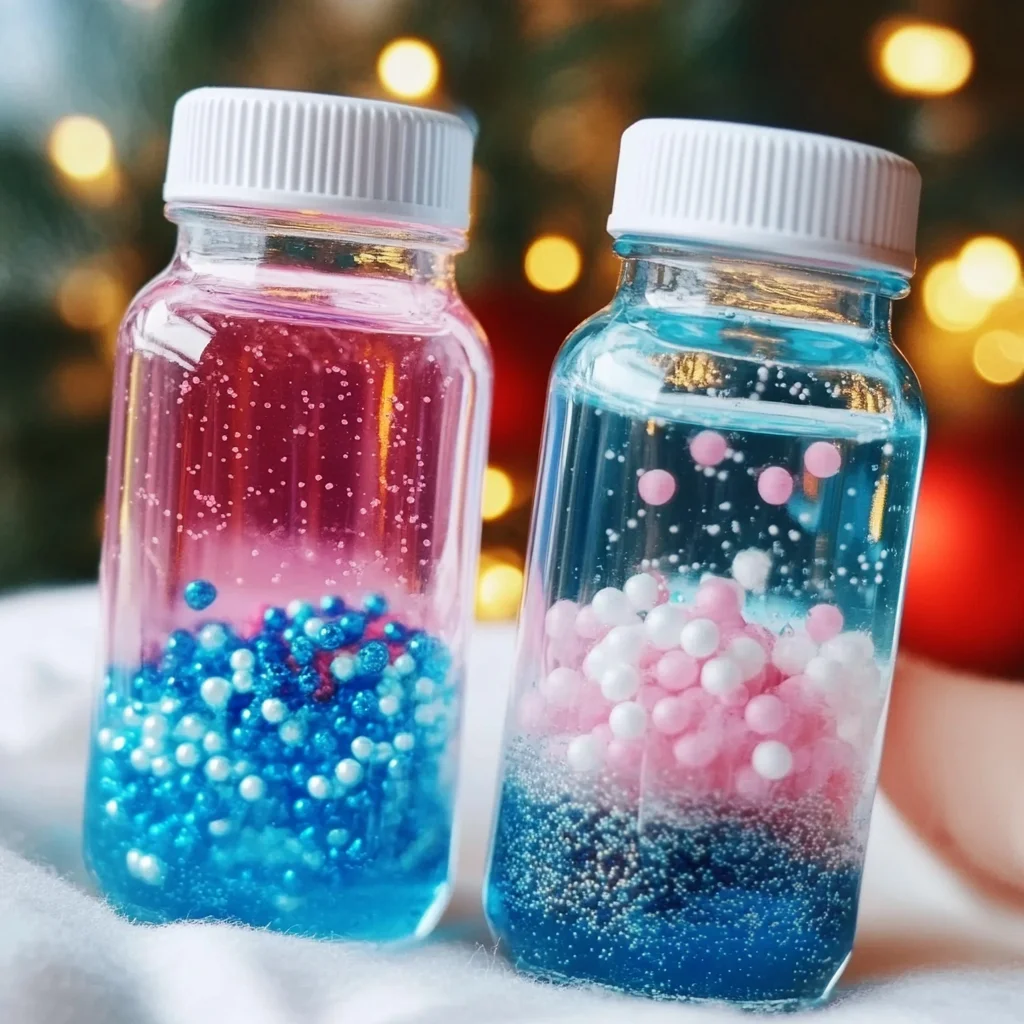
There’s something truly magical about winter, isn’t there? The soft crunch of snow beneath your boots, the twinkling lights that adorn the streets, and the cozy warmth of hot cocoa in your hands. Now, imagine capturing all that winter joy in a beautiful sensory bottle. DIY Winter Sensory Bottles are not just a delightful craft; they are a way to bring a piece of the season indoors, creating a mesmerizing display that can spark joy and wonder in both kids and adults alike. As you craft, you’ll find yourself immersed in a world of creativity, where each shake of the bottle brings to life a swirling winter scene that feels like a gentle snowstorm in your hands.
Why You’ll Love DIY Winter Sensory Bottles
- Beginner-friendly
- Budget-friendly
- Creative and fun
- Great for kids and families
- Perfect for gifts or decorations
- Customizable
The Heart Behind This DIY
Creating these sensory bottles is not just about the end product; it’s about the process and the joy it brings. The act of crafting encourages mindfulness, allowing you to focus on the colors, textures, and sounds around you. As you select each glittery element and watch it swirl together, you’ll feel a sense of calm wash over you. This project is perfect for spending quality time with family, fostering creativity, and even enhancing fine motor skills for little hands. Each bottle serves as a beautiful reminder of the joy of making something with your own hands, a true celebration of winter’s beauty.
A Gentle Look at the Process
When you dive into making your Winter Sensory Bottles, prepare for a delightful experience. You’ll start with a clean bottle, feeling the smooth surface beneath your fingers, and then slowly fill it with all the enchanting ingredients you’ve gathered. The colors will blend, the glitter will twinkle, and the decorations will bring a smile to your face. As you seal the bottle and give it a gentle shake, you’ll create a captivating scene that dances and swirls, inviting you to take a moment and lose yourself in its beauty.
Materials You’ll Need
- Clear plastic bottles or glass jars with lids: Choose your favorite shapes and sizes.
- Distilled water: This keeps your bottle clear and clean.
- Glitter (silver, white, or blue): For that magical shimmer.
- Epsom salt or fake snow: Adds a snowy texture to your creation.
- Liquid glycerin (optional): Thickens the liquid for a slower-moving effect.
- Small winter-themed decorations: Think miniature trees, snowflakes, or cute animals.
- Food coloring (optional): For a pop of color that suits your winter theme.
Step-by-Step Directions
Step 1
Begin by selecting your bottle or jar. Make sure to clean it thoroughly, as this will be the magical vessel for your winter wonderland.
Step 2
Fill the bottle about two-thirds full with distilled water. As you pour, listen to the gentle sound of water filling the bottle—it’s soothing and exciting at the same time!
Step 3
Add a tablespoon of glitter to the water. Watch it sparkle and swirl, giving your bottle that enchanting wintery feel.
Step 4
If you’re using Epsom salt or fake snow, add a tablespoon now. This will create a lovely snowy texture that floats beautifully in the water.
Step 5
For a thicker consistency, add a small amount of liquid glycerin to the mixture. This will help the glitter and snow move more slowly, creating a calming effect.
Step 6
If you’d like, this is the time to add a few drops of food coloring. Mix in your chosen color to achieve a winter wonderland hue that speaks to you.
Step 7
Carefully place your winter-themed decorations into the bottle. Position them as you like, imagining how they will look when the bottle is shaken.
Step 8
Fill the rest of the bottle with distilled water, leaving a little space at the top. This will prevent overflow when you shake it.
Step 9
Secure the lid tightly to avoid any spills. Give it a gentle shake to ensure everything is mixed well.
Step 10
Finally, shake the bottle gently to mix the ingredients and create a sensory experience. Take a moment to admire your beautiful creation!
Creative Ways to Use DIY Winter Sensory Bottles
Once your Winter Sensory Bottle is complete, the possibilities are endless! Display it on a shelf or table as a beautiful piece of winter decor. Use it as a calming tool for kids during quiet time, or as a fun and educational sensory experience for younger children. You can even gift them to friends and family during the holidays, spreading a little winter magic. Imagine how delightful it would be to see their faces light up as they shake the bottle and watch the sparkles dance!
How to Store, Preserve, or Reuse DIY Winter Sensory Bottles
To preserve the beauty of your sensory bottles, keep them in a cool, dry place away from direct sunlight. If you find that the liquid has evaporated over time, simply top it off with more distilled water. These bottles can be reused or repurposed for different seasons or occasions, allowing your creativity to shine again and again.
Creative Variations and Customizations
- Color variations: Experiment with different food coloring combinations for unique effects.
- Theme ideas: Create bottles that represent other seasons or holidays, like autumn leaves or spring flowers.
- Seasonal adaptations: Change the decorations according to the season, like adding pumpkins for fall.
- Kid-friendly modifications: Use larger decorations that are safe for little hands.
- Advanced creative upgrades: Try adding essential oils for a sensory experience that smells as good as it looks!
Tips for Success
- Common mistakes to avoid: Ensure the lid is secured tightly to prevent leaks.
- Safety tips if applicable: If using glass jars, be cautious with little ones around.
- Preparation suggestions: Gather all materials before starting to keep the process smooth and enjoyable.
- Cleanup recommendations: Use a towel or tray to catch any spills during the pouring process.
- Expert crafting tips: Don’t rush! Enjoy each step and let your creativity flow.
FAQs About DIY Winter Sensory Bottles
Can beginners make this?
Absolutely! This project is designed for all skill levels, making it perfect for beginners.
Can children participate?
Yes! Kids can help with pouring, adding decorations, and shaking the bottle, making it a fun family activity.
How long does it last?
With proper sealing and storage, these bottles can last for a long time, providing enjoyment throughout the season.
Can I customize it?
Definitely! Feel free to personalize your sensory bottle with different colors, themes, and decorations.
A Final Creative Note
As you embark on your crafting journey, remember that the true joy lies in the process of creating. Each DIY Winter Sensory Bottle is a unique expression of your imagination, filled with memories and warmth. Celebrate your creativity, and don’t hesitate to share your creations with friends and family. For more delightful recipes, check out [delicious treats] or [simple DIY projects] for treats you will love! Now, gather your materials and let the magic of winter inspire you.
For more DIY inspiration, follow our Pinterest account!
DIY Winter Sensory Bottles
Ingredients
Equipment
Method
- Step 1: Begin by selecting your bottle or jar. Make sure to clean it thoroughly.
- Step 2: Fill the bottle about two-thirds full with distilled water.
- Step 3: Add a tablespoon of glitter to the water.
- Step 4: If using Epsom salt or fake snow, add a tablespoon now.
- Step 5: For a thicker consistency, add a small amount of liquid glycerin.
- Step 6: If desired, add a few drops of food coloring.
- Step 7: Carefully place your winter-themed decorations into the bottle.
- Step 8: Fill the rest of the bottle with distilled water, leaving some space at the top.
- Step 9: Secure the lid tightly to avoid any spills.
- Step 10: Shake the bottle gently to mix the ingredients and create a sensory experience.