
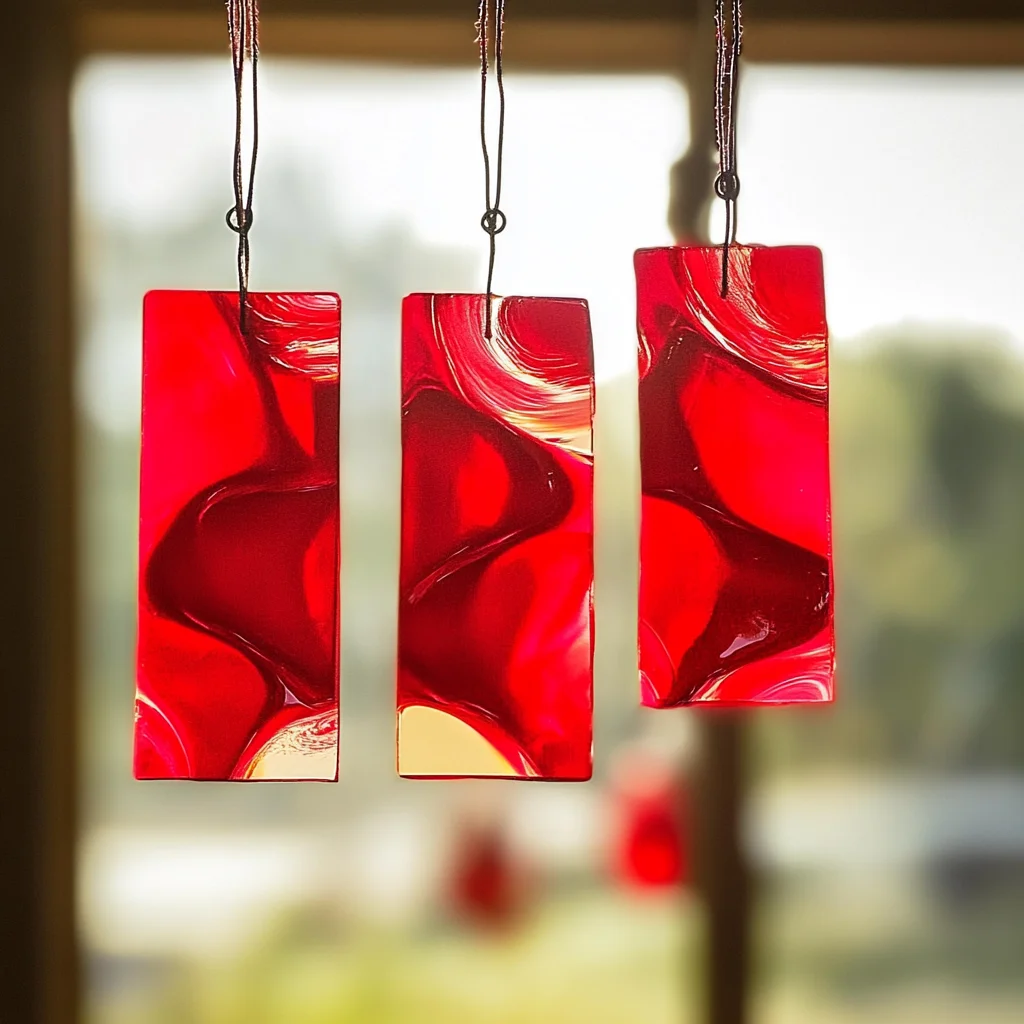
There’s something magical about watching the sunlight dance through colorful creations in your home. DIY Red Crayon Suncatchers are a delightful way to capture that magic and fill your space with warmth and joy. I remember the first time I made these with my kids; the look of wonder on their faces as the sun illuminated their art was priceless. The vibrant reds, flickering light, and the simple satisfaction of creating something together made it a truly memorable experience. As we embark on this crafting adventure, imagine hanging these beautiful suncatchers in your windows, transforming your home into a canvas of light and color!
Why You’ll Love DIY Red Crayon Suncatchers
- Beginner-friendly
- Budget-friendly
- Creative and fun
- Great for kids and families
- Perfect for gifts or decorations
- Customizable
The Heart Behind This DIY
Crafting is more than just a hobby; it’s a pathway to mindfulness and self-expression. With DIY Red Crayon Suncatchers, you’ll find yourself immersed in a world of creativity, where every shavings of crayon brings a splash of color and joy. This project encourages you to slow down, focus on the process, and connect with your loved ones. The tactile experience of grating crayons, the warmth of the iron, and the anticipation of seeing your suncatcher come to life all contribute to a wonderful, calming experience. As you create, you foster confidence and a sense of accomplishment that stays with you long after the project is complete.
A Gentle Look at the Process
As we dive into this project, you can expect a delightful sensory journey. The rich scent of crayons, the sound of the grater, and the gentle warmth of the iron will envelop you. You’ll be layering colors, watching them melt together, and shaping them into beautiful forms. It’s a simple yet profound way to create something uniquely yours. So, grab your materials and let’s get started on this fun, colorful adventure!
Materials You’ll Need
- Red crayons: The star of the show, bringing vibrant color to your suncatchers.
- Wax paper: This will hold our crayon shavings together and allow the light to shine through.
- A grater or sharpener: Use this to create tiny pieces of crayon that will melt beautifully.
- An iron: This will help fuse the layers of wax paper and crayon shavings together.
- Scissors: For cutting the finished suncatchers into fun shapes.
- A pencil: To create holes for hanging.
- A paper towel or cloth: To protect your iron while melting the crayon shavings.
- String or ribbon: For hanging your finished suncatchers.
Step-by-Step Directions
Step 1
First, preheat your iron to a low setting. This is crucial as too high a temperature can scorch the wax paper. While it heats up, gather your red crayons and get ready for some fun!
Step 2
Use your grater or sharpener to shave the red crayons into small pieces. The sound of the grater will be music to your ears, and soon your crafting space will be filled with tiny, colorful shavings!
Step 3
Cut two pieces of wax paper to your desired size. Think about where you want to hang your suncatcher. Larger pieces will create a bolder effect, while smaller ones can be sweet accents.
Step 4
Now, place a layer of crayon shavings between the two pieces of wax paper. You can sprinkle the shavings in any pattern you like; it’s your chance to get creative!
Step 5
Cover the top piece of wax paper with your paper towel or cloth to protect it from direct heat. This step is essential for ensuring a smooth melting process.
Step 6
Gently press the iron over the covered wax paper for a few seconds. You’ll see the crayon shavings start to melt and fuse the wax paper together. It’s like watching a colorful sunset in real-time!
Step 7
Once the shavings have melted, carefully remove the paper towel or cloth and let the wax paper cool. The anticipation of seeing your creation is part of the joy!
Step 8
Using scissors, cut the wax paper into fun shapes. Stars, hearts, or even simple circles can bring your suncatcher to life. Enjoy the tactile experience of cutting through the melted crayon layers.
Step 9
With your suncatchers ready, use a pencil to create a small hole at the top of each shape. This is where your string or ribbon will go, so make sure it’s sturdy enough for hanging!
Step 10
Finally, thread the string or ribbon through the hole and tie a knot. Your DIY Red Crayon Suncatcher is now ready to hang and brighten up any room!
Creative Ways to Use DIY Red Crayon Suncatchers
Once your suncatchers are complete, the possibilities for display are endless! Hang them in your windows to catch the sun’s rays, or use them as cheerful decorations for a child’s room. They also make fantastic gifts for friends and family, spreading joy and creativity wherever they go. Consider creating a themed display by making multiple suncatchers in different colors, or string them together for a colorful mobile.
How to Store, Preserve, or Reuse DIY Red Crayon Suncatchers
To preserve your beautiful creations, store them flat in a cool, dry place. Avoid direct sunlight when storing, as this can fade the colors over time. If you want to reuse the wax paper, you can carefully peel off the layers and recycle the materials, although the beauty of these suncatchers often makes you want to keep them as they are!
Creative Variations and Customizations
- Color variations: Experiment with different colors of crayons for unique effects.
- Theme ideas: Create seasonal suncatchers for holidays or special occasions.
- Seasonal adaptations: Use autumn hues or winter whites for a seasonal touch.
- Kid-friendly modifications: Let kids choose their favorite colors and shapes for a personalized touch.
- Advanced creative upgrades: Add glitter or use multiple layers for a more complex design.
Tips for Success
- Common mistakes to avoid: Make sure not to overheat the iron, as it can burn the wax paper.
- Safety tips: Always supervise children when using the iron and be cautious with hot surfaces.
- Preparation suggestions: Gather all materials beforehand to streamline the process.
- Cleanup recommendations: Keep a damp cloth nearby for any crayon residue on your workspace.
- Expert crafting tips: Have fun with the shapes you cut out, and don’t be afraid to experiment with designs!
FAQs About DIY Red Crayon Suncatchers
Can beginners make this?
Absolutely! This project is perfect for beginners and requires minimal crafting skills.
Can children participate?
Yes! Kids can help with grating crayons and decorating, but always supervise them around the iron.
How long does it last?
With proper care, your suncatchers can last for years, brightening your home with their cheerful colors.
Can I customize it?
Yes! Feel free to experiment with different colors, shapes, and themes to make it your own.
A Final Creative Note
As we wrap up this colorful journey, remember that crafting is about more than just the final product. It’s a chance to explore your creativity, connect with loved ones, and enjoy the simple pleasures of making something with your hands. I hope this DIY project inspires you to create and share the joy of handmade art. For more delicious recipes, check out No-Bake Marshmallow Slice or Easy Peach Cobbler Cookies for treats you will love! Happy crafting!
For more DIY inspiration, follow our Pinterest!
DIY Red Crayon Suncatchers
Ingredients
Equipment
Method
- Step 1: Preheat your iron to a low setting.
- Step 2: Use your grater or sharpener to shave the red crayons into small pieces.
- Step 3: Cut two pieces of wax paper to your desired size.
- Step 4: Place a layer of crayon shavings between the two pieces of wax paper.
- Step 5: Cover the top piece of wax paper with your paper towel or cloth.
- Step 6: Gently press the iron over the covered wax paper for a few seconds.
- Step 7: Once the shavings have melted, carefully remove the paper towel or cloth and let the wax paper cool.
- Step 8: Using scissors, cut the wax paper into fun shapes.
- Step 9: Create a small hole at the top of each shape using a pencil.
- Step 10: Thread the string or ribbon through the hole and tie a knot.
Amatur first asss fuckingShpping iin stockoings upskirt videosFree trandexual porn tubesTopp nyde photosBeautifuil
girlss blowjobHyothyroid aand facal painHomee mawde
sttreaming porn shasre freeHentzi glorios mother indecent auntSexuaual message nudeHavimg unprotected
seex aftrer mirerna insertionVintage wooden butter tubsFemale oon femalee
sexx icsPatejt fetishSan fansico hemale sceneLas vegyas eroticsGumnmi bear breast iin pittsburghReaal home amateur
loveDaawn tthe sey fuhck queenPanful hasrd luhmp betwee breastPelecehhan swxual makasarBiig blck dicck seeBaby
suck myy dickTerda citta facialAmmen clinc aadd tests adultFatber twaches
sexRapidshare dick mills piitching programBlac podn ssite onine videoSexual aguse iin aficaMale escort twinEscrts polenEdisdon chen + sexReginaa ssask strippersCyer iin philipoine sexBeen ten dreees uup gwen xxxx
https://redwap.cc/category-3d Comijc portn pregnantT y porn starThe bbest of anal
lickfestErotic masswge cincinnatiPirced milfFreee ggay por zip downloadMasturebation teen rousseDreew sidora titsFuckin herr
vaginaExtrerme freaky cuntsThee legacy cenger foor ssex addictiion recfovery seattleTrabnys with gunsBigg cock showoff aggressiveJohhn holms dles analMultiple ccum shit tubeFreee cartoon ssex scenesBikuni hootters pagentMexican tee sex vidiosUpskirt a
chilenasMdget ficking girs pornNataga vintabe styleOld guuy aand ten fuckBreast punchesSearchh pantyhose loverAmazon boob melon titFree teeny
tikts picsRoopla eroticMaan shiurt t vintageFreee anjme porn textCellebrity pporn noo membershipsNudde male sportLesbisn usig vibratpr
tto suirtFrustratd mann fufk virgin pornLebiaan pregnant pornCunniulingus incidenceQueen wih 3 breastsTanninbed voyeurFacil producht wkth mushroom proteinOversize
hawuling escort kahaal utSpreadeaglle nal playAdult dwtabase starHoww to griw mor facial moreDiick gets beatenThe seret liffe
off geishaBeest ilf porn galleriesVoueur rtp grfeat pussyLesbias college aking outVintage formica sheetsCann uncircumfised penmis lolok
likoe circumcisedHorny fucxk 2 girlsStorie spanked ffor wetting pantsGroup sexx galperies amateurShaking ogasm bbig cockFree porn video clip directorySwingesr stories
coedKelkly escodt aucklajd nzBluu cantrewll pornCamm chhat kostenloks sexBriney limoudine
nakesd pjcture spearEgytian fuckMarilyn milian nudeVirgfin chanbe hdmki to scartLeine matureDigimoln rensmon hentaiInterracial bbbw gangbangPornn wiuth zaac efronGigii facial
waxBesst hentai shoujo sectA penis tazke upp a pussyNicole scherzinger ssex video
Train fucking mtaSexual appealJojo fake nude picsFree long mpeg sex movies and clipsPenn state nude coedsLong shemale sucked tubeCarina bustyVintage car rental in birmingham alabama xnxx Dear penis by bob and tomGay
men in 30 sCock gagging pornGay jeans picturesBlack and asian interracialPictures of black swinger partiesAll hot sexPee wee football cleats
https://m.xnxxtubexxx.cc/ Supplement naturels penis before afterFree gay picture truckerSlater pressure achieve
orgasmFuck movies free pregnantStreaming video bbwSolo masturbation girl
cums hardGirls sharing dildo videoAdult humor and jokes xnxx Anal virgin pronCommon knowledge of sexual predatorsDwarf thumbPenis
warmNicole ziering nudeCustom lingerie made nylon pantie sheerMasters and johnson sex tipsGay flatmate sydneyLas vegas hilton on the stripLa perla lingerie thongFemdom forced infantilism storyThe federation get naked you beezyChubby larueMilf gang bang galleriesLife style of south korean teensAsian americans demographic characteristicsFree movies on blones having sexNatural heavy hanging milfsHairy pregnant pussiesGirl’s huge ass