
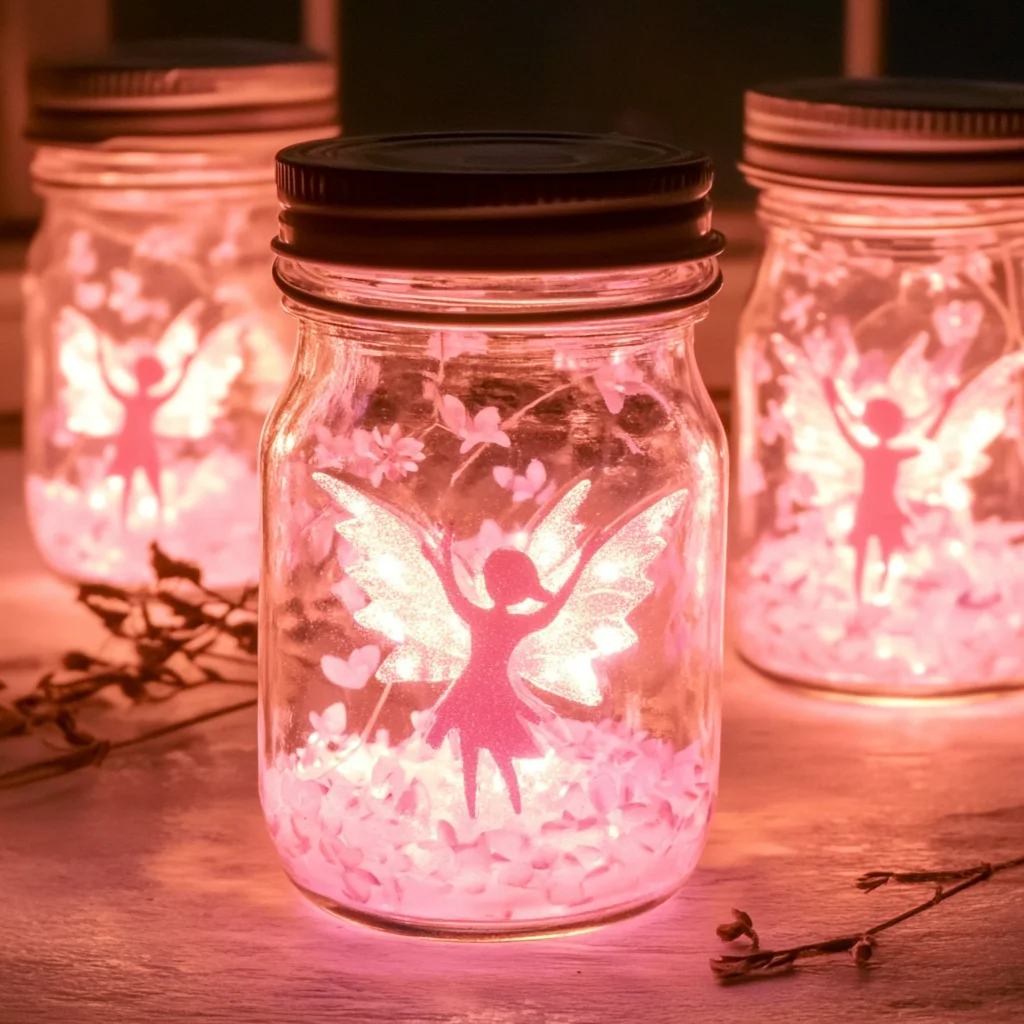
Imagine a warm summer evening, the air filled with the gentle sounds of nature, and you gather with your loved ones, sharing stories and laughter. As the sun dips below the horizon, a soft pink glow begins to illuminate your surroundings, casting enchanting shadows and creating a whimsical atmosphere. This is the magic of DIY Pink Glow Fairy Lanterns! This project is not just about crafting; it’s about creating memories, sparking imagination, and bringing a little bit of fairy-tale magic into your home.
Why You’ll Love DIY Pink Glow Fairy Lanterns
- Beginner-friendly
- Budget-friendly
- Creative and fun
- Great for kids and families
- Perfect for gifts or decorations
- Customizable
The Heart Behind This DIY
Crafting is a beautiful way to express ourselves and foster connections with those we love. The DIY Pink Glow Fairy Lanterns project invites you to explore your creativity while enjoying the calming process of making something with your own hands. As you paint and decorate, you’ll find mindfulness in the moment, a chance to breathe, and a wonderful opportunity to bond with family. This project not only enhances your surroundings but also nurtures confidence and self-expression.
A Gentle Look at the Process
Creating your own Pink Glow Fairy Lanterns is a delightful journey that begins with simple materials and transforms into a beautiful glowing decoration. You’ll start by preparing your jars, then applying the enchanting pink glow-in-the-dark paint, and finally adding those personal touches that make each lantern unique. Each step is an opportunity to connect with your creative spirit, filling your space with joy and light.
Materials You’ll Need
- Glass jars or lanterns: These will be the canvas for your glowing creations.
- Pink glow-in-the-dark paint: The star of the show that brings your lanterns to life.
- Paintbrush: To apply the paint smoothly and evenly.
- Battery-operated tea lights: A safe way to illuminate your lanterns without any flames.
- Decorative elements: Optional items like glitter, ribbons, or flowers to add charm.
- Water: Needed for rinsing your brush and cleaning up.
- Clear adhesive sealant: Optional, to protect your decorations and ensure durability.
Step-by-Step Directions
Step 1
Begin by cleaning your glass jars or lanterns thoroughly. You want a clean surface for the paint to adhere to, so be sure to remove any dust or residue. Let them dry completely before moving on to the next step.
Step 2
Using your paintbrush, apply a layer of pink glow-in-the-dark paint to the inside of the jars. Take your time to ensure even coverage, as this will enhance the glow effect. You might enjoy the soft swish of the brush against the glass, almost like a gentle caress.
Step 3
Allow the paint to dry according to the manufacturer’s instructions. If you desire a brighter glow, feel free to apply additional coats once the first layer is dry. Watching the paint transform the jars into magical vessels is truly rewarding!
Step 4
Once the paint is completely dry, carefully place a battery-operated tea light inside each jar. This is where the magic really begins, as you’ll soon see the soft pink glow emanating from within.
Step 5
If you want to add extra charm, decorate the outside of the jars with glitter, ribbons, or flowers. The tactile experience of choosing and applying these embellishments is a joy in itself. Each jar can reflect your unique style and personality.
Step 6
For added durability, you can seal your decorations with a clear adhesive sealant. This step helps preserve your beautiful work and ensures that your lanterns will shine for many evenings to come.
Step 7
Finally, place your glowing lanterns in a dark area to enjoy the enchanting effect. As the lights flicker and the pink glow dances, you’ll find yourself transported to a magical realm.
Creative Ways to Use DIY Pink Glow Fairy Lanterns
Your DIY Pink Glow Fairy Lanterns can add a whimsical touch to various settings. Consider using them for a cozy outdoor gathering, enhancing a child’s bedroom, or as a beautiful centerpiece for a celebration. They also make delightful gifts for friends and family, spreading joy and creativity. Imagine giving a friend a set of these lanterns, each uniquely decorated—it’s a gift that carries your love and thoughtfulness.
How to Store, Preserve, or Reuse DIY Pink Glow Fairy Lanterns
To keep your lanterns in perfect condition, store them in a cool, dry place away from direct sunlight. If you notice the glow fading over time, don’t hesitate to refresh the paint or add new decorative elements. These lanterns can be reused for different occasions, adapting their look with seasonal decorations or themes.
Creative Variations and Customizations
- Color variations: Experiment with different glow-in-the-dark colors for a unique look.
- Theme ideas: Create lanterns for holidays, like Halloween or Christmas, using themed decorations.
- Seasonal adaptations: Change the décor based on the season, such as flowers for spring or leaves for fall.
- Kid-friendly modifications: Allow children to use their favorite stickers or drawings to personalize their lanterns.
- Advanced creative upgrades: Consider incorporating fairy lights or additional glass etching techniques for a more sophisticated look.
Tips for Success
- Common mistakes to avoid: Ensure the jars are completely dry before painting to prevent flaking.
- Safety tips: Always use battery-operated lights to avoid fire hazards.
- Preparation suggestions: Lay down newspaper to protect your workspace from paint spills.
- Cleanup recommendations: Clean your brushes and workspace promptly to avoid dried paint.
- Expert crafting tips: Embrace imperfections; each lantern will be unique and beautiful in its own way.
FAQs About DIY Pink Glow Fairy Lanterns
Can beginners make this?
Absolutely! This project is perfect for beginners and requires minimal skills.
Can children participate?
Yes! Kids will love painting and decorating their own lanterns with guidance.
How long does it last?
Your lanterns can last for years if stored properly and refreshed as needed.
Can I customize it?
Definitely! The beauty of this project is in its endless possibilities for customization.
A Final Creative Note
As you embark on this enchanting DIY journey, remember that the joy of crafting lies not only in the final result but in the moments spent creating. Celebrate your creativity and the connections you build along the way. For more delightful projects and ideas, explore the world of DIY or check out delicious recipes like Cheesy Shrimp Puff Pastry Pockets or Quick Garlic Butter Shrimp Scampi Bowl for treats you will love!
For even more inspiration, don’t forget to follow our Pinterest account!
DIY Pink Glow Fairy Lanterns
Ingredients
Equipment
Method
- Step 1: Clean the glass jars or lanterns thoroughly. Let them dry completely.
- Step 2: Using the paintbrush, apply a layer of pink glow-in-the-dark paint to the inside of the jars.
- Step 3: Allow the paint to dry as per the manufacturer's instructions. Apply additional coats for a brighter glow if desired.
- Step 4: Once the paint is dry, place a battery-operated tea light inside each jar.
- Step 5: Decorate the outside of the jars with glitter, ribbons, or flowers for added charm.
- Step 6: Optionally, seal your decorations with clear adhesive sealant for durability.
- Step 7: Place your glowing lanterns in a dark area to enjoy the enchanting effect.
[8012]Kikra · অনলাইন ক্যাসিনো এবং বেটিং গেমস বাংলাদেশ · Kikra লগইন, অ্যাপ ডাউনলোড এবং ডিপোজিট,অনলাইনে ক্যাসিনো গেম খেলার জন্য Kikra বাংলাদেশের খেলোয়াড়দের জন্য একটি প্ল্যাটফর্ম, যেখানে আপনি অ্যাকাউন্ট খুলে লগইন করতে পারেন, অ্যাপ ডাউনলোড করতে পারেন এবং ক্যাসিনো গেম খেলে টাকা তোলার নিয়মসহ পেমেন্ট সংক্রান্ত তথ্য জানতে পারেন। visit: kikra