
Remember those magical afternoons spent creating art, the smell of glue and the sheer joy of vibrant colors? There’s something so special about crafting, especially when it involves making your own supplies. Today, we’re diving into a recipe that’s not just delicious (okay, not edible, but incredibly satisfying to make!), but also brings back all those wonderful childhood memories. We’re talking about DIY Fluffy Paint! This is one of those recipes that’s so simple, so quick, and yields such delightful results, you’ll be wondering why you haven’t made it sooner.
Why You’ll Love Fluffy Paint
- Fast: Seriously, you can whip this up in minutes!
- Easy: Even the littlest artists can help with this one.
- Giftable: Package it up in cute jars for a thoughtful homemade gift.
- Crowd-pleasing: Perfect for playdates, parties, or just a cozy afternoon at home.
Ingredients
Gathering the ingredients for this fluffy paint is a breeze. You probably have most of them hiding in your craft stash or under the sink!
- 1/2 cup white school glue: This is your base, the binder that holds everything together.
- 1/2 cup unscented foam shaving cream: This is the magic ingredient that gives our paint its signature fluffy texture. Make sure it’s foam and unscented so the colors shine through!
- Food coloring or liquid watercolors (optional): This is where the fun really begins! You can go classic primary colors, or get adventurous with pastels and neons.
How to Make Fluffy Paint
Ready to get your hands a little messy (in the best way possible)? Let’s get this fluffy paint party started!
- Step 1: The Glue Base. Start by pouring your 1/2 cup of white school glue into a mixing bowl. This is the foundation of our fluffy creation.
- Step 2: Add the Fluff! Now, carefully add 1/2 cup of unscented foam shaving cream to the bowl with the glue. It’s like adding a cloud to your art project!
- Step 3: Gentle Mixing. Grab a spatula or a spoon and gently stir the glue and shaving cream together. The key here is to be gentle. We don’t want to deflate all that lovely fluffiness, so avoid overmixing. Just swirl until it’s combined into a lovely, airy mixture.
- Step 4: Color Time! If you’re feeling colorful, now’s the time to divide your mixture. Pour portions into separate cups, one for each color you want to create. This is where you can get really creative, just like when making beautiful desserts such as these no-bake marshmallow slices.
- Step 5: Add the Hues. To each cup, add a few drops of your chosen food coloring or liquid watercolors. Swirl it lightly with a craft stick or spoon. If you want a marbled effect, don’t mix too much! Just a gentle swirl will do.
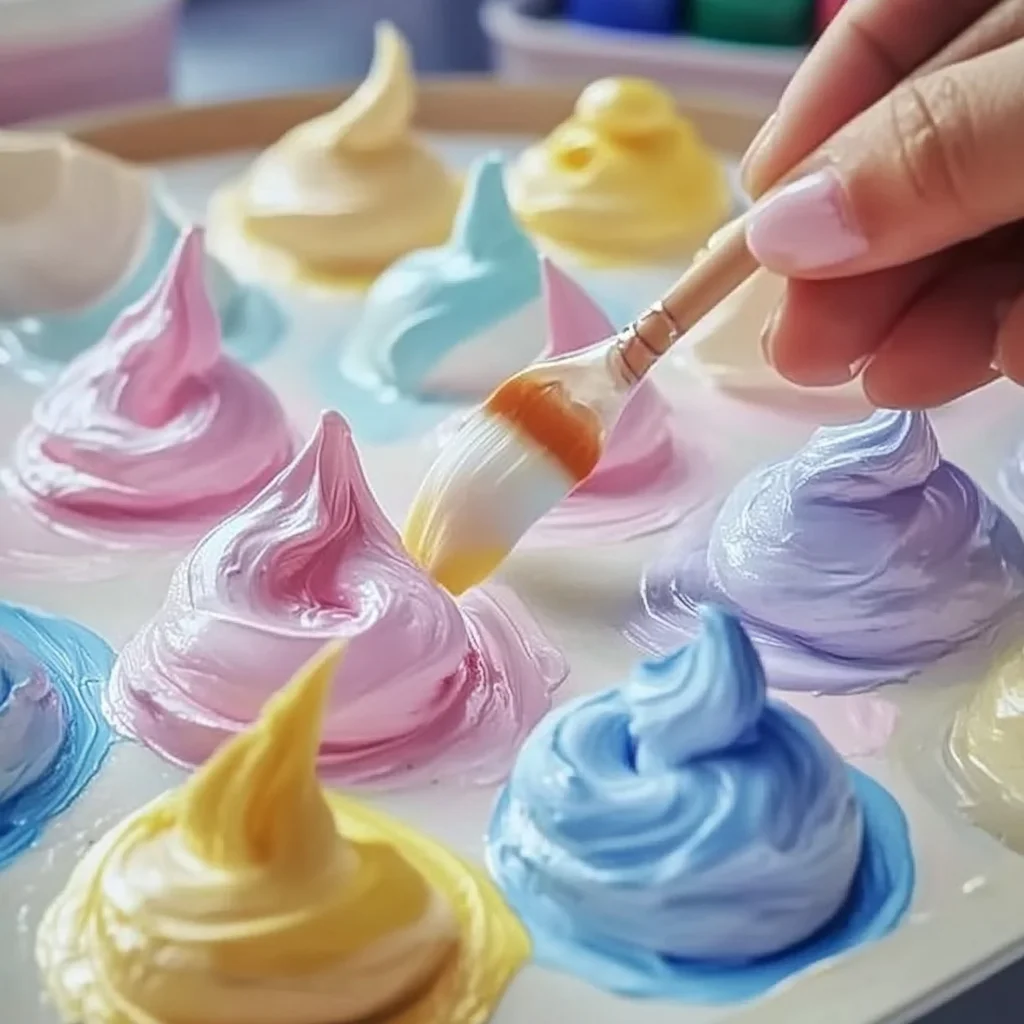
- Step 6: Unleash Your Inner Artist. Now for the best part – painting! Grab your paintbrushes, craft sticks, or even just your fingers (the ultimate tools!) and apply your gorgeous fluffy paint to paper, cardstock, or canvas.
- Step 7: Let it Dry. Give your masterpieces some time to air dry. Thin layers will typically dry in about 4–6 hours, while thicker, more decadent applications might need overnight to fully set.
Substitutions & Additions
While this recipe is wonderfully simple as is, feel free to get creative! You can experiment with different scents by adding a drop or two of essential oils (think lavender for calm or citrus for energy). For a bit of sparkle, mix in some glitter! If you’re out of white school glue, clear school glue can also work, though it might result in slightly more translucent colors.
Tips for Success
Here are a few little tips I’ve picked up along the way to make your fluffy paint experience even better:
- Don’t Overmix: I know I keep saying it, but it’s worth repeating! Overmixing will make your paint less fluffy. Aim for gentle incorporation.
- Test Your Colors: Before you commit to coloring a whole batch, test a small amount to ensure you achieve the shade you’re looking for.
- Prep Ahead: You can make the base fluffy paint mixture ahead of time and store it in an airtight container. Then, just add color when you’re ready to paint! This is similar to how you might prep ingredients for something like easy homemade cream cheese which can be used in so many delightful recipes.
- Protect Surfaces: Shaving cream can be a little messy, so lay down some newspaper or a craft mat to protect your workspace.
How to Store Fluffy Paint
Leftover fluffy paint can be stored in airtight containers or resealable bags. It’s best to store each color separately. While it’s at its fluffiest when freshly made, it will generally keep well for a week or two in the refrigerator. If it starts to look a bit deflated or separated, a gentle stir might bring it back to life. If it develops any off smells, it’s time to let it go.
FAQs
Can I use hairspray instead of shaving cream?
No, hairspray won’t give you the same fluffy texture. Foam shaving cream is essential for that signature airy quality.
Is this paint washable?
White school glue is generally washable, but shaving cream can sometimes be a bit trickier. It’s always a good idea to have an apron or old clothes handy!
Can I add glitter to the paint?
Absolutely! Glitter is a fantastic addition for some extra sparkle and fun. Mix it in with the color.
How long does the paint take to dry completely?
This depends on the thickness of your application. Thin layers usually dry in 4-6 hours, while thicker applications might take longer, even overnight. You can speed up the drying process slightly by using a fan.
I hope you have as much fun making and playing with this DIY Fluffy Paint as I do! It’s a simple craft that brings so much joy. For more creative ideas and delicious recipes, be sure to follow us on Pinterest!
DIY Fluffy Paint
Ingredients
Equipment
Method
- Step 1: The Glue Base. Start by pouring your 1/2 cup of white school glue into a mixing bowl. This is the foundation of our fluffy creation.
- Step 2: Add the Fluff! Now, carefully add 1/2 cup of unscented foam shaving cream to the bowl with the glue. It's like adding a cloud to your art project!
- Step 3: Gentle Mixing. Grab a spatula or a spoon and gently stir the glue and shaving cream together. The key here is to be gentle. We don't want to deflate all that lovely fluffiness, so avoid overmixing. Just swirl until it's combined into a lovely, airy mixture.
- Step 4: Color Time! If you're feeling colorful, now's the time to divide your mixture. Pour portions into separate cups, one for each color you want to create.
- Step 5: Add the Hues. To each cup, add a few drops of your chosen food coloring or liquid watercolors. Swirl it lightly with a craft stick or spoon. If you want a marbled effect, don't mix too much! Just a gentle swirl will do.
- Step 6: Unleash Your Inner Artist. Now for the best part – painting! Grab your paintbrushes, craft sticks, or even just your fingers (the ultimate tools!) and apply your gorgeous fluffy paint to paper, cardstock, or canvas.
- Step 7: Let it Dry. Give your masterpieces some time to air dry. Thin layers will typically dry in about 4–6 hours, while thicker, more decadent applications might need overnight to fully set.
Your point of view caught my eye and was very interesting. Thanks. I have a question for you.
Sau khi xác nhận thành công, bạn có thể đăng nhập vào tài khoản của mình và bắt đầu trải nghiệm các trò chơi hấp dẫn tại 66B . Lưu ý, mỗi người chỉ được phép có một tài khoản để đảm bảo tính công bằng và tránh các rắc rối về bảo mật. TONY04-24H
Sau khi dùng thử tải 888slot , mình cảm thấy mọi thao tác đều khá mượt. TONY06-18
I don’t think the title of your article matches the content lol. Just kidding, mainly because I had some doubts after reading the article.