Remember those days when you wanted a warm, melty crunch wrap but didn’t have a tortilla on hand? Or maybe you’re looking for a lighter twist on that classic comfort food. Well, this Cottage Cheese Crunch Wrap Melt without a tortilla is about to become your new kitchen best friend! It’s nostalgic, easy, and surprisingly quick to whip up — perfect for when you want something satisfying but fuss-free.
I love how this recipe gives you all the cheesy, melty goodness of a crunch wrap, but with a protein-packed, gluten-free twist. Plus, it’s so versatile and fun to customize. Whether you’re making a quick lunch or a snack that impresses, this is a little dish that delivers big on flavor and crunch.
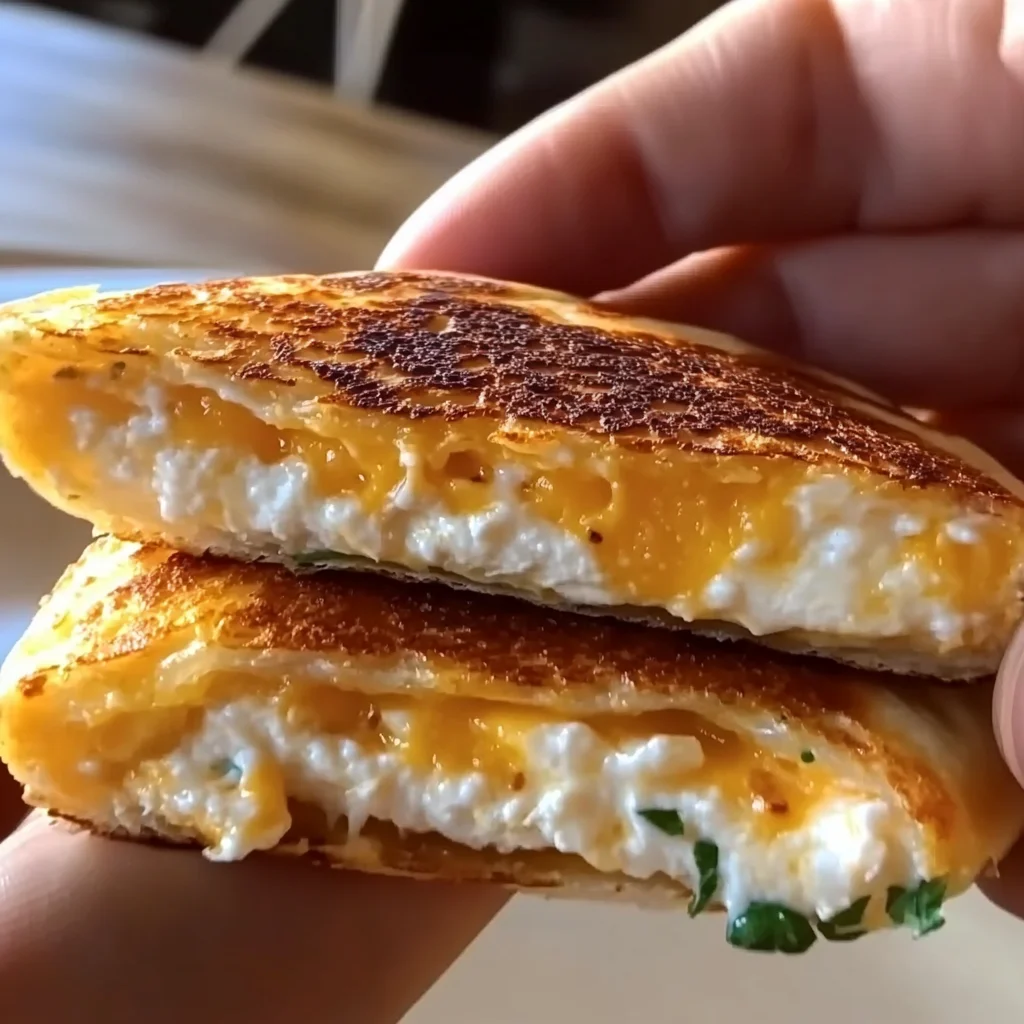
Why You’ll Love Cottage Cheese Crunch Wrap Melt — No Tortilla
- Fast: Ready in just minutes, perfect for busy days or last-minute cravings.
- Easy: Just a few simple ingredients and straightforward steps.
- Giftable: Make it for friends or family—they’ll be asking for the recipe!
- Crowd-pleasing: Melty cheese and a crispy wrap are always a hit.
Ingredients
- 1 cup cottage cheese: The star of the show—creamy and packed with protein.
- 2 eggs: They help bind everything together into a flexible wrap.
- ¼ cup shredded cheese: Adds that melty, gooey magic inside.
- Optional seasonings: Taco seasoning or garlic powder can amp up the flavor, plus a thin layer of your favorite filling (think salsa, cooked veggies, or seasoned ground meat).
How to Make Cottage Cheese Crunch Wrap Melt — No Tortilla
Let’s get cooking! This is such a simple recipe, but there are a few little tricks to make it perfect.
- Blend the base: Combine the cottage cheese and eggs in a blender or food processor. Blend until smooth and creamy. This step is key to getting a uniform, flexible wrap that won’t tear.
- Cook the wrap: Pour the mixture into a preheated nonstick skillet and spread it into a thin, even round. If you prefer, you can bake it as a thin sheet in a greased pan until it’s set enough to lift. Keep the base thin to ensure it folds cleanly.
- Add the filling: Place a small amount of shredded cheese or your chosen filling in the center of the cooked round.
- Fold it up: Carefully fold the edges inward, creating a neat wrap around the filling.
- Crisp it up: Return the wrap to the pan and cook over medium heat until the outside turns golden and crisp, and the inside is hot and melty.
- Serve warm: Cut in half and enjoy immediately with your favorite dips or a fresh salad on the side.
Substitutions & Additions
If you want to switch things up or make this recipe your own, here are some fun ideas:
- Dairy swaps: Use lactose-free cottage cheese or a soft vegan cheese for a dairy-free version.
- Egg alternatives: For an egg-free option, try a chia or flax egg, but note the texture might be a bit different.
- Flavor boosts: Add chopped jalapeños, fresh herbs, or a sprinkle of smoked paprika to the batter for extra zing.
- Fillings: Think beyond cheese—try seasoned ground beef, shredded chicken, sautéed mushrooms, or even a spread of guacamole inside.
- If you’re curious about other creative ways to use cottage cheese in easy dishes, you might enjoy my recipe for crispy cottage cheese chips — they’re a perfect crunchy snack!
Tips for Success
- Keep the base thin: A thinner cottage cheese and egg layer folds better without cracking.
- Use a nonstick skillet: This helps prevent sticking and makes flipping easier.
- Don’t overload the filling: Too much can make folding tricky and lead to tears.
- Prep ahead: You can blend the base mixture ahead of time and keep it chilled until ready to cook.
- Experiment with heat: Cook on medium heat to get that golden crust without burning.
- For a cozy brunch idea, pair your crunch wrap with some fluffy wheat germ pancakes — a wholesome way to round out your meal.
How to Store Cottage Cheese Crunch Wrap Melt — No Tortilla
If you happen to have leftovers (which might be unlikely because they’re so delicious!), here’s how to keep them fresh:
- Store in an airtight container in the refrigerator for up to 2 days.
- Reheat gently in a skillet over low heat to maintain crispiness, or microwave briefly, then crisp in a pan if desired.
- This dish is best enjoyed fresh, but you can prepare the base mixture in advance and cook when ready.
FAQs
Can I make this crunch wrap vegan?
While the traditional recipe uses eggs and cheese, you can try vegan substitutes like flax eggs and plant-based cheeses. Texture might vary, but it’s definitely worth experimenting!
What fillings work best inside the wrap?
Any melty cheese is great, plus seasoned meats, sautéed veggies, or even a dollop of salsa or guacamole. Just keep fillings thin to fold easily.
Can I bake the crunch wrap instead of cooking it on the stove?
Yes! Bake the blended base in a thin layer until set, then add fillings and fold carefully before crisping it up in the pan or under a broiler briefly.
Is this recipe gluten-free?
Absolutely! Since there’s no tortilla or flour, this is naturally gluten-free and a great option for those avoiding gluten.
For more quick and cozy meals that feel like a warm hug, check out my take on crispy parmesan garlic chicken burritos — another fantastic way to enjoy a crispy, cheesy wrap experience.
Ready to add this comforting crunch wrap to your recipe box? It’s a breeze to make and perfect for any time you want a delicious melt without the tortilla fuss. Plus, if you love easy no-bake treats for dessert after your meal, you might enjoy the bright flavors in my no-bake orange creamsicle cheesecake. It’s a perfect sweet finish to your cozy kitchen creations.
Happy cooking, and don’t forget to share the love with your friends and family—they’ll thank you for introducing them to this gem!
For more inspiration and mouthwatering recipes, follow me on Pinterest.
Cottage Cheese Crunch Wrap Melt — No Tortilla Needed
Ingredients
Equipment
Method
- Step 1: Blend the base by combining cottage cheese and eggs in a blender or food processor until smooth and creamy to create a flexible wrap.
- Step 2: Pour the mixture into a preheated nonstick skillet and spread it into a thin, even round. Alternatively, bake as a thin sheet in a greased pan until set enough to lift.
- Step 3: Place a small amount of shredded cheese or your chosen filling in the center of the cooked round.
- Step 4: Carefully fold the edges inward, creating a neat wrap around the filling.
- Step 5: Return the wrap to the pan and cook over medium heat until the outside is golden and crisp, and the inside is hot and melty.
- Step 6: Cut in half and serve warm, optionally with your favorite dips or a fresh salad on the side.
Just looking into this exact topic and your take on stitched fashion is incredible.
Thanks for the detail!