
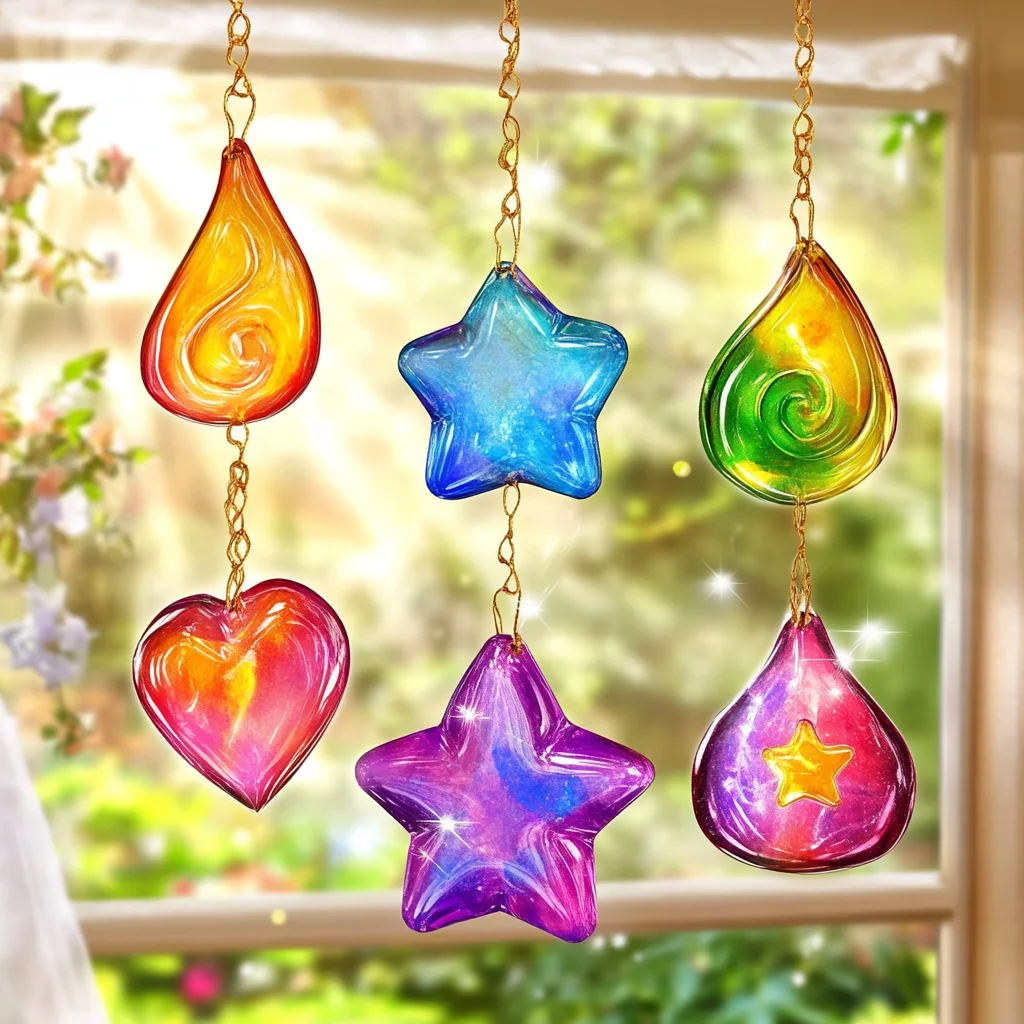
Have you ever looked at the sunlight streaming through your window and wished it could be even more beautiful? I know I have! There’s something truly magical about the way light dances through colors, creating a warm, inviting ambiance in any space. That’s why I’m excited to share a delightful DIY project with you: colorful bioplastic suncatchers! This project not only fills your home with vibrant hues but also offers a fantastic way to spend quality time with family or friends. Imagine the joy of creating something beautiful from scratch, your hands busy with colors and textures, all while sharing laughter and stories. Let’s dive in and make something that will brighten both your windows and your spirits!
Why You’ll Love Colorful Bioplastic Suncatchers
- Beginner-friendly
- Budget-friendly
- Creative and fun
- Great for kids and families
- Perfect for gifts or decorations
- Customizable
The Heart Behind This DIY
Crafting colorful bioplastic suncatchers is not just about making something pretty; it’s about the experience of creation itself. Many people find joy and relaxation in the act of crafting, as it allows for mindfulness and self-expression. When you pour your heart into a project, you’re not just creating an object; you’re crafting memories and connections. This project encourages creativity in a way that’s educational and sensory-rich, making it a wonderful activity for kids and adults alike. As you mix colors and shape your creations, you’ll find a sense of calm and satisfaction that comes from working with your hands.
A Gentle Look at the Process
As you embark on this colorful adventure, you can expect a blend of playful experimentation and a touch of science. The process begins with simple ingredients that you’ll mix and heat, creating a thick, gooey substance that transforms into beautiful suncatchers. Each step is an opportunity to engage your senses – the warmth of the saucepan, the vibrant colors as you mix, and the delightful texture that forms under your fingertips. Picture an array of colors spread out before you, waiting to be shaped into beautiful designs that will catch the sunlight just right.
Materials You’ll Need
- 1 cup of water – the base for our mixture
- 1 tablespoon of glycerin – adds flexibility to your suncatchers
- 1 tablespoon of corn syrup – helps with the glossy finish
- 1 cup of cornstarch – the main ingredient for our bioplastic
- Food coloring (various colors) – to bring your suncatchers to life
- Wax paper or plastic wrap – to protect your workspace
- Cookie cutters (optional) – for fun shapes
- A mixing bowl – to combine your ingredients
- A saucepan – for heating the mixture
Step-by-Step Directions
Step 1
In a saucepan, combine the water, glycerin, and corn syrup. Heat the mixture over medium heat, stirring until everything is well blended. You’ll notice the ingredients melding together, creating a smooth base.
Step 2
Gradually add the cornstarch to the mixture, stirring continuously to prevent any lumps from forming. As you stir, keep an eye on the consistency; it will start to thicken and resemble a glue-like texture. This is where the magic begins!
Step 3
Remove the saucepan from heat and divide the thickened mixture into separate bowls, depending on how many colors you want to create. This is a great time to get creative!
Step 4
Add a few drops of food coloring to each bowl, mixing until you achieve your desired colors. This is where you can have fun experimenting with different shades and combinations!
Step 5
On a flat surface, lay down a piece of wax paper or plastic wrap. Pour or scoop the colored mixtures onto the wax paper, spreading them out to your desired thickness. Don’t be shy – let your creativity flow!
Step 6
If you’re using cookie cutters, press them into the colored mixtures to create fun shapes before they cool. Imagine the joy of seeing stars, hearts, or flowers reflecting the sunlight!
Step 7
Allow the suncatchers to dry for at least 24 hours, or until completely hardened. The anticipation of seeing your creations come to life is part of the fun!
Step 8
Once dried, carefully peel the suncatchers off the wax paper or plastic wrap. Hang them in a sunny window and watch as they catch the light, creating a dazzling display of color throughout your space.
Creative Ways to Use Colorful Bioplastic Suncatchers
Now that you have your beautiful suncatchers, let’s explore how to display them. You can hang them in your windows to enjoy the way they light up as the sun shines through. Consider gifting them to friends or family as a personalized touch for special occasions. You might even use them to brighten up a child’s room or as festive decorations for different seasons. The possibilities are endless!
How to Store, Preserve, or Reuse Colorful Bioplastic Suncatchers
To ensure your suncatchers last, store them in a cool, dry place away from direct sunlight when not in use. If they become dusty, a gentle wipe with a damp cloth can help them shine again. If you ever want a new look, consider reusing the materials to create fresh designs!
Creative Variations and Customizations
- Color variations – experiment with gradients or swirls
- Theme ideas – create suncatchers for holidays or special events
- Seasonal adaptations – use autumn colors or spring pastels
- Kid-friendly modifications – let kids choose their shapes and colors
- Advanced creative upgrades – try layering colors for depth
Tips for Success
- Common mistakes to avoid – stir continuously to prevent lumps!
- Safety tips – keep the hot saucepan out of reach from little hands
- Preparation suggestions – gather all materials before starting to keep things organized
- Cleanup recommendations – use warm soapy water to clean up any spills
- Expert crafting tips – don’t rush the drying process for the best results
FAQs About Colorful Bioplastic Suncatchers
Can beginners make this?
Absolutely! This project is perfect for beginners and requires no special skills.
Can children participate?
Yes! Kids will love mixing colors and shaping their suncatchers, but adult supervision is recommended during the heating process.
How long does it last?
With proper care, your suncatchers can last for a long time, adding cheer to your space.
Can I customize it?
Definitely! The beauty of this project lies in its versatility. You can choose any colors, shapes, or themes!
A Final Creative Note
As you embark on this colorful journey, remember that crafting is about more than just the final product; it’s about the joy of creating, expressing yourself, and enjoying the process. I hope this project inspires you to dive into your own creativity and share it with those you love. For more delicious recipes, check out Lana’s delightful treats or fun family-friendly ideas you will enjoy! Let’s keep creating and brightening our homes, one colorful suncatcher at a time!
For more DIY inspiration, be sure to follow our Pinterest account!
Colorful Bioplastic Suncatchers
Ingredients
Equipment
Method
- Step 1: Clear a flat workspace and cover it with parchment paper. Gather the ingredients, cooking pot, stirring spoon, measuring cups, molds, and baking sheet.
- Step 2: Combine 1 cup cornstarch, 1 cup water, and 1/4 cup corn syrup in a cooking pot. Stir until the mixture is smooth and free of lumps.
- Step 3: Heat the mixture over medium heat while stirring continuously. Continue until it becomes thick, sticky, and translucent.
- Step 4: Remove the pot from the heat and carefully divide the mixture into smaller portions. Add food coloring to each portion and stir until the colors are evenly distributed.
- Step 5: Pour the colored mixture into silicone molds or shape it with cookie cutters placed on parchment paper. Experiment with different shapes and thicknesses.
- Step 6: Place the shaped pieces in a warm, dry area and allow them to dry completely for approximately 24 to 48 hours. Once firm and dry, gently remove them from the molds or parchment paper.
- Step 7: Hang the finished suncatchers in windows or other light-filled areas where sunlight can pass through them and highlight their colors.
The mobile version is just as good as the desktop one. I can play anywhere and anytime without issues. mpoasia88login
Very clean design and the rewards are actually fair. It feels like they really care about the players. Cheers to winevo54.