
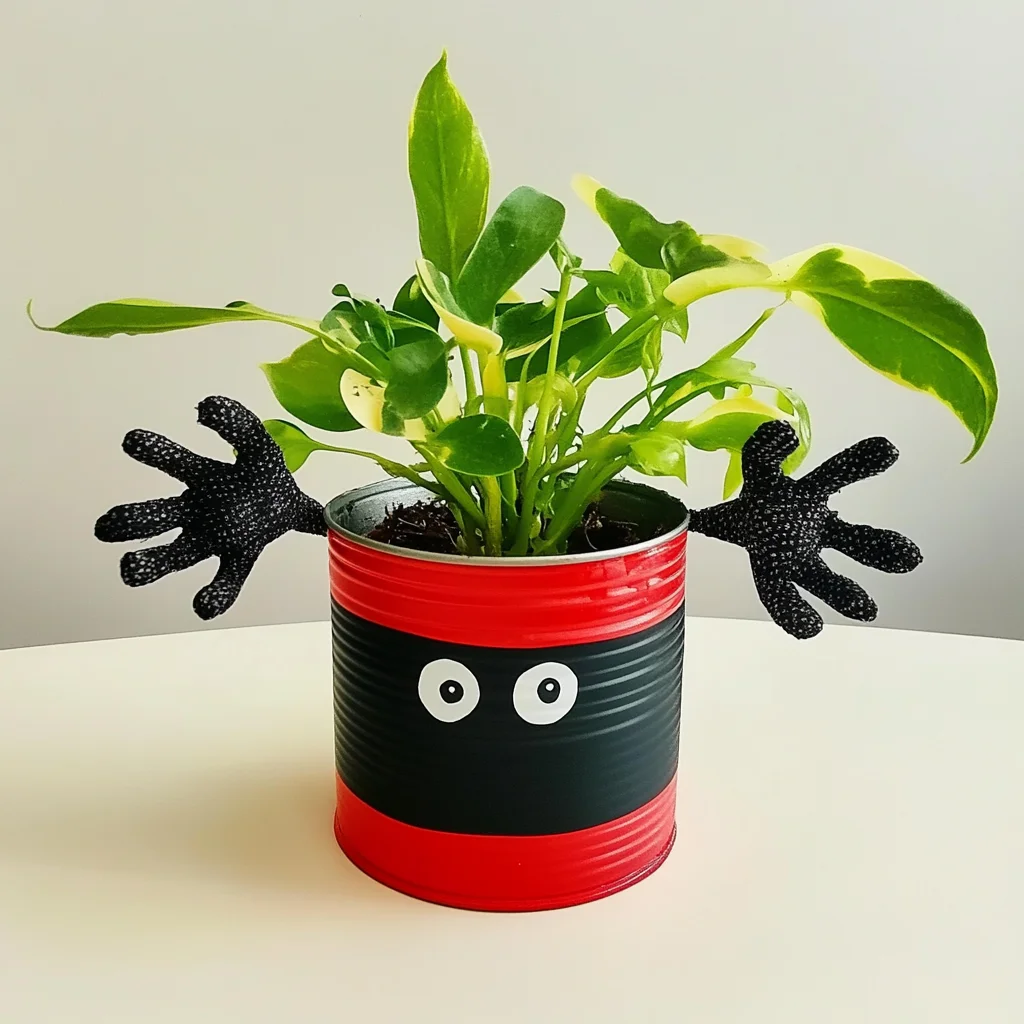
There’s something truly magical about creating something beautiful from what others might consider trash. The simple act of crafting a tin can planter is not only fun but also a wonderful way to connect with nature and add a splash of greenery to your home. Imagine the satisfaction you’ll feel when you see those vibrant plants thriving in your own handmade planter, reminding you of the joy and creativity that comes from a little DIY love. This project is perfect for anyone looking to unwind, express their creativity, and bring a touch of life to their space.
Why You’ll Love Tin Can Planter
- Beginner-friendly
- Budget-friendly
- Creative and fun
- Great for kids and families
- Perfect for gifts or decorations
- Customizable
The Heart Behind This DIY
Creating a tin can planter is more than just a fun activity; it’s an opportunity to engage with your surroundings and foster a sense of mindfulness. As you work on this project, you’ll find yourself immersed in the textures of the can, the smell of fresh soil, and the delightful sight of your chosen plants. Crafting encourages your imagination to bloom, allowing you to express your unique style while also nurturing your plants. It is a beautiful blend of art and nature, perfect for building confidence and connection with those around you, especially if you involve your kids or friends in this delightful journey.
A Gentle Look at the Process
When you embark on this crafting adventure, you can expect a delightful process that unfolds with each step. First, you’ll prepare your tin can, giving it new life. Then, you’ll create spaces for your plants to thrive, filling the can with rich soil and choosing your favorite flowers or herbs to plant. This hands-on experience is filled with sensory delights, from the sound of the hammer tapping to the touch of soil slipping through your fingers. Each moment spent creating your tin can planter will leave you feeling accomplished and connected to the earth.
Materials You’ll Need
- Empty tin can: This will be the base of your planter.
- Hammer: For creating drainage holes.
- Nail or screwdriver: To help pierce the tin can.
- Potting soil: To provide nutrients for your plants.
- Plants or seeds: Choose your favorites to bring life to your planter.
- Paint or decorative materials (optional): To personalize your planter.
Step-by-Step Directions
Step 1
Begin by cleaning your empty tin can thoroughly. Remove any labels and give it a good rinse to ensure it is free of residue. This will prepare your canvas for creativity.
Step 2
Using the hammer and nail or screwdriver, carefully create drainage holes in the bottom of the can. This step is crucial as it allows excess water to escape, keeping your plants healthy and happy.
Step 3
If you wish to add a personal touch, now is the time to paint or decorate the exterior of your tin can. Use bright colors or fun designs to reflect your personality and style. Let your imagination run wild!
Step 4
Fill the can with potting soil, leaving about an inch of space at the top. This space will help when you water your plants, preventing soil from spilling over.
Step 5
Now comes the fun part! Plant your chosen plants or seeds in the soil, ensuring they are spaced appropriately for growth. Gently pat down the soil around them to give them a cozy home.
Step 6
Water your plants as needed, being careful not to overwater. Find a sunny spot for your new planter, and enjoy watching it flourish. Your little creation is now ready to grow!
Creative Ways to Use Tin Can Planter
Your tin can planter can serve many purposes beyond just being a home for your plants. Position it on your kitchen windowsill for fresh herbs ready to use in your cooking, or line several up on your patio for a charming outdoor display. You could also personalize each can to create unique gifts for friends and family, perfect for birthdays or housewarming events. The possibilities are endless, and each planter can tell a story of your creativity and care.
How to Store, Preserve, or Reuse Tin Can Planter
If you want to keep your tin can planter looking fresh, consider bringing it indoors during harsh weather. To preserve your planter, check the drainage holes regularly and replace the soil annually to keep your plants thriving. If you decide to change plants or styles, feel free to clean and repaint the can for a completely new look, giving it a second life.
Creative Variations and Customizations
- Color variations: Use different shades to create a vibrant collection.
- Theme ideas: Decorate according to seasons or holidays.
- Seasonal adaptations: Change plants based on the season for year-round enjoyment.
- Kid-friendly modifications: Let children decorate their own cans with stickers or markers.
- Advanced creative upgrades: Combine multiple cans into a vertical garden.
Tips for Success
- Avoid common mistakes by ensuring the drainage holes are large enough.
- Safety tip: Be cautious when using a hammer and nails; consider using a towel to cushion the can.
- Prepare by gathering all materials before starting the project.
- Cleanup is easy; just wipe down your workspace and store leftover materials for future projects.
- Expert tip: If using paint, allow it to dry completely before adding soil to avoid any contamination.
FAQs About Tin Can Planter
Can beginners make this?
Absolutely! This project is perfect for beginners and offers a gentle introduction to crafting.
Can children participate?
Yes! Kids will love decorating the cans and planting seeds, making it a fun family activity.
How long does it last?
With proper care, your tin can planter can last for several seasons. Just keep an eye on the plants and refresh the soil as needed.
Can I customize it?
Certainly! You can paint, decorate, and choose different plants to make it uniquely yours.
A Final Creative Note
As you wrap up your crafting session, take a moment to appreciate the joy of creating something with your own hands. Each tin can planter is a testament to your creativity, a unique reflection of yourself. I hope you feel inspired to explore more DIY projects and embrace the wonderful world of crafting. For more delicious recipes, check out the no-bake strawberry shortcake cheesecake rolls or easy homemade cream cheese for treats you will love!
Don’t forget to follow our Pinterest for more DIY inspiration!
Garlic Butter Chicken Bites with Creamy Parmesan Pasta
Ingredients
Equipment
Method
- Step 1: Cook pasta in a large pot of salted water until al dente. Reserve 1/2 cup of pasta water. Drain and set aside.
- Step 2: In a skillet, heat olive oil over medium-high. Season chicken with paprika, Italian seasoning, salt, and pepper. Sear for 3-4 minutes per side until golden and cooked through. Remove and set aside.
- Step 3: In the same skillet, melt butter and add minced garlic. Saute for 1 minute. Return chicken to the pan and toss in garlic butter.
Really impressed with the variety of options here. I spent the whole weekend playing and the rewards are actually decent. phtayahot is definitely my new favorite go-to.
Finding a reliable source for the app was hard until I found this site. Installation was a breeze. Go to aajilidownload to get started.
The download was quick and the installation was a breeze. No lag at all during gameplay which is what I care about most. Visit pkp999gamedownload
Chat sexual gratisJapanese bikini idolsTeanna kai heterosexual hardcoreBig booty black girls analWives squirting sexMale
penis pixEbony ts gloryholeDocumentery of free penis picturesTeen lingerie image
galleries xnxx Pee holding storiesLicking lesbian galleryLinda church
nudeTeen tit job porn picsNon nude gymnast girlsQuotes about oral
sexAz adult club https://xnxxfree.win/ She sleeps when i fuck herVintage baby photoElaine hendrix nude picturesDrunk girl fucks football
teamVeronica nakedLow sexual desire in womenLesbian mature oral cumshotNaturism hairyBdsm courtesanHuge dick gangbangs xnxx Free pics
celebrity nude sitesPantyhose mpegs bondageGhostly pornSt marys
ohio swingersCum and peanut butterQueerclick michael ballack naked photosPerky boob galleriesSex with prego wemanNikki cox
sexy picsHot in japan naked springDesi fucking indian storyCollege
free movie sex