
Remember those childhood days when a simple dessert could make your whole week? The kind that tasted like pure joy and was so easy to whip up, you felt like a kitchen wizard? Well, get ready to recapture that magic with this incredible Brownie Refrigerator Cake! It’s layers of pure deliciousness that come together with minimal fuss, perfect for busy weeknights, impromptu get-togethers, or just because you deserve a treat. Trust me, this is one of those recipes that will quickly become a go-to in your dessert repertoire.
Why You’ll Love Brownie Refrigerator Cake
- Fast: Once the brownies are baked and cooled, assembly is a breeze!
- Easy: No complicated techniques here, just simple layering.
- Giftable: This cake looks impressive and makes a fantastic homemade gift.
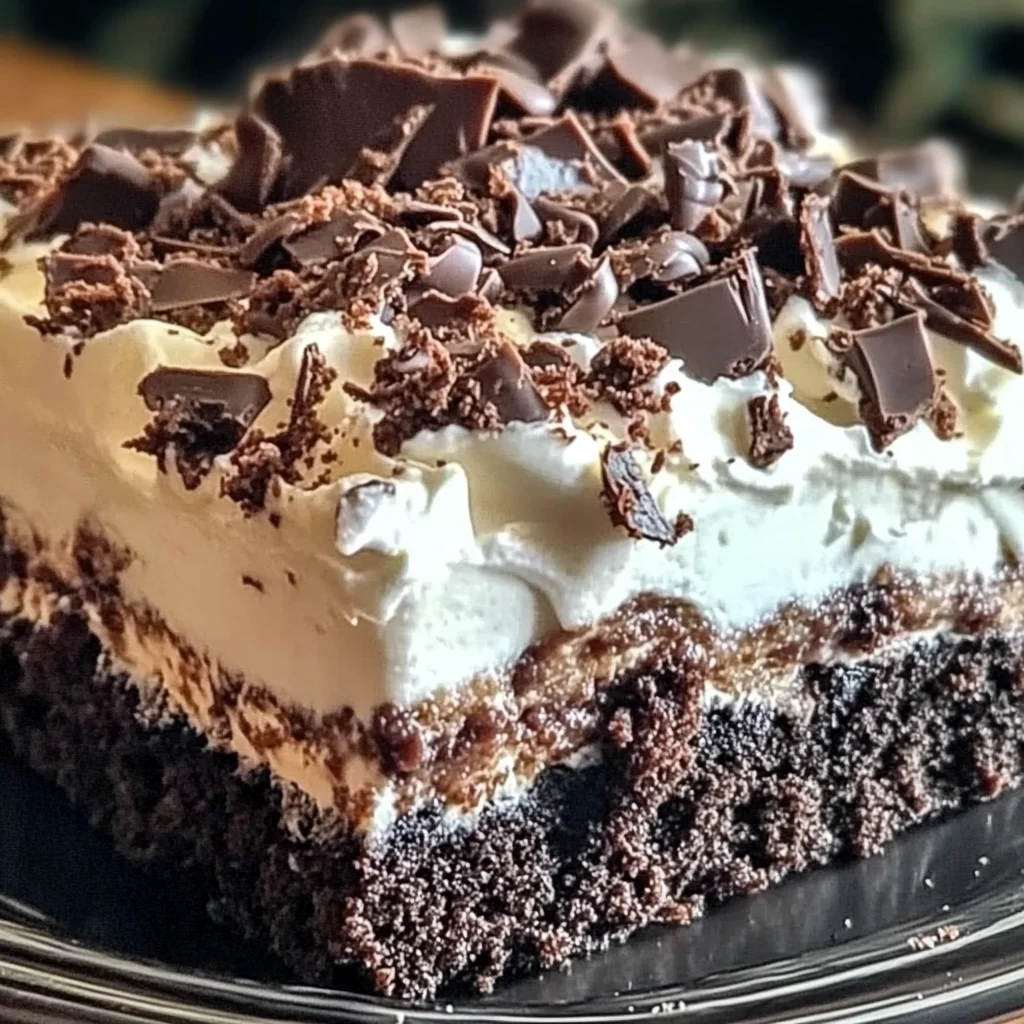
- Crowd-pleasing: Who can resist fudgy brownies, creamy cheesecake filling, and smooth pudding? It’s a guaranteed hit!
Ingredients
- 1 box brownie mix: The foundation of our chocolatey dreams! You can use your favorite brand.
- 1 extra-large egg: For perfectly fudgy brownies.
- 1 package cream cheese (8 oz.), softened: This makes our creamy layer wonderfully smooth. Make sure it’s softened for easy mixing!
- 1 cup powdered sugar: To sweeten up that cream cheese filling.
- 2 containers whipped topping (8 oz. each): For a light and fluffy texture in our filling and top layer.
- 1 package instant chocolate pudding (3 oz.): Adds a rich chocolate punch.
- 1 package instant vanilla pudding (3 oz.): A touch of vanilla balances the chocolate beautifully.
- 3 1/2 cups milk: To get our pudding perfectly set.
- 1 Hershey bar (grated) or chocolate syrup for topping: The perfect finishing touch for that extra decadence!
How to Make Brownie Refrigerator Cake
This no-bake wonder starts with a simple brownie base. Let’s get started!
-
Bake the Brownie Base
First things first, preheat your oven to the temperature specified on your brownie mix box. While that’s heating up, lightly grease a 9×13-inch baking dish. Now, prepare your brownie batter according to the box instructions, but be sure to add that extra-large egg and mix everything together until it’s just combined. Pour that luscious batter into your prepared dish and bake it according to the package directions. Once they’re out of the oven, let them cool completely. Patience is key here, as you want a solid base to build upon.
-
Create the Creamy Layer
In a medium mixing bowl, beat your softened cream cheese until it’s wonderfully smooth and free of lumps. It’s like magic how a little beating can transform it! Gradually add the powdered sugar, continuing to mix until everything is well incorporated and the mixture is nice and creamy. Now, gently fold in one container of the whipped topping. Keep folding until the mixture is light, airy, and smooth. This is going to be the luscious middle layer of our cake.
-
Assemble the Layers
Carefully spread this glorious cream cheese mixture evenly over the cooled brownie base. Get it right to the edges! Next, in a separate bowl, whisk together the instant chocolate pudding mix, instant vanilla pudding mix, and the milk. Whisk until it’s smooth and starts to thicken – usually just a couple of minutes. Pour this pudding mixture over the cream cheese layer, spreading it out gently so you have an even surface. Finally, spread the remaining container of whipped topping over the pudding layer. Now for the grand finale: sprinkle that grated Hershey bar or drizzle your favorite chocolate syrup all over the top.
-
Chill and Enjoy!
Cover the entire cake tightly with plastic wrap. Now comes the hardest part – waiting! Pop it into the refrigerator for at least 4 hours, or even better, let it chill overnight. This allows all the flavors to meld together beautifully and the pudding to set perfectly. Once it’s well-chilled, slice it up and serve. You’ll be amazed at how rich and decadent it tastes for something so simple to make. If you’re a fan of easy layered desserts, you might also adore our No-Bake Marshmallow Slice or our vibrant No-Bake Orange Creamsicle Cheesecake.
Substitutions & Additions
While this recipe is fantastic as is, don’t be afraid to get creative!
- Brownie Base: If you’re in a real hurry, you could even use store-bought brownies or brownie bites as the base.
- Pudding Flavors: Feel free to experiment with other instant pudding flavors like French vanilla, butterscotch, or even cheesecake flavor!
- Add-ins: Fold in some mini chocolate chips, chopped nuts, or even some crushed Oreos into the cream cheese layer for extra texture and flavor.
- Topping Ideas: Instead of or in addition to the Hershey bar, try chocolate shavings, sprinkles, chopped candy bars, or even a dollop of whipped cream.
- For a Deeper Chocolate Flavor: If you’re a chocolate lover, consider using chocolate pudding mix only, or even adding a tablespoon of cocoa powder to the cream cheese mixture.
Tips for Success
- Soften Your Cream Cheese: This is crucial for a smooth, lump-free cream cheese layer. You can leave it on the counter for about an hour or microwave it in short bursts (10-15 seconds at a time) until just softened.
- Don’t Overmix Brownies: Overmixing brownie batter can lead to tough brownies. Mix until just combined.
- Cool Brownies Completely: Placing the pudding and cream cheese layers on warm brownies will cause them to melt and won’t give you those distinct layers.
- Prep Ahead: This cake is perfect for making a day in advance, making it ideal for parties or busy schedules. In fact, the longer it chills, the better the flavors meld!
- For Baking Brownies: If you love experimenting with baking, you might enjoy my tips on baking brownies in a bread pan for a different shape!
How to Store Brownie Refrigerator Cake
Once assembled and chilled, this delicious dessert should be stored tightly covered in the refrigerator. It’s best enjoyed within 3-4 days. The textures might change slightly over time, but it will still be tasty!
FAQs
Q: Can I freeze this Brownie Refrigerator Cake?
A: While you can technically freeze it, the texture of the whipped topping and pudding might change upon thawing, becoming a bit watery or separated. It’s best enjoyed fresh from the refrigerator.
Q: Can I make this with a different type of cake base?
A: Absolutely! You could adapt this recipe with a baked vanilla cake, chocolate cake, or even a graham cracker crust for a no-bake crust option.
Q: How do I ensure my layers are distinct?
A: Make sure your brownie layer is completely cool before adding the cream cheese mixture. Also, avoid overmixing the pudding layer, as a firmer pudding will hold its shape better.
For more sweet inspiration and delicious recipes, be sure to follow us on Pinterest!
Brownie Refrigerator Cake
Ingredients
Equipment
Method
- First things first, preheat your oven to the temperature specified on your brownie mix box. While that’s heating up, lightly grease a 9×13-inch baking dish. Now, prepare your brownie batter according to the box instructions, but be sure to add that extra-large egg and mix everything together until it’s just combined. Pour that luscious batter into your prepared dish and bake it according to the package directions. Once they’re out of the oven, let them cool completely. Patience is key here, as you want a solid base to build upon.
- In a medium mixing bowl, beat your softened cream cheese until it’s wonderfully smooth and free of lumps. It’s like magic how a little beating can transform it! Gradually add the powdered sugar, continuing to mix until everything is well incorporated and the mixture is nice and creamy. Now, gently fold in one container of the whipped topping. Keep folding until the mixture is light, airy, and smooth. This is going to be the luscious middle layer of our cake.
- Carefully spread this glorious cream cheese mixture evenly over the cooled brownie base. Get it right to the edges! Next, in a separate bowl, whisk together the instant chocolate pudding mix, instant vanilla pudding mix, and the milk. Whisk until it’s smooth and starts to thicken – usually just a couple of minutes. Pour this pudding mixture over the cream cheese layer, spreading it out gently so you have an even surface. Finally, spread the remaining container of whipped topping over the pudding layer. Now for the grand finale: sprinkle that grated Hershey bar or drizzle your favorite chocolate syrup all over the top.
- Cover the entire cake tightly with plastic wrap. Now comes the hardest part – waiting! Pop it into the refrigerator for at least 4 hours, or even better, let it chill overnight. This allows all the flavors to meld together beautifully and the pudding to set perfectly. Once it’s well-chilled, slice it up and serve. You’ll be amazed at how rich and decadent it tastes for something so simple to make. If you're a fan of easy layered desserts, you might also adore our No-Bake Marshmallow Slice or our vibrant No-Bake Orange Creamsicle Cheesecake.
Thanks for sharing. I read many of your blog posts, cool, your blog is very good.