
Remember those sunny afternoons spent crafting as a kid? The feeling of creating something beautiful with your own two hands always felt magical. Today, I’m bringing back that nostalgic joy with a super simple, incredibly charming craft: DIY Mason Jar Lid Sun Catchers! These little beauties are perfect for brightening up any window and are so easy to make, you’ll want to create a whole collection. Plus, they make the most adorable handmade gifts!
Why You’ll Love Mason Jar Lid Sun Catchers
- Fast: You can whip up a batch in no time, making it a great last-minute gift idea or a fun afternoon activity.
- Easy: Seriously, it doesn’t get much simpler than this. Perfect for crafters of all ages and skill levels!
- Giftable: These make wonderful, thoughtful gifts for teachers, neighbors, friends, or even as party favors.
- Crowd-pleasing: Who doesn’t love a bit of sparkle and color? Everyone will be asking how you made them!
Ingredients
Gathering your supplies is a breeze. You probably even have most of them already!
- Colored art page or coloring page: This is where the magic happens! You can use anything from vibrant construction paper to intricate coloring book pages. I love using pages from old kids’ art books for a touch of whimsy.
- Mason jar lids: The standard, round metal lids are what you’ll need. You can find these at most grocery stores or craft shops.
- Wide mouth mason jar bands: These are the screw-on rings that go with the lids. Make sure they’re for wide-mouth jars, as they have a slightly larger diameter.
How to Make Mason Jar Lid Sun Catchers
Let’s get crafting! Follow these simple steps, and you’ll have gorgeous sun catchers in no time.
- Select your artwork: Start by choosing a colorful art page or a fun coloring page. If you’re using a coloring page, get creative with markers, crayons, or colored pencils to bring it to life! Think about the colors that will pop when the sun shines through them.
- Cut to fit: Carefully cut your chosen artwork with scissors. You want to create a circle that fits snugly inside the flat part of a mason jar lid. Measure twice, cut once, making sure it covers the entire bottom of the lid without any gaps.
- Place the artwork: Lay your cut-out artwork flat inside the mason jar lid. Smooth out any wrinkles to ensure it looks neat and tidy.
- Secure the band: Take a wide-mouth mason jar band and screw it around the lid, over the artwork. This will hold your beautiful paper design securely in place and give your sun catcher a finished look.
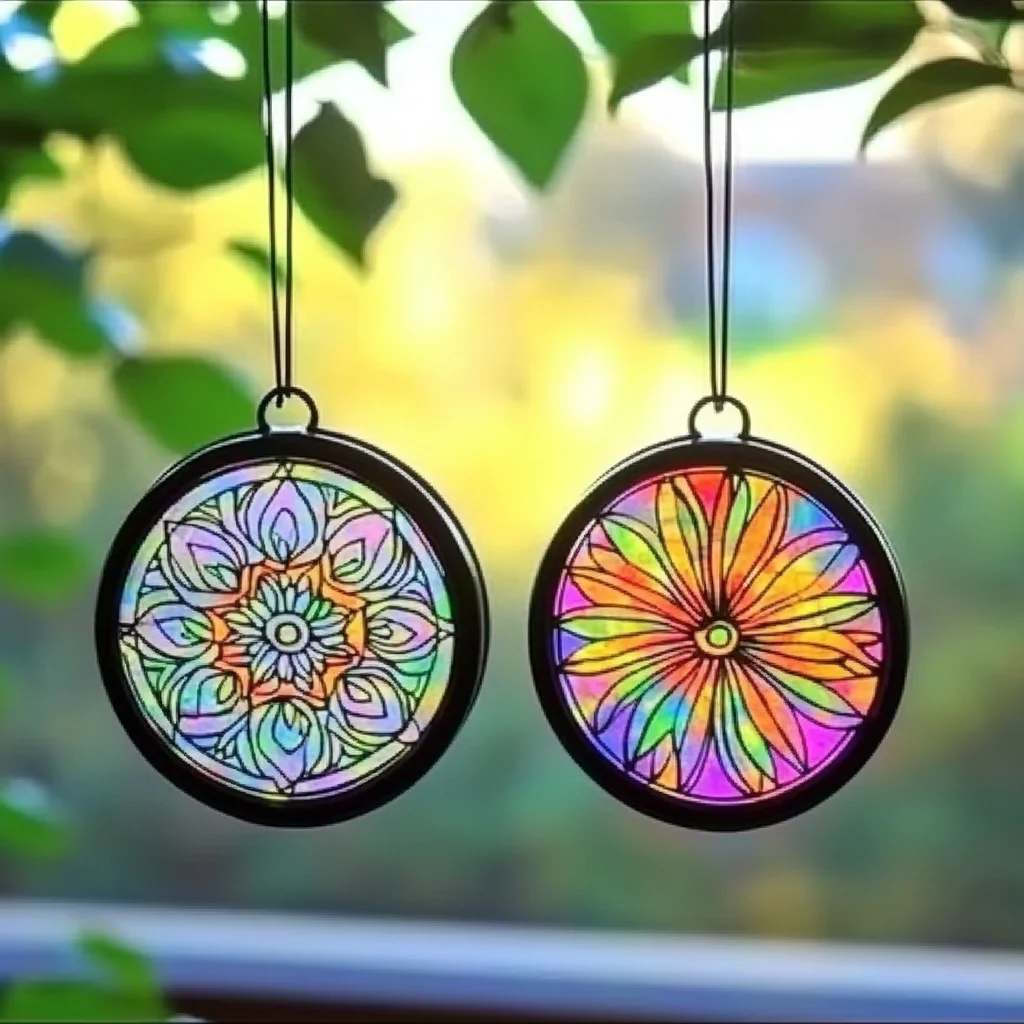
- Hang and admire: Now for the best part! Find a sunny spot for your creation. You can hang it in a window, on your porch, or even from a tree branch. Use a piece of string or ribbon tied through the center hole of the lid band. Watch as the sunlight streams through, casting colorful patterns wherever you hang it!
Substitutions & Additions
Feeling inspired to get even more creative? Here are a few ideas:
- Vary the paper: Instead of just flat paper, try using tissue paper for a translucent effect, or even pressed flowers for a natural touch.
- Add glitter: A little bit of glitter glue on the edges or specific parts of the artwork can add extra sparkle.
- Layering: You can even layer different pieces of colored paper or thin fabric for a more complex design.
- Alternative bindings: If you don’t have mason jar bands, you could try other thin metal rings or even craft wire to secure the artwork.
- Theme it: Make holiday-themed sun catchers using colored paper related to the season, or create them based on your favorite colors.
Tips for Success
A few little tricks to make your sun catchers even more spectacular:
- Sharp scissors are key: This will help you get clean, precise cuts for a professional look.
- Test your fit: Before you commit to gluing or securing, make sure your paper circles fit well within the lid.
- Avoid moisture: These are best for indoor windows or sheltered outdoor spaces, as moisture can damage the paper.
- Prep ahead: If you’re making these with kids, you can cut out a bunch of circles in advance to make the crafting process smoother. This is also a great way to prepare for events like crafting parties.
- Consider the light: Think about where you’ll hang them. Lighter, brighter colors will show up best in direct sunlight.
How to Store Mason Jar Lid Sun Catchers
When the seasons change or you want to swap out your decorations, storing these is simple. Just keep them in a dry place. Since they are made of paper, it’s best to avoid damp areas. They should last for a good while if stored properly, ready to bring color to your windows again next year!
FAQs
- Can I use regular mouth mason jar lids? While you can, wide-mouth bands are generally easier to work with and fit the lids better for this project.
- Can kids do this craft unsupervised? With sharp scissors, it’s best to supervise younger children. However, the overall process is very simple and safe with adult guidance.
- Can these be hung outside? Yes, but it’s best to hang them in a spot that’s somewhat protected from heavy rain and direct, harsh sunlight for extended periods, as the paper might fade or degrade over time.
These DIY Mason Jar Lid Sun Catchers are such a delightful way to add a handmade touch to your home. They’re a testament to how simple materials can be transformed into something truly special. If you enjoyed this craft, be sure to check out more creative ideas on our website, like our delightful smashed potato salad or our fun crystal flowers! Happy crafting, friends!
If you loved making these sun catchers, you’ll find even more inspiration by following us on Pinterest!
DIY Mason Jar Lid Sun Catchers
Ingredients
Equipment
Method
- Step 1: Select your artwork. If using a coloring page, color it with markers, crayons, or colored pencils.
- Step 2: Cut your artwork into a circle that fits snugly inside the flat part of a mason jar lid. Ensure it covers the entire bottom without gaps.
- Step 3: Place the cut-out artwork inside the mason jar lid, smoothing out any wrinkles.
- Step 4: Screw a wide-mouth mason jar band around the lid, over the artwork, to secure it.
- Step 5: Tie a piece of string or ribbon through the center hole of the lid band. Hang your sun catcher in a window or any desired spot.