Remember those rainy days when you were little, searching for something fun and creative to do? Or maybe you’re looking for a delightful activity to share with your kids or grandkids that doesn’t involve a ton of mess or complicated steps? Well, I’ve got just the thing for you! Today, we’re diving into the magical world of salt painting. It’s a super simple, incredibly satisfying craft that brings out the artist in everyone, creating beautiful, textured artwork with just a few household items. Get ready to be amazed by what a little salt and paint can do!
Why You’ll Love Salt Painting
- Fast: You can create a masterpiece in under an hour.
- Easy: Even the littlest hands can get involved with supervision.
- Giftable: These sparkly creations make wonderful, handmade gifts.
- Crowd-pleasing: Kids and adults alike are mesmerized by the magic!
Ingredients
Gathering your supplies is a breeze, and you likely have most of them in your craft stash or kitchen already!
- Black or dark-colored cardstock or heavy paper: This makes the colors really pop and creates a beautiful contrast.
- White school glue: Your trusty artist’s pen!
- Table salt: The magic ingredient that makes everything sparkle.
- Watercolor paints or liquid food coloring: For vibrant hues.
- Paintbrushes or pipettes: To apply the colors.
- Small cups or palette for colors: To mix your paints.
- Paper towels: To protect your workspace – because even simple crafts can get a little splashy!
How to Make Salt Painting
Let’s get creating! This process is so engaging, and watching the colors bloom is pure joy. It reminds me a bit of the satisfaction I get from mastering a new baking technique, like creating perfect sweet potato cheesecake cookies – it’s all about patience and enjoying the process.
- Prep your station: Lay down some paper towels on your work surface. This is your first line of defense against runaway colors!
- Draw your design: Grab your white school glue and a piece of dark cardstock. You can draw anything you like – squiggly lines, stars, flowers, letters, or even a fun design inspired by your favorite treats, like a slice of Reese’s Peanut Butter Cup pie!
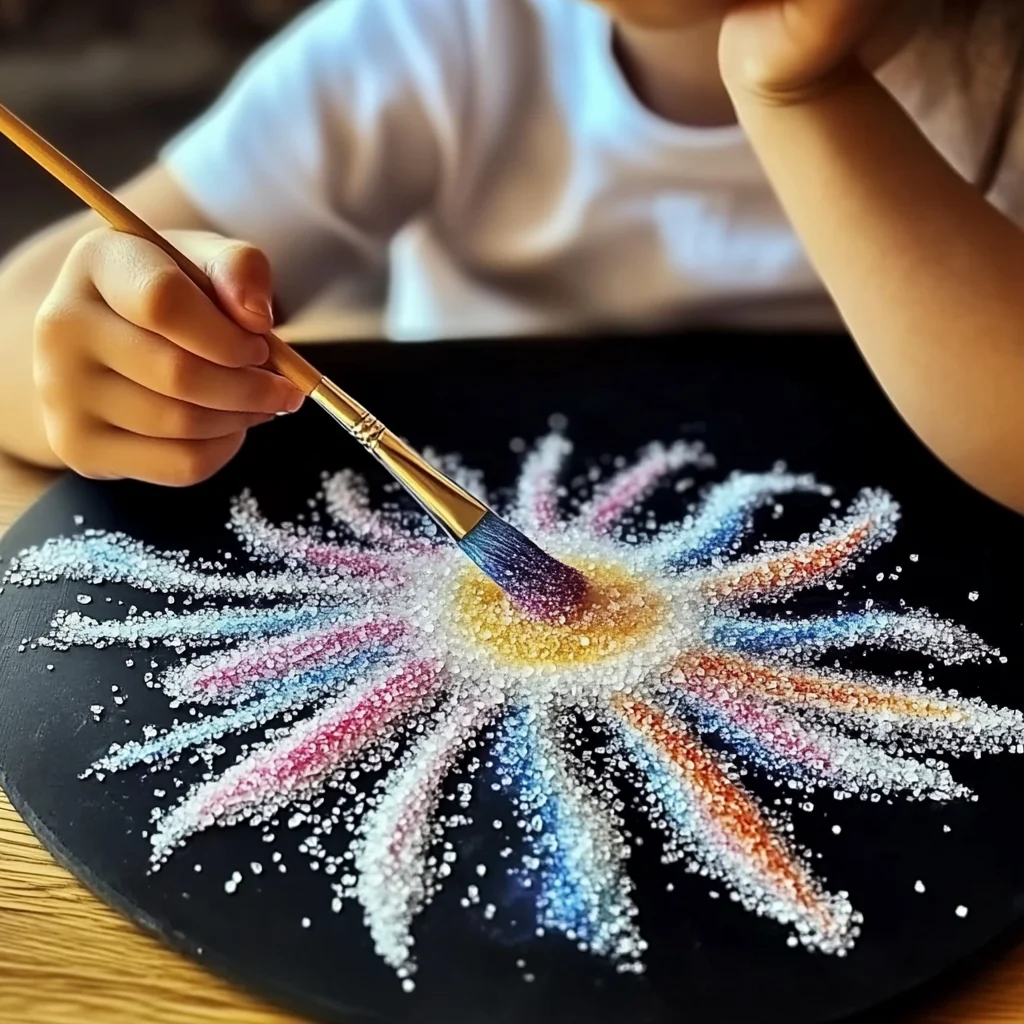
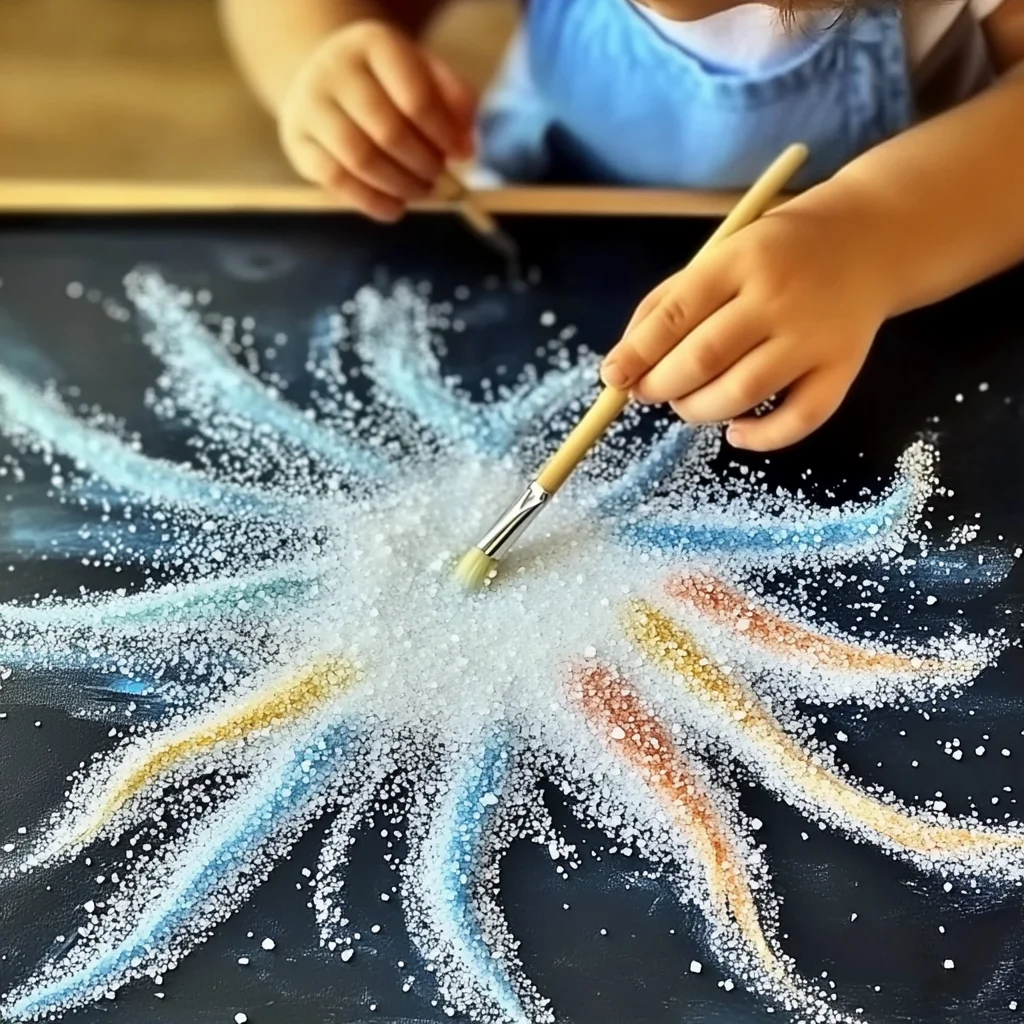
- Salt it up: While the glue is still wet, generously sprinkle table salt over every glue line. You want to make sure the glue is completely covered. Gently tilt the paper to shake off any excess salt. It’s like a sparkly blanket for your design!
- Mix your colors: In your small cups, mix your watercolor paints or liquid food coloring with just a tiny bit of water. You want a concentrated color that will spread well. If you’re using food coloring, a drop or two is usually plenty.
- Paint with magic: Now for the fun part! Dip a paintbrush or a pipette into your first color. Gently touch the tip to the salt-covered glue lines. Watch as the color magically travels along the salt crystals, spreading and creating beautiful, textured patterns.
- Layer and blend: Continue adding different colors, letting them touch and blend together. Don’t be afraid to experiment! The salt acts as a wick, pulling the color and creating an almost watercolor-like effect. It’s like a mini science experiment meets art project!
- Let it dry: Once you’re happy with your creation, set it aside to air dry completely. This might take a few hours, depending on how much liquid you used. Patience is key here!
- Admire your masterpiece: When it’s fully dry, you’ll have a stunning piece of art with a unique, sparkly, textured finish. It’s truly mesmerizing!
Substitutions & Additions
Feeling adventurous? You can totally tweak this recipe! If you don’t have watercolors or food coloring, even diluted acrylic paints can work, though they might not spread as fluidly. You can also try using different types of salt – Epsom salt can give a chunkier sparkle, or you can even use colored sand for a different effect. Want to add another layer of fun? Try making some DIY bioplastic suncatchers alongside these salt paintings for a full afternoon of crafting!
Tips for Success
- Don’t over-thin your paint: Too much water will make the colors run too much and can wash away the salt effect.
- Work on a flat surface: This helps the glue and salt stay put until you’re ready to paint.
- Gentle touch is key: When applying the paint, don’t scrub. Just touch the brush or pipette to the salt.
- Experiment with glue designs: Try using glue bottles with finer tips for more intricate details, similar to how I like to get precise with decorating my homemade cream cheese frosting.
How to Store Salt Painting
Once your salt painting is completely dry, you can display it as is. If you want to preserve it for a longer time, especially if it will be handled frequently, you can spray it with a clear acrylic sealant (like Mod Podge or a spray fixative). This will help lock the salt and color in place and prevent shedding. Store it somewhere flat and out of direct sunlight to keep the colors vibrant.
FAQs
Q: Can I use regular paper instead of cardstock?
A: You can, but heavy paper or cardstock is recommended because it holds up better to the moisture from the glue and paint. Regular paper might wrinkle or tear.
Q: What if my colors aren’t spreading?
A: Make sure you’re touching the salt lines directly with the damp brush or pipette. The salt needs to absorb the color to spread!
Q: Can I use glitter too?
A: Absolutely! You can sprinkle fine glitter over the wet glue before adding the salt for an extra touch of sparkle. Just be prepared for a bit more glitter around your crafting area!
Q: How long does it take to dry?
A: Drying time can vary, but usually, it takes a few hours. It’s best to let it dry overnight to be sure.
Happy crafting, friends! I hope you have as much fun creating these vibrant salt paintings as I do. It’s a wonderful way to add a little sparkle to your day. For more fun DIYs and creative ideas, be sure to follow us on Pinterest!
Sparkle and Shine: Easy Salt Painting Craft
Ingredients
Equipment
Method
- Step 1: Prep your station: Lay down some paper towels on your work surface. This is your first line of defense against runaway colors!
- Step 2: Draw your design: Grab your white school glue and a piece of dark cardstock. You can draw anything you like – squiggly lines, stars, flowers, letters, or even a fun design inspired by your favorite treats, like a slice of Reese's Peanut Butter Cup pie!
- Step 3: Salt it up: While the glue is still wet, generously sprinkle table salt over every glue line. You want to make sure the glue is completely covered. Gently tilt the paper to shake off any excess salt. It’s like a sparkly blanket for your design!
- Step 4: Mix your colors: In your small cups, mix your watercolor paints or liquid food coloring with just a tiny bit of water. You want a concentrated color that will spread well. If you’re using food coloring, a drop or two is usually plenty.
- Step 5: Paint with magic: Now for the fun part! Dip a paintbrush or a pipette into your first color. Gently touch the tip to the salt-covered glue lines. Watch as the color magically travels along the salt crystals, spreading and creating beautiful, textured patterns.
- Step 6: Layer and blend: Continue adding different colors, letting them touch and blend together. Don't be afraid to experiment! The salt acts as a wick, pulling the color and creating an almost watercolor-like effect. It’s like a mini science experiment meets art project!
- Step 7: Let it dry: Once you’re happy with your creation, set it aside to air dry completely. This might take a few hours, depending on how much liquid you used. Patience is key here!
- Step 8: Admire your masterpiece: When it's fully dry, you'll have a stunning piece of art with a unique, sparkly, textured finish. It’s truly mesmerizing!
Your article helped me a lot, is there any more related content? Thanks!