
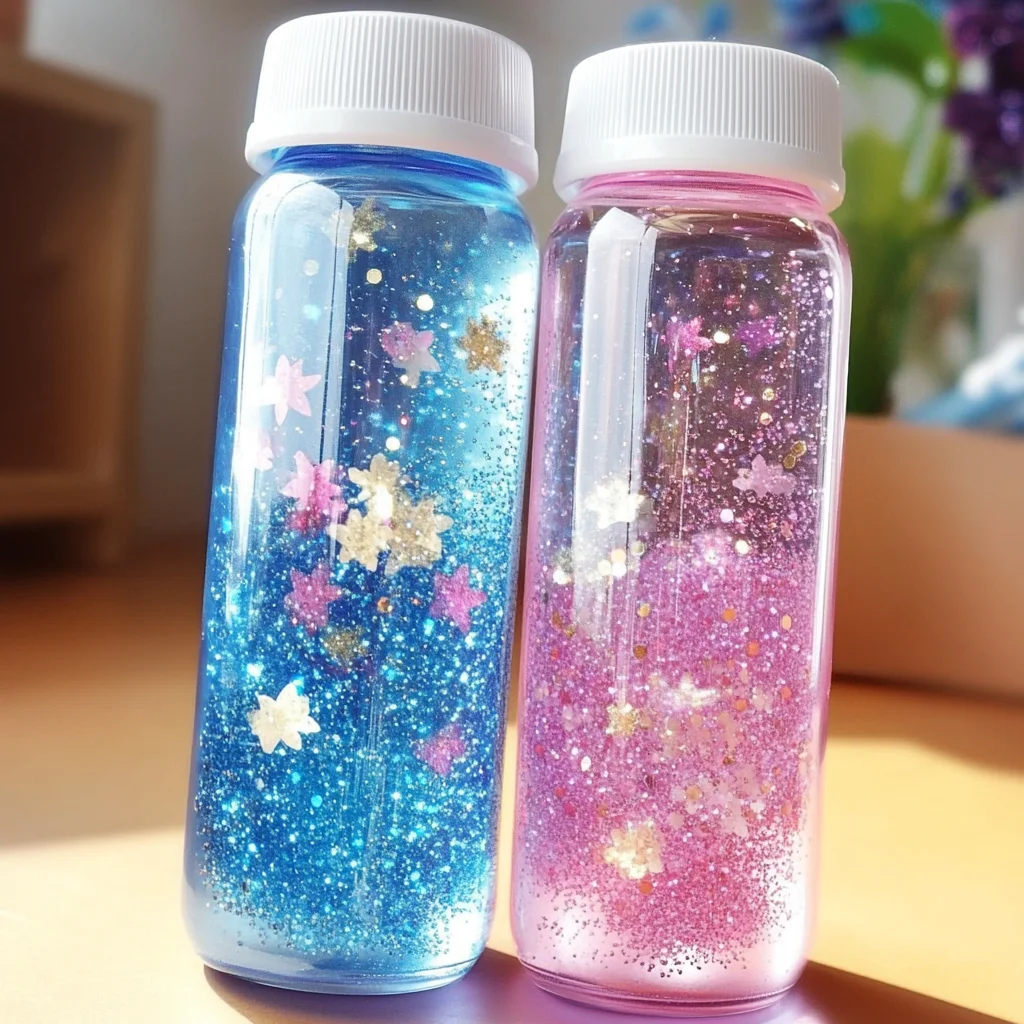
Have you ever found yourself needing a moment of peace amidst the chaos of everyday life? If so, you’re in for a treat with this delightful DIY project: the Calm Down Sensory Bottle. Not only is it a beautiful creation to look at, but it also serves as a tool for calming nerves and sparking creativity. Imagine sitting down with your family or friends, crafting together, and watching your own handmade sensory bottle come to life. As you shake it gently, the glitter swirls and glides, creating a mesmerizing display that soothes the mind and spirit.
Why You’ll Love DIY Calm Down Sensory Bottle
- Beginner-friendly
- Budget-friendly
- Creative and fun
- Great for kids and families
- Perfect for gifts or decorations
- Customizable
The Heart Behind This DIY
Crafting a Calm Down Sensory Bottle is more than just a fun activity; it is a wonderful way to promote mindfulness and relaxation. As you pour the ingredients into the bottle, you will find a sense of calm washing over you. This project encourages creativity, allowing you to express yourself through colors and textures. Plus, it’s an educational experience for children, teaching them about mixing and observing changes in their creation. The act of making something with your hands fosters confidence and connection, making it a perfect family bonding activity.
A Gentle Look at the Process
Picture yourself gathered around the table, surrounded by vibrant materials and eager hands. You’ll begin by filling the bottle, watching as the water flows smoothly. Then, you’ll add glue, glitter, and colors, each step inviting your imagination to take flight. The sounds of pouring, mixing, and shaking fill the air, creating a joyful atmosphere. Each moment spent creating this sensory bottle is an opportunity to connect with your inner artist and find peace in the process.
Materials You’ll Need
- Clear plastic bottle with a secure lid: This will be the container for your calming creation.
- Water: The main ingredient that brings your sensory bottle to life.
- Clear glue or glycerin: This slows down the movement of the contents, enhancing the sensory experience.
- Glitter (optional): For a sparkling touch that adds visual appeal.
- Small beads or sequins (optional): These can create delightful movement inside the bottle.
- Food coloring (optional): A few drops can make your bottle a colorful masterpiece.
Step-by-Step Directions
Step 1
Begin by filling your clear plastic bottle about two-thirds full with water. You can feel the refreshing coolness of the water as you pour it in, setting the stage for your calming creation.
Step 2
Next, add a few tablespoons of clear glue or glycerin to the water. This ingredient is essential as it helps to slow down the movement of the glitter and any other items you add, creating a soothing effect when you shake the bottle.
Step 3
Now comes the fun part! If you like, sprinkle in some glitter, small beads, or sequins. Imagine how they will float and swirl, creating a magical underwater scene as they settle.
Step 4
For a burst of color, add a few drops of food coloring to the mixture and stir gently. Watch as the colors blend beautifully, adding vibrancy to your sensory bottle.
Step 5
Fill the rest of the bottle with water, leaving a small space at the top. This space is important to prevent any overflow when you secure the lid.
Step 6
Secure the lid tightly on the bottle to avoid any spills. Feel the satisfaction of knowing your creation is safe and sound!
Step 7
Finally, give your bottle a good shake and enjoy the calming effect as the items settle. Take a moment to breathe deeply and appreciate the beauty of your handiwork.
Creative Ways to Use DIY Calm Down Sensory Bottle
Your DIY Calm Down Sensory Bottle can serve many purposes beyond just being a soothing tool. You can display it on your desk as a calming décor piece, use it during meditation or relaxation sessions, or gift it to a friend who could use a little extra tranquility in their life. Kids love to shake it up during storytime or quiet moments, creating a peaceful environment for learning and creativity.
How to Store, Preserve, or Reuse DIY Calm Down Sensory Bottle
To keep your sensory bottle in top condition, store it in a cool, dry place away from direct sunlight. If you notice any separation of ingredients, simply shake it gently to mix them back together. You can reuse the bottle as well; just rinse it out and start fresh with new materials for a different sensory experience.
Creative Variations and Customizations
- Color variations: Try using different food coloring combinations for unique effects.
- Theme ideas: Create holiday-themed bottles using seasonal colors and decorations.
- Seasonal adaptations: Make a summer beach bottle with sand and shells or a winter wonderland with fake snow.
- Kid-friendly modifications: Use non-toxic glitter and safe materials for younger crafters.
- Advanced creative upgrades: Incorporate essential oils for added sensory benefits.
Tips for Success
- Common mistakes to avoid: Make sure the lid is secured tightly to prevent spills!
- Safety tips if applicable: Always supervise young children during the crafting process.
- Preparation suggestions: Gather all materials beforehand for a smooth crafting experience.
- Cleanup recommendations: Use a tray or mat to catch any spills while crafting.
- Expert crafting tips: Experiment with different amounts of glue or glycerin to see how it affects the flow of contents.
FAQs About DIY Calm Down Sensory Bottle
Can beginners make this?
Absolutely! This project is perfect for beginners and requires only a few simple materials.
Can children participate?
Yes! Children can help with pouring and mixing, making it a great family activity.
How long does it last?
With proper sealing and care, your sensory bottle can last for a long time!
Can I customize it?
Definitely! Feel free to get creative with colors, decorations, and themes.
A Final Creative Note
As you wrap up your crafting session, take a moment to admire what you’ve created. Remember, the joy of DIY projects lies in the journey of making, sharing, and expressing yourself. Celebrate your creativity and the connections you’ve fostered through this simple activity. For more delicious recipes, check out family-friendly meals or treats you will love! Don’t forget to follow our Pinterest account for more DIY inspiration.
DIY Calm Down Sensory Bottle
Ingredients
Equipment
Method
- Step 1: Fill the clear plastic bottle about two-thirds full with water.
- Step 2: Add a few tablespoons of clear glue or glycerin to the water.
- Step 3: Sprinkle in some glitter, small beads, or sequins.
- Step 4: Add a few drops of food coloring to the mixture and stir gently.
- Step 5: Fill the rest of the bottle with water, leaving a small space at the top.
- Step 6: Secure the lid tightly on the bottle.
- Step 7: Shake the bottle and enjoy the calming effect as the items settle.
The variety of games is just insane. I spent the whole weekend exploring and I am still not bored. k777game is definitely my new favorite spot.
Great to see such a reliable login portal for the community here. Everything works as expected without any glitches. Visit bajiapppakistanlogin
Finally a site that feels fair and transparent. The user interface is clean and easy to navigate even for beginners. Big thanks to idbigobet.
The download was quick and the installation was a breeze. No lag at all during gameplay which is what I care about most. Visit pkp999gamedownload