
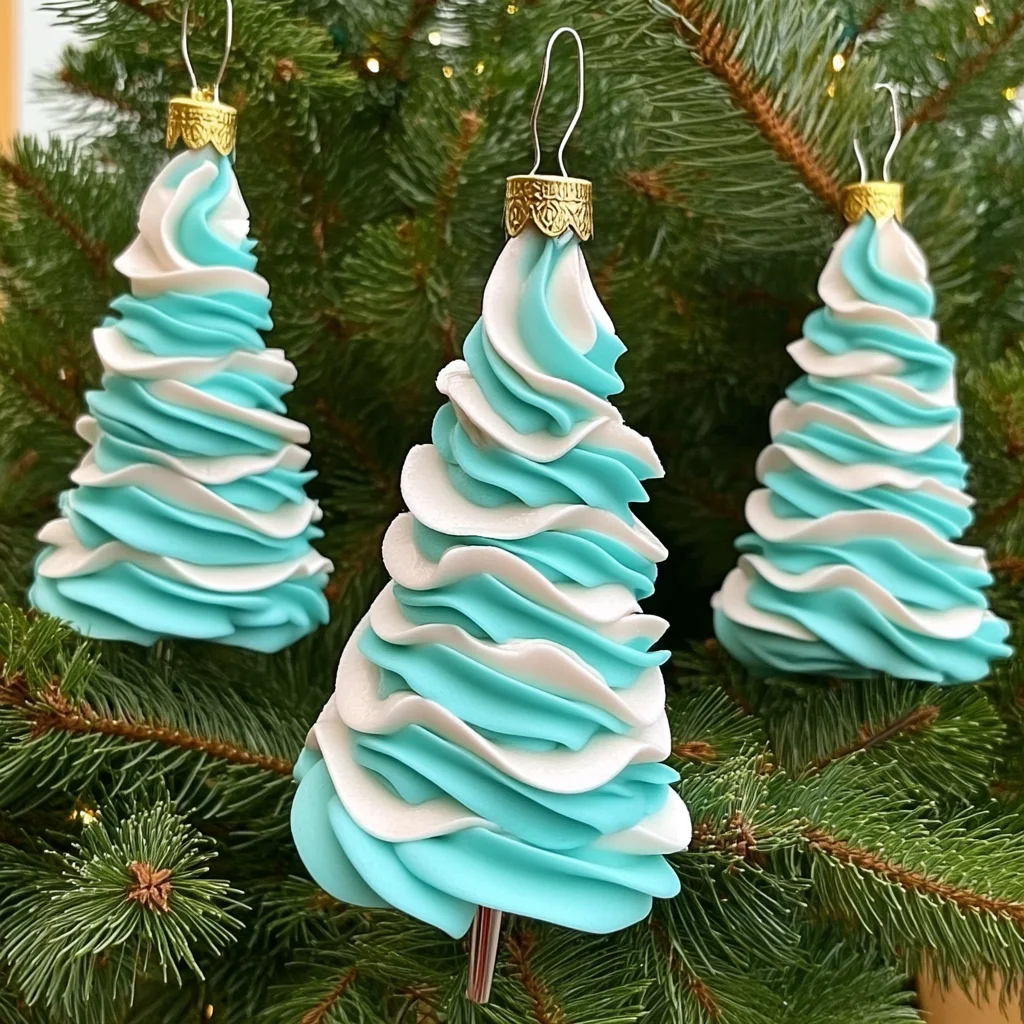
There’s something truly magical about the holiday season, isn’t there? The air is filled with the scent of pine, twinkling lights adorn every corner, and the joy of crafting becomes a cherished tradition. Today, I’m excited to share with you a delightful DIY project: Shaving Cream Christmas Trees! This project is not just about creating festive decorations; it’s an exploration of creativity, a sensory experience, and a wonderful way to spend quality time with loved ones. Imagine the fluffy texture of the shaving cream and the vibrant colors as you mix and mold each tree. Let’s dive into this enchanting craft that will surely bring smiles and warmth to your holiday celebrations!
Why You’ll Love Shaving Cream Christmas Trees
- Beginner-friendly
- Budget-friendly
- Creative and fun
- Great for kids and families
- Perfect for gifts or decorations
- Customizable
The Heart Behind This DIY
Crafting has an incredible way of bringing people together. As we create, we allow our minds to wander, fostering mindfulness and connection. Shaving Cream Christmas Trees are particularly special because they evoke childhood memories of playful creativity and the joy of making something unique. This project encourages you to express yourself, letting your imagination run wild as you decorate each tree with colors and embellishments that speak to your personality. Plus, the act of crafting is a soothing experience, allowing you to focus on the tactile sensations of the materials, creating a moment of tranquility amid the holiday hustle and bustle.
A Gentle Look at the Process
As you embark on this crafting journey, picture yourself surrounded by colorful supplies, the sound of laughter from family members, and the delightful aroma of shaving cream filling the air. The process is simple yet fulfilling. You will start by mixing and creating your unique green shade, then cut out tree shapes, and finally, you’ll build up layers of texture with the shaving cream. The joy comes not just from the finished product, but from the delightful experience of creating it together!
Materials You’ll Need
- White shaving cream – This will be the fluffy base of your trees, adding texture and dimension.
- Green food coloring – A few drops will transform your shaving cream into a festive hue.
- Cardstock or heavy paper – This is the sturdy foundation upon which your trees will be built.
- Scissors – For shaping your tree cutouts.
- Craft knife – For more intricate cuts if desired (always supervise kids!).
- Glitter (optional) – To add a touch of sparkle and magic to your trees.
- Glue – For attaching decorative items.
- Decorative items (e.g., sequins, beads, small ornaments) – Let your creativity shine as you personalize your trees!
Step-by-Step Directions
Step 1
In a bowl, mix the white shaving cream with a few drops of green food coloring. Stir gently until you achieve your desired shade of green. The texture should be fluffy and light, reminiscent of fluffy clouds. As you mix, imagine the vibrant trees that will soon come to life!
Step 2
Using scissors or a craft knife, cut the cardstock into a tree shape, approximately 6-12 inches tall. You can create a classic triangular shape or get creative with whimsical designs. Feel the satisfaction of shaping your base; it’s the first step toward your beautiful creation!
Step 3
Apply a thick layer of the green shaving cream mixture to your cardstock tree shape. Spread it evenly with your fingers or a craft stick, creating a textured look that mimics the boughs of a tree. Don’t worry about making it perfect; the more texture, the better!
Step 4
If you want to add a little extra sparkle, sprinkle glitter over the wet shaving cream. Watch as it catches the light, turning your trees into shimmering works of art. This step is where the magic really begins to happen!
Step 5
Allow the shaving cream trees to dry completely. This may take a few hours, but it’s worth the wait! As they dry, you’ll notice the shaving cream holding its shape beautifully, ready for the next step.
Step 6
Once dry, it’s time to decorate! Use glue to attach sequins, beads, or small ornaments to your trees. Let your imagination run wild! You can create colorful ornaments or even a snowy effect with white glitter. Each tree will have its own unique personality.
Step 7
Display your finished shaving cream Christmas trees as festive holiday decorations. Whether on a mantel, table, or as part of a centerpiece, they will surely bring joy and cheer to your home!
Creative Ways to Use Shaving Cream Christmas Trees
These charming trees aren’t just for decoration! You can use them as unique gifts for friends and family, bringing a touch of handmade love to your holiday greetings. Consider creating a mini forest as a centerpiece for your holiday table or using them as part of a festive display in your home. They also make great conversation starters during gatherings, inviting others to share their own crafting experiences!
How to Store, Preserve, or Reuse Shaving Cream Christmas Trees
To preserve your shaving cream trees, store them in a cool, dry place. If they become a bit soft after some time, you can gently reshape them or reapply a little more shaving cream to refresh their look. While they may not be permanent decorations, their charm will certainly last through many holiday seasons!
Creative Variations and Customizations
- Color variations – Experiment with different shades of green or even pastel colors for a whimsical touch.
- Theme ideas – Create a winter wonderland theme with white trees or a colorful rainbow forest.
- Seasonal adaptations – Make them for other holidays, like red and pink for Valentine’s Day.
- Kid-friendly modifications – Let kids use their favorite colors and lots of fun decorations.
- Advanced creative upgrades – Try adding a light layer of Mod Podge for a glossy finish or incorporating other textures like cotton balls for snow.
Tips for Success
- Common mistakes to avoid – Be careful not to apply the shaving cream too thin; it needs to be thick to create that lovely texture.
- Safety tips if applicable – Always supervise children when using scissors or craft knives.
- Preparation suggestions – Lay down newspaper or a crafting mat to catch any spills or drips.
- Cleanup recommendations – Clean your workspace with warm soapy water to easily remove any leftover shaving cream.
- Expert crafting tips – Don’t be afraid to experiment! Each tree is a reflection of your creativity, so have fun with it.
FAQs About Shaving Cream Christmas Trees
Can beginners make this?
Absolutely! This project is beginner-friendly and perfect for all ages. The process is simple and allows for plenty of creativity.
Can children participate?
Yes! Kids will love this project with adult supervision. It’s a safe and fun way for them to express their creativity.
How long does it last?
Once dried, your shaving cream trees can last for several weeks, depending on storage conditions. They may not be permanent, but they bring joy while they last!
Can I customize it?
Definitely! You can customize the colors, decorations, and sizes to fit your personal style or holiday theme.
A Final Creative Note
As you embark on this crafting adventure, remember that the joy of creating is just as important as the finished product. Every tree you make is a celebration of creativity, self-expression, and the wonderful connections you build with those you share this experience with. So grab your materials, gather your loved ones, and let your holiday spirit shine bright! If you’re looking for more delightful crafting ideas, don’t forget to check out Lana’s delicious recipes or creative treat ideas for your festive gatherings. Happy crafting!
For more DIY inspiration, follow Pinterest!
Shaving Cream Christmas Trees
Ingredients
Equipment
Method
- Step 1: Cover a flat work surface with newspaper or another protective covering. Gather the shaving cream, food coloring, paper, craft sticks, and optional decorations.
- Step 2: Squeeze a generous amount of non-gel shaving cream into a bowl. Add a few drops of green food coloring and gently mix until the color is distributed. Avoid overmixing if you want visible swirls.
- Step 3: Scoop the colored shaving cream onto paper or cardstock and use your hands or a spoon to form it into a triangular Christmas tree shape. Build the tree gradually for a fuller, fluffy appearance.
- Step 4: Use small amounts of other food coloring shades to create ornaments and decorative patterns. Sprinkle glitter, sequins, or other lightweight decorations over the tree if desired.
- Step 5: Carefully insert a toothpick or small craft stick into the bottom of the tree to represent the trunk. Adjust the shaving cream around the base to help keep it upright.
- Step 6: Leave the finished trees undisturbed for a few hours in a safe, dry location. Enjoy them as temporary sensory and holiday decorations while the shaving cream remains attractive.