
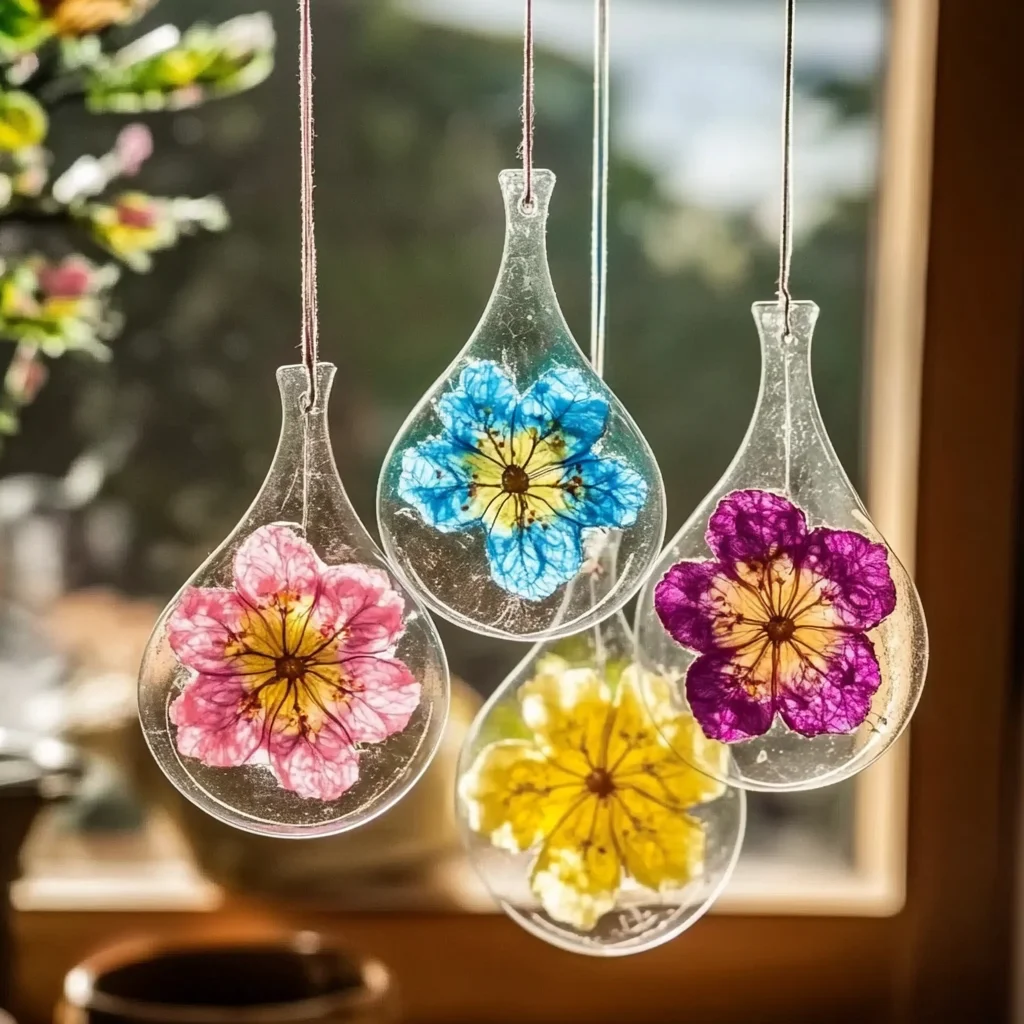
There’s something truly magical about watching the sunlight dance through delicate flowers, isn’t there? Creating flower suncatchers is not only a delightful way to bring a splash of color into your home but also an opportunity to connect with nature and unleash your creativity. As you gather your materials and begin this enchanting project, I want you to imagine the finished creation: vibrant hues glowing in the sunlight, casting lovely patterns on your walls. It’s a wonderful feeling to know you made something special with your own hands.
Why You’ll Love Flower Suncatchers
- Beginner-friendly
- Budget-friendly
- Creative and fun
- Great for kids and families
- Perfect for gifts or decorations
- Customizable
The Heart Behind This DIY
There’s a sense of peace that comes from crafting. Whether you’re creating flower suncatchers alone or with loved ones, you’ll find that this project helps you unwind and focus on the present moment. The act of arranging flowers encourages mindfulness, allowing your thoughts to settle as you immerse yourself in colors and textures. Plus, it’s a wonderful way to foster creativity and confidence, especially in children. Watching their eyes light up as they make something beautiful is truly heartwarming!
A Gentle Look at the Process
As you embark on this crafting journey, expect to be enveloped in the soothing process of selecting and arranging your dried flowers. You’ll cut and place, seal and display, all while enjoying the delightful scents and sights of your materials. The entire experience is about savoring each step, allowing creativity to flow freely, and appreciating the beauty of nature right in your hands.
Materials You’ll Need
- Clear contact paper: The base for your suncatcher that will hold everything together.
- Dried flowers (various types): These will be the stars of your suncatcher, adding color and charm.
- Scissors: To cut the contact paper to your desired size.
- Colored paper or cardstock: Optional, but great for adding a decorative backing.
- Glue (optional): If you wish to secure your suncatcher onto colored paper.
- A window for display: To let the sunlight shine through your creation.
Step-by-Step Directions
Step 1
Begin by cutting a piece of clear contact paper to your desired size. Think about where you want to display your suncatcher, as this will help determine the dimensions. I like to make mine about 10×12 inches, but you can adjust it to fit your space!
Step 2
Now comes the fun part! Arrange your dried flowers on the sticky side of the contact paper. Take your time with this—play around with different layouts, mixing colors and shapes until you’re happy with the design. It’s like painting with nature!
Step 3
Once you are satisfied with your arrangement, take another piece of clear contact paper and place it over the flowers to seal them in place. This will preserve your flowers and protect them from dust. Gently press down to eliminate any air bubbles.
Step 4
Next, trim any excess contact paper around the edges. You want your suncatcher to look neat and polished, so take your time with this step.
Step 5
If you’d like, you can glue your suncatcher onto a piece of colored paper or cardstock for added support and decoration. This gives it a beautiful border and makes it feel more finished.
Step 6
Finally, find a sunny window to hang your suncatcher. As the light filters through the flowers, you’ll be rewarded with a dazzling display of colors that brings warmth and cheer to your space!
Creative Ways to Use Flower Suncatchers
Your flower suncatchers can be displayed in so many creative ways! Hang them in windows to enjoy the sunlight filtering through, or use them as a charming decoration on a wall. They also make thoughtful gifts for loved ones, especially during holidays or special occasions. Imagine brightening someone’s day with a handmade piece of art! You can even create a series of suncatchers for different seasons, each showcasing the flowers that bloom during that time.
How to Store, Preserve, or Reuse Flower Suncatchers
To keep your flower suncatchers looking fresh, store them in a cool, dry place away from direct sunlight when not displayed. If you want to reuse the materials, carefully peel apart the layers of contact paper to preserve the flowers for future projects or even to create a new suncatcher!
Creative Variations and Customizations
- Color variations: Experiment with different colored flowers to create suncatchers that match your home decor.
- Theme ideas: Create seasonal themes, like autumn leaves or spring blossoms.
- Seasonal adaptations: Use dried flowers that are representative of each season.
- Kid-friendly modifications: Let kids use stickers or drawings alongside the flowers for a personal touch.
- Advanced creative upgrades: Try layering different sizes and types of flowers for depth and dimension.
Tips for Success
- Common mistakes to avoid: Be careful not to rush the arranging process; take your time to find the perfect look.
- Safety tips: If using scissors, supervise children to ensure safe handling.
- Preparation suggestions: Lay out all your materials before starting to keep the crafting process smooth.
- Cleanup recommendations: Keep a damp cloth handy to wipe up any sticky residues from the contact paper.
- Expert crafting tips: If you have leftover flowers, consider creating a mini suncatcher as a fun bonus project!
FAQs About Flower Suncatchers
Can beginners make this?
Absolutely! Flower suncatchers are beginner-friendly and a great way to start crafting.
Can children participate?
Yes! This project is perfect for children with adult supervision, making it a wonderful family activity.
How long does it last?
With proper care, your suncatchers can last for a long time, although the colors of the flowers may fade over time.
Can I customize it?
Definitely! You can use different flowers, colors, and materials to make each suncatcher unique.
A Final Creative Note
As you finish your flower suncatcher, take a moment to admire your handiwork. Remember, crafting is not just about the final product but about the joy of creation and the memories made along the way. I hope this project inspires you to explore even more creative endeavors. For more delicious recipes, check out easy meal ideas or treats you will love! Happy crafting!
For even more DIY inspiration, don’t forget to follow our Pinterest account!
Flower Suncatchers
Ingredients
Equipment
Method
- Step 1: Set up a clean, flat crafting surface and gather the clear sheets, colorful tissue paper or cellophane, scissors, glue, and other supplies. Protect the work area from spills if needed.
- Step 2: Cut colorful tissue paper or cellophane into flower shapes. Experiment with different sizes, petal styles, and botanical designs.
- Step 3: Place one clear sheet or piece of wax paper on your work surface and arrange the flower pieces. Overlap transparent colors to create additional shades and depth.
- Step 4: Apply clear-drying glue and carefully attach the flower pieces. Gently smooth the pieces into position so they adhere evenly.
- Step 5: Place another clear sheet or piece of wax paper over the design and gently press from the center toward the edges to remove air bubbles and seal the layers.
- Step 6: If the chosen materials are suitable for oven heating, place the assembled design on a baking sheet and warm it at approximately 200°F for a few minutes while monitoring continuously. Alternatively, allow the suncatcher to air dry completely while flat.
- Step 7: Once completely cool and set, carefully cut around the flower shapes. Create a small hole near the top and thread ribbon or string through it for hanging.
Quick deposits and even quicker withdrawals. That is all I really care about and they nail it. I am sticking with jilicashslotlogin from now on.
Quick and easy access to all my favorite slots. No complicated steps just a straightforward login and straight to the wins! jilli777login
Quick access and very reliable servers. I have not experienced any crashes since I started using this platform. ppp999login is definitely a winner.
The variety of games here is insane. I spent the whole night exploring and won big. peryagamecasinoplus is definitely a winner.
Finally found a site that doesn’t crash every five minutes. The navigation is intuitive and the bonuses are generous. Love laga88login so far!
Really impressed with the variety of games here. It is easy to navigate and the customer support is actually helpful. Cheers to vngau88 for the awesome experience.
The app version is a game changer. I can play anywhere and the connection is always stable. Love 881betloginapp.