
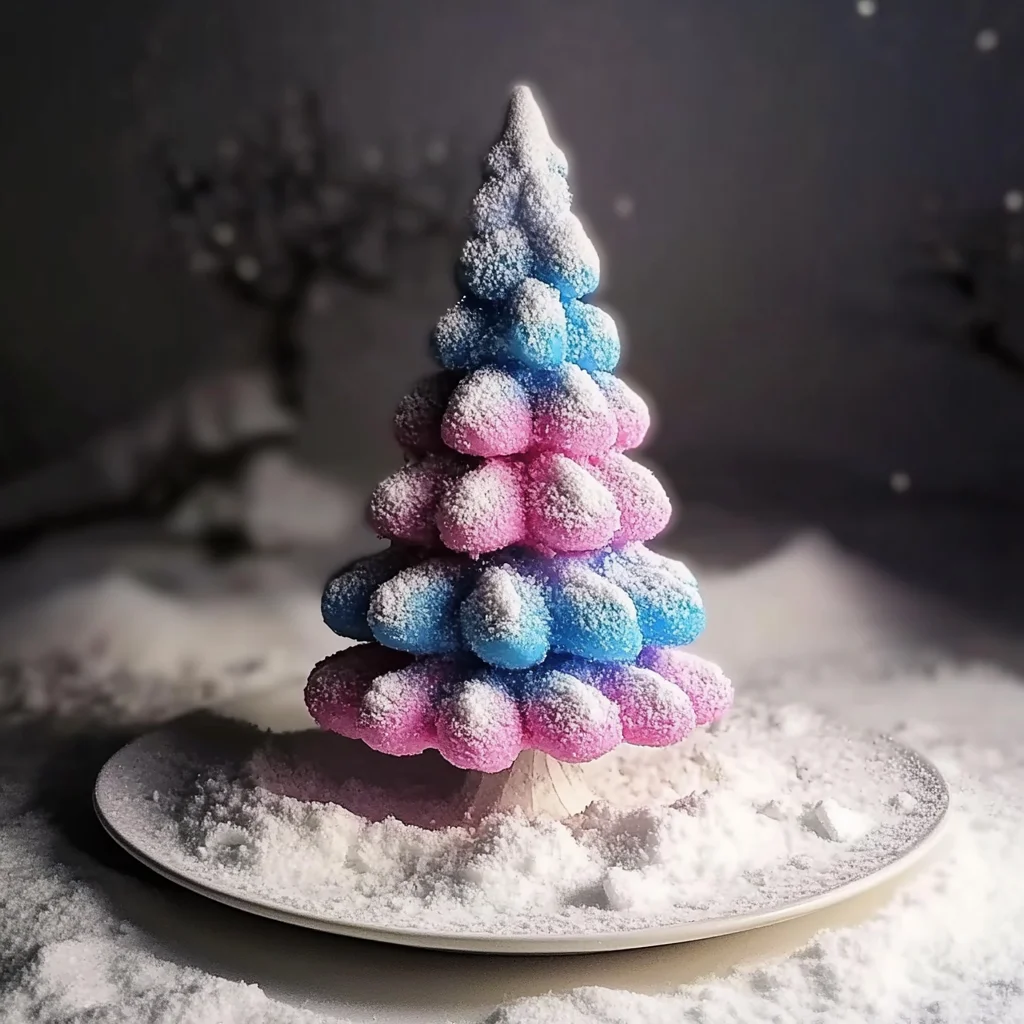
Imagine a cozy afternoon filled with laughter and creativity as you gather around the table with family or friends. The air is filled with the light scent of baking soda and vinegar, and soon, a whimsical snow tree emerges from your very own hands! This DIY project is not just about creating something visually stunning; it’s about the joy of making, the excitement of watching science in action, and the memories you’ll build along the way. When you see the finished creation, with its fluffy white texture and vibrant colors, you’ll feel a sense of pride and accomplishment that only comes from crafting something special.
Why You’ll Love Baking Soda Growing Snow Tree
- Beginner-friendly
- Budget-friendly
- Creative and fun
- Great for kids and families
- Perfect for gifts or decorations
- Customizable
The Heart Behind This DIY
There’s something magical about combining simple ingredients to create a delightful project like the Baking Soda Growing Snow Tree. Crafting allows us to step away from our busy lives, engage our minds, and find our creative flow. This project is perfect for encouraging mindfulness, as you focus on the textures and colors around you. It invites curiosity, ignites imagination, and fosters connection as you work together, sharing ideas and laughter. Plus, it’s a wonderful opportunity to teach kids about chemical reactions while having fun!
A Gentle Look at the Process
As you embark on this enchanting journey, you’ll experience the joy of mixing, watching, and waiting. First, you’ll create a thick paste that feels cool and slightly grainy in your hands. Then, as you combine the vinegar and soap, you’ll witness a delightful fizzing reaction that brings your snow tree to life! The anticipation builds as the mixture expands and transforms into a fluffy, snowy masterpiece. Each step is a moment to savor, and I promise you’ll find joy in this creative experience.
Materials You’ll Need
- 1 cup baking soda – This is the star of our show, creating the snow-like texture.
- 1/3 cup water – Helps to create a paste that serves as the base for your tree.
- 1 tablespoon white vinegar – The magic ingredient that makes everything fizz and grow!
- 1 tablespoon liquid dish soap – Adds volume and texture to your creation.
- Optional: food coloring – For a splash of color to personalize your snow tree.
Step-by-Step Directions
Step 1
In a mixing bowl, combine the baking soda and water. Stir gently until the mixture forms a thick paste that feels almost like dough. It’s such a fun texture to work with, and you might even want to take a moment to feel it between your fingers!
Step 2
In a separate small bowl, mix the white vinegar and liquid dish soap together. As you stir, you’ll notice a bubbly reaction starting to form. This is where the magic begins!
Step 3
Gradually add the vinegar and soap mixture to the baking soda paste, stirring continuously. If you’d like to make your snow tree colorful, this is the perfect time to add a few drops of food coloring! Watch as the mixture starts to fizz and expand, resembling a snowy tree sprouting right before your eyes.
Step 4
Once the ingredients are fully combined, set your creation aside for a few minutes. Allow it to grow and set, transforming into a fluffy, snow-like structure that you can’t wait to show off!
Creative Ways to Use Baking Soda Growing Snow Tree
Now that you have your beautiful snow tree, the possibilities are endless! You can display it as a unique holiday decoration, use it as a playful centerpiece for a winter-themed party, or even gift it to a friend as a delightful surprise. The tactile experience of the snow tree makes it a fantastic sensory play item for kids, sparking their imagination and creativity. You can also create a whole winter wonderland scene by making multiple trees and adding other elements like cotton balls for snowflakes or tiny figurines for a whimsical touch.
How to Store, Preserve, or Reuse Baking Soda Growing Snow Tree
If you want to preserve your snow tree for a little while longer, simply let it air dry completely. Once dry, it can be stored in a cool, dry place. However, as this creation is made from simple ingredients, it is best enjoyed fresh and may not last indefinitely. You can always make a new one to keep the fun going!
Creative Variations and Customizations
- Color variations – Experiment with different food coloring combinations for a rainbow effect.
- Theme ideas – Create themed trees for holidays like Christmas or Halloween.
- Seasonal adaptations – Make smaller versions for spring flowers or summer scenes!
- Kid-friendly modifications – Use non-toxic and edible materials for younger crafters.
- Advanced creative upgrades – Add glitter or small decorations to enhance the visual appeal.
Tips for Success
- Common mistakes to avoid – Make sure to mix the vinegar and soap separately before adding to the baking soda to avoid premature fizzing.
- Safety tips – Always supervise young children during the project, especially with mixing ingredients.
- Preparation suggestions – Gather all your materials beforehand to make the process smooth and enjoyable.
- Cleanup recommendations – Keep a damp cloth nearby to wipe up any spills, and enjoy the process without worry!
- Expert crafting tips – Don’t rush! Take your time to enjoy each step, and feel free to experiment with textures and colors.
FAQs About Baking Soda Growing Snow Tree
Can beginners make this?
Absolutely! This project is perfect for beginners and families to enjoy together.
Can children participate?
Yes! Kids love the hands-on experience and watching the fizzing reaction.
How long does it last?
The snow tree is best enjoyed fresh but can be kept for a few days if dried properly.
Can I customize it?
Definitely! Use different colors or add decorations to make it uniquely yours.
A Final Creative Note
As we wrap up this delightful project, remember that the joy of crafting lies in the process, not just the finished product. Embrace your creativity, celebrate your unique style, and take pride in every handmade creation. For more delicious recipes, check out Lana’s delicious recipes or easy craft ideas for treats you will love! Happy crafting!
For more DIY inspiration, be sure to follow our Pinterest page!
Baking Soda Growing Snow Tree
Ingredients
Equipment
Method
- Step 1: Place a shallow tray or baking dish on a stable, flat surface. If using small plastic or paper trees, arrange them in the center of the tray.
- Step 2: Combine 1 cup of baking soda with 1/3 cup of water in a mixing bowl. Add a few drops of food coloring if desired and mix in 1 teaspoon of white glue for additional texture.
- Step 3: Stir until the mixture resembles damp sand and can hold its shape. Carefully spoon the mixture around the base and branches of the trees to create a snow-covered appearance.
- Step 4: Leave the snow-covered trees undisturbed for several minutes and observe the changing texture and appearance. Compare different shapes and amounts of mixture as part of the sensory activity.
- Step 5: Experiment with additional winter decorations and arrangements. Take pictures of the finished winter scene before the mixture begins to dry and change texture.
Super easy to navigate and the customer service is on point. I feel safe depositing my funds here. Keep it up krwego88!
Super friendly customer support. They helped me out with my deposit issue in just a few minutes. Five stars for phjili188!
Really impressed with the user interface. Everything is so easy to find and the loading speed is top notch. Love phaaajili7!