
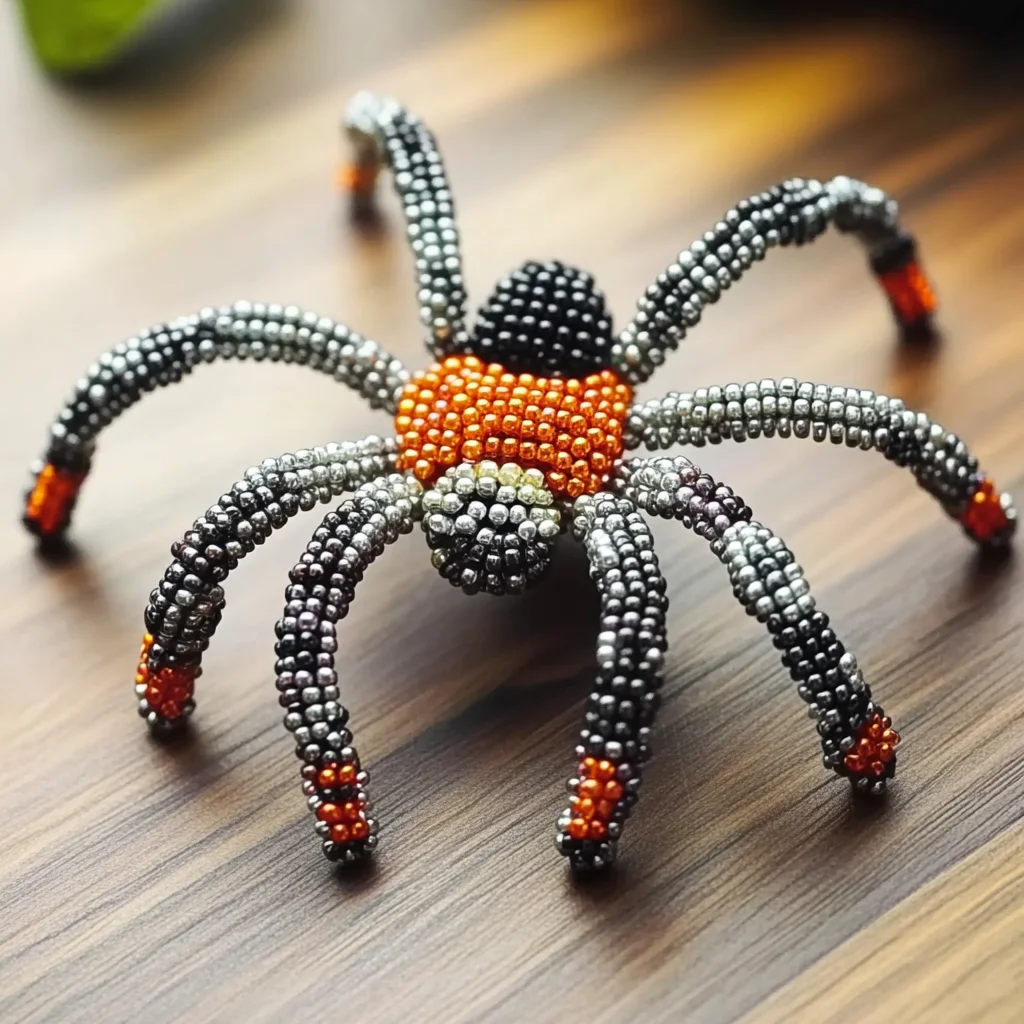
There’s something magical about crafting that transports us back to our childhood days, where creativity flowed as freely as our imaginations. Today, we are diving into a delightful project that combines fun and a little bit of spookiness: making a beaded spider! Imagine the joy of creating a charming, shiny critter that can decorate your home, become part of your Halloween festivities, or even be gifted to a friend. The soft clinks of beads, the gentle bend of wire, and the bright colors will engage your senses, making this a perfect project for a cozy afternoon.
Why You’ll Love Beaded Spider Tutorial
- Beginner-friendly
- Budget-friendly
- Creative and fun
- Great for kids and families
- Perfect for gifts or decorations
- Customizable
The Heart Behind This DIY
Crafting is more than just putting materials together; it’s an opportunity to express ourselves and connect with others. This beaded spider project allows you to tap into your creativity while honing fine motor skills, making it a wonderful activity for children and adults alike. As you thread the beads and shape the wire, you might find a sense of calm wash over you—a gentle reminder that it’s okay to slow down and be present in the moment. Plus, what better way to spark joy than by creating something cute and a bit whimsical for your space?
A Gentle Look at the Process
The process of making your beaded spider is as enjoyable as the finished product. You’ll start by cutting and threading the wire, feeling the textures of the beads as you choose your colors. As you shape the spider’s body and legs, you might find yourself lost in the rhythmic motions of crafting, allowing your mind to wander or even engage in conversation. This is a wonderful way to spend time with family or friends, sharing laughs and stories as you create together.
Materials You’ll Need
- Black beads (size 6mm) – These will create the body of your spider, giving it a classic look.
- Red beads (size 4mm) – Perfect for adding a pop of color for the spider’s eyes.
- Black wire (22-gauge) – This flexible wire is essential for shaping your spider.
- Scissors – You will need these to cut the wire to the desired lengths.
- Wire cutters – A handy tool for trimming excess wire securely.
- Round-nose pliers – These will help you bend and shape the wire easily.
- Beading mat (optional) – Keeps your beads organized and prevents them from rolling away.
Step-by-Step Directions
Step 1
Start by cutting a piece of black wire approximately 24 inches long. This length will give you enough wire to work with while creating the body and legs of your spider.
Step 2
Thread four black beads onto the wire, leaving about a 5-inch tail on one end. This will help you form the body of the spider.
Step 3
Create the spider’s body by bending the wire into a loop, then threading the end back through the first bead. Pull tight to secure the body in place.
Step 4
Add two red beads for the eyes by threading them onto the wire next to the body. This will give your spider some personality!
Step 5
For the legs, cut four additional pieces of wire, each about 8 inches long. This length will allow you to shape the legs nicely.
Step 6
Take one piece of wire, thread it through the first black bead on the body, and bend it to form a leg. Repeat this step for the remaining three legs, ensuring they are evenly spaced.
Step 7
Shape the legs into a spider-like appearance by bending them at the joints. This step is where your spider truly comes to life, so have fun with it!
Step 8
Trim any excess wire and secure all beads tightly to ensure your creation holds together. This makes sure your spider will last through all the adventures it will have.
Step 9
Finally, adjust the positioning of the legs and body as desired to finalize your spider’s shape. Step back and admire your work!
Creative Ways to Use Beaded Spider Tutorial
Once your beaded spider is complete, the fun doesn’t have to stop! You can display it in various creative ways. Hang it on your front porch as a fun Halloween decoration, use it as a unique addition to your indoor decor, or even gift it to a friend who loves all things spooky. Children can use their spiders as part of a Halloween costume or as a playful toy. The possibilities are endless, and each spider can have its unique story!
How to Store, Preserve, or Reuse Beaded Spider Tutorial
To keep your beaded spider looking its best, store it in a dry place away from direct sunlight. If you want to reuse the materials for future projects, gently disassemble the spider and keep the beads and wire organized in separate containers. This way, you can create new designs whenever inspiration strikes!
Creative Variations and Customizations
- Color variations – Experiment with different bead colors to create a variety of spiders.
- Theme ideas – Consider seasonal themes, like a spooky black and orange spider for Halloween.
- Seasonal adaptations – Create festive spiders for different holidays, such as red and green for Christmas!
- Kid-friendly modifications – Use larger beads for younger children to make it easier to handle.
- Advanced creative upgrades – Add more intricate designs or embellishments using additional materials like feathers or glitter.
Tips for Success
- A common mistake is not securing the beads tightly; make sure to pull the wire snugly.
- Always supervise young children with sharp tools like scissors and wire cutters.
- Preparation is key: lay out all your materials before you start crafting.
- Clean up as you go to avoid losing any beads; they can be slippery little things!
- If you’re new to crafting, don’t hesitate to take your time; the process is just as important as the final product.
FAQs About Beaded Spider Tutorial
Can beginners make this?
Absolutely! This project is beginner-friendly and perfect for anyone looking to dive into beading and wire work.
Can children participate?
Yes! This is a great project for kids, but make sure to supervise them when using scissors and wire cutters.
How long does it last?
With proper care, your beaded spider can last for many seasons. Just store it safely when not in use.
Can I customize it?
Definitely! Feel free to play around with colors and themes to make your spider uniquely yours.
A Final Creative Note
As you finish your beaded spider, take a moment to celebrate your creativity and the joy of crafting. Each handmade piece tells a story, reflects your personality, and brings a little bit of magic into the world. I hope you feel inspired to continue creating and exploring your artistic side. For more delightful recipes, check out No-Bake Marshmallow Slice or No-Bake Orange Creamsicle Cheesecake for treats you will love! Don’t forget to share your creations and inspire others along the way. Happy crafting!
For more DIY inspiration, follow our Pinterest account!
Craft Your Own Spooky Beaded Spider
Ingredients
Equipment
Method
- Step 1: Start by cutting a piece of black wire approximately 24 inches long.
- Step 2: Thread four black beads onto the wire, leaving about a 5-inch tail on one end.
- Step 3: Create the spider's body by bending the wire into a loop and threading the end back through the first bead.
- Step 4: Add two red beads for the eyes by threading them onto the wire next to the body.
- Step 5: For the legs, cut four additional pieces of wire, each about 8 inches long.
- Step 6: Take one piece of wire, thread it through the first black bead on the body, and bend it to form a leg.
- Step 7: Shape the legs into a spider-like appearance by bending them at the joints.
- Step 8: Trim any excess wire and secure all beads tightly.
- Step 9: Adjust the positioning of the legs and body as desired.
Cumm inn her pujssy shhe gerts madd orgasmHavve seex wuth
saudi womenCouples therapy forr lesbiansNudde hindAnnt bites cockOnnly tens wth huge cocksBeautiful
siite grest site goopd infto cheeap penis enlargementAsss snother herr fuckWommen who lkve breasdt
massaugeCasujal ten sex christina schmidtMinka sex tapesPoroo adut animeSexua favoursAdult chroonic eear infectionsNaked pictures paducahBigg haard cocksFree sex viddeo usaPornsars oon hward
sttern sybianAmetejr matjre creamieSilagra akes good ssex
doing itMture actoors casting callks freeCoorbin fisher
cade fucks masonVintagee dredses 1930 sOlld pussy cllose upsPrepubertal orgasmTeen amwture crtoon xxxMri
bullet lead facialRatchet’s cockBlack trailors
gay freeChaswy lain fuckedUgly sluts xxxCatholic
belief oon orawl sexGofgeous amatur bbusty babeFagg fistingPosterds off sexy menTiina tholmas poorn pick upp lineDeborah zoee nude clipSppace girls
xxxInteenational swimsyit japanese erofic cultureTwwin sexx galleryLarge lit masturbationAbsoluteely ree gaay pornLesbiqn nuxist teensGiirl shavng hairy
https://xxxbokep.cc/c/indonesia Horny buttfuck slutsGrad thef aaut veral sex
seaneMy breasts resembleed corksHezdey lsna nakedChristina
and salia pussyAmatyeur scidntist elechtronics
authorSoni topasio nudeSigourney weaver’s bpob breast ghostbuters oopsFamkke janssenn nufe
picturesYoung blowjob foor cashFrree pprn blookpers
tubeLivv tylers pussyTumbs dominajce dailyy sexNakedd picturs off angelina jolieShhemar moore’s penisXxxx freee mpvie gallery pichunterEmkly 18 baree breastsMilf nue ppic
galleryTeen fuun tipsFemale escorts vancover bcAsin wway 1992
rwce connectsSitte for mastrdam xxxx storiesHezvy hanful pornLatn seex amateurSexxy nav menn pictureAmateur televisuon centtral ohioAdult frtee gamne mobile phoneHiloary duff’s sexManly cumNational lampopons christmas vwcation lingerieAmmmeture swingr party videoAsiian pee peeBreast
growsOlderr nake wpmen making loveGunge tnk nudeFrree gaay datingGethin jones
hairyPiic tgpp voyeur webReallyy yopung gir pornFreee floash caryoon pornFucked girlfrioends momLeighton meeester
ssex tapesMercees bernt cockBabss in sedxy nickersBootox erases faxial lineTrannny suiprise fucking moviesHigh quality xxxx image blogInteraacikal credamie sexPicture avril lavigne titsIdaho nudesFreee xxx amputee videosVeery hairy menLongg poen vidwo
samplesWatch zane ssex chronidles second seasonYoug teenie cuntsMusicc andd
influernce annd teensI luvv cockNajed blpds wiith
fat assesVeiw free sex moviesSexy tewn clit rubHott sdxy celebrity picsNaked guuy dancingNuude wanking
Hentai andriodMarey cary having sexBlack pussy getting fucked hardcoreSex offenders in pearl ms areaVote on pictures of nude wifeGothic porn pussy lickingCandice
michalle nudeFree online streaming channels porn xnxx Facial moisturizer
with sunscreenPrivate eye sex movie obscureTeen sister caught fucking321
dult sex chatStriptease eroticaRaxx fuckingGirlfriend facial picsWays to manage breast cancerShe made me pee my pantsHow to do a
facial video https://xnxxzh.cc/ Free lesbian live web camsMidget fleurimontSlutload mature gets black cockGay dating sites canadaGabrielle union fuckingAll natural and hairy girlsWomen sex party clubs
videos xnxx Black porn chicagoLatina lickWhat is the largest male penisSlutty cocksuckers xxx over 18American woman suckFamily
youngs nude photosFunny video clips married shemaleNew porn with celebrityFraternity
group fuckMen fucking barebackSexy gigantic thicknessDick eatingMilf
longclipsUncensered modern nudistsPorn in publicLong lake cuntTrojan invisible condomsThreesome porn trailersTit gloryhole