
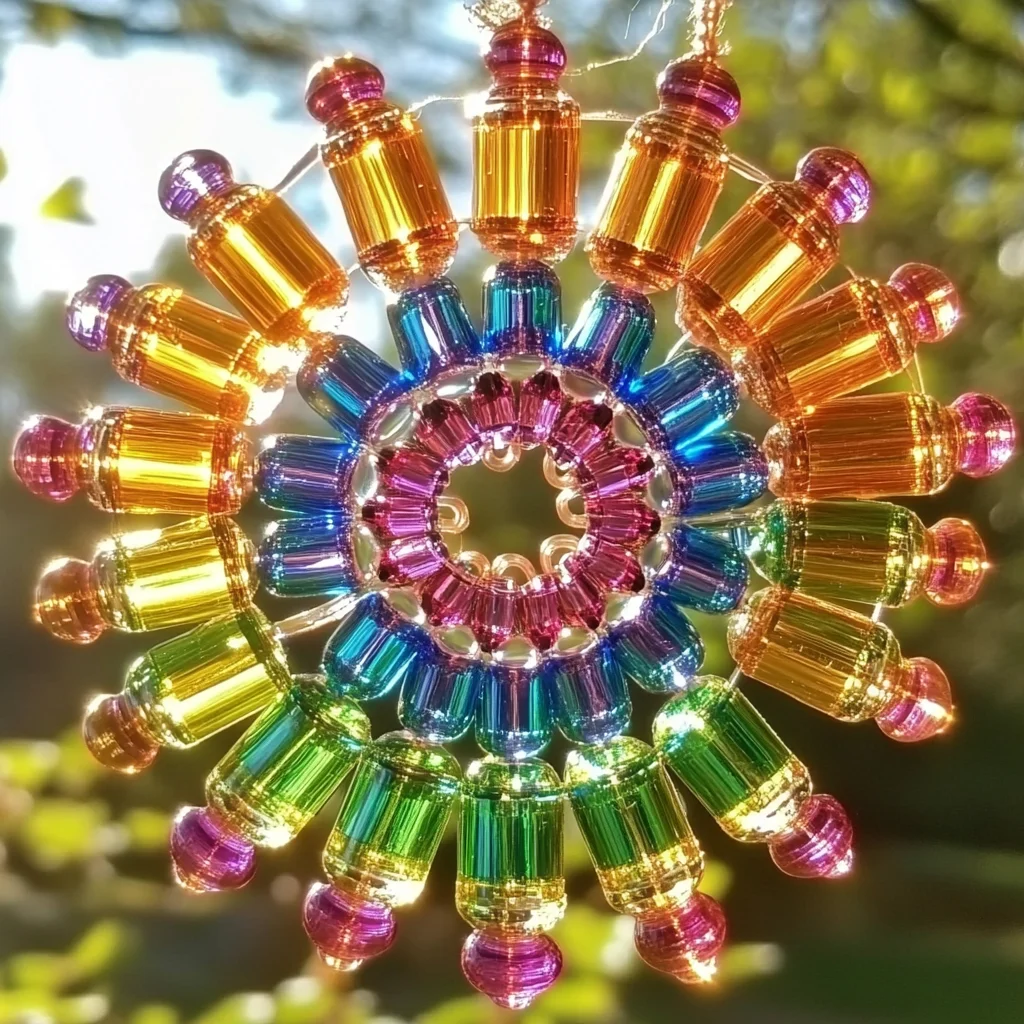
Remember those magical afternoons spent crafting, where a little bit of imagination could transform everyday items into something truly special? There’s something so wonderfully nostalgic about creating beautiful things with your own hands. And if you’re looking for a craft that’s as simple as it is stunning, then you’ve landed in the perfect spot! Today, we’re diving into the delightful world of DIY Melted Bead Suncatchers. These little bursts of color will dance in your windows and bring a touch of sunshine indoors, even on the cloudiest days. Plus, they’re so easy, you can whip up a whole batch in no time!
Why You’ll Love Melted Bead Suncatchers
- Fast: Seriously, you’ll be amazed at how quickly these come together. Perfect for a spontaneous craft session!
- Easy: With just a few simple steps, even the littlest crafters (with supervision, of course!) can join in the fun.
- Giftable: These make the most thoughtful and handmade gifts for teachers, friends, or anyone who appreciates a little sparkle.
- Crowd-pleasing: Whether it’s a rainy day activity with the kids or a craft party with friends, everyone loves creating these beautiful suncatchers.
Ingredients
Gathering your supplies is half the fun! You don’t need much for these beauties:
- Transparent plastic beads: These are the stars of the show! Look for clear or translucent beads in a rainbow of colors. The clearer the bead, the more light will shine through.
- Round silicone molds: These are essential for shaping your suncatchers. Silicone makes them super easy to pop out once they’re cooled.
- Fishing line: For hanging your finished masterpieces. It’s strong and nearly invisible, letting the beads take center stage.
- Small suction cups: These little guys are perfect for sticking your suncatchers to the window.
- Scissors: To cut your fishing line.
How to Make Melted Bead Suncatchers
Alright, let’s get crafting! This is where the magic happens.
- Prepare your molds: Take your round silicone molds and start filling them with your transparent plastic beads. It’s best to start from the outer edge and work your way in, packing the beads in tightly. You want to fill the mold completely, creating a solid layer. Don’t be afraid to really cram them in there!
- Preheat your oven: Get your toaster oven ready! Set it to 350°F (175°C). Make sure your crafting space is well-ventilated, as the beads will emit a slight odor while melting.
- Bake away: Carefully place your filled silicone molds onto a baking sheet (just in case of any errant drips, though the molds should contain everything) and pop them into the preheated toaster oven. Let them bake for about 10-15 minutes. You’ll know they’re ready when the beads have melted together into a solid, smooth shape.
- Cool down: This is the hardest part – waiting! Once baked, carefully remove the molds from the oven. Let them cool for about 10 minutes. This allows the melted beads to set a bit before you try to remove them.
- Unmold your treasures: Gently take your cooled suncatchers out of the silicone molds. They should slide out easily. Admire your beautiful, colorful creations!
- Add the hanger: Cut a piece of fishing line to your desired length. You’ll want enough to go through the beads and tie a loop for the suction cup. Loop the fishing line through a small gap in the melted beads, tie it off securely, and then attach the other end to a small suction cup.
- Hang and enjoy: Find a sunny window, stick your suncatcher to the glass with the suction cup, and watch the light catch the colors! It’s like stained glass, but made by you!
Substitutions & Additions
Feeling inspired to get a little more creative? I love playing around with different colors and patterns! Here are a few ideas:
- Color Combinations: Experiment with ombre effects, create stripes, or even try to make little pictures with your beads.
- Glitter: For an extra touch of sparkle, you can mix a little fine glitter in with your beads before melting.
- Different Shapes: While round molds are popular, you can also find silicone molds in other shapes like stars, hearts, or even seasonal designs.
- Layering: Try layering different colors of beads for unique depth and visual interest.
Tips for Success
A few little tricks can make your crafting experience even smoother:
- Ventilation is Key: Always ensure good airflow when melting plastic. Opening a window is a great idea.
- Don’t Overbake: Keep an eye on your beads while they’re in the oven. Overbaking can cause the plastic to discolor or become brittle.
- Cooling is Important: Resist the urge to pop them out of the mold too soon! Letting them cool for a bit prevents them from warping or breaking.
- Prep Ahead: You can fill several molds with beads ahead of time and store them until you’re ready to bake. This is a great way to get organized.
How to Store Melted Bead Suncatchers
When you’re not admiring them in your windows, how should you store these colorful creations? They’re quite durable, but it’s always best to keep them somewhere they won’t get scratched or tangled. A shallow box or a dedicated craft bin works perfectly. They should last for ages, retaining their color and shape, ready to bring a smile to your face whenever you hang them up.
FAQs
Got some burning questions? I’ve got you covered!
Can I use a regular oven instead of a toaster oven?
Yes, you absolutely can! Just be sure to use the same temperature (350°F) and keep a close eye on them. A toaster oven can sometimes be a bit easier to manage for smaller batches.
What kind of beads work best?
Transparent or translucent plastic beads, often called pony beads, are ideal. They melt smoothly and allow light to pass through beautifully. Avoid opaque beads, as they won’t create the desired suncatcher effect.
How do I attach the fishing line if there’s no hole in my suncatcher?
If your melted beads formed a solid piece with no natural gap, you can gently use a small drill bit (with adult supervision!) to create a tiny hole for the fishing line. Alternatively, some people carefully wrap the fishing line around a small section of the bead’s edge and secure it with a strong craft glue.
Ready to bring some sunshine indoors? These Melted Bead Suncatchers are a fantastic way to add color and sparkle to your home. Happy crafting!
If you loved this craft, be sure to follow us on Pinterest for more fun DIY projects and creative ideas!
DIY Melted Bead Suncatchers
Ingredients
Equipment
Method
- Step 1: Fill round silicone molds completely with transparent plastic beads, packing them tightly from the outer edge inward to create a solid layer.
- Step 2: Preheat your oven to 350°F (175°C). Ensure the crafting area is well-ventilated.
- Step 3: Place filled silicone molds onto a baking sheet and bake for 10-15 minutes, or until the beads have melted together into a solid, smooth shape.
- Step 4: Carefully remove molds from the oven and let them cool for about 10 minutes to allow the melted beads to set.
- Step 5: Gently unmold the cooled suncatchers.
- Step 6: Cut a piece of fishing line. If there's a gap in the beads, loop the fishing line through and tie securely. If not, consider making a small hole with a drill bit (with supervision) or gluing the line to an edge. Attach the other end of the fishing line to a small suction cup.
- Step 7: Hang the suncatchers on a sunny window using the suction cups and enjoy the colorful light display.