There’s something so comforting about a meal that fills the kitchen with the warm aroma of garlic and honey, right? I still remember the first time I made honey garlic chicken thighs—it was one of those dishes that instantly felt like a hug on a plate. Whether you’re cooking for a busy weeknight dinner or planning a cozy weekend meal, this recipe is a total game-changer. It’s simple, quick, and the sticky, flavorful sauce will have everyone asking for seconds.
Why You’ll Love Honey Garlic Chicken Thighs
- Fast: Ready in under 40 minutes, perfect for busy days.
- Easy: Minimal ingredients, no complicated steps.
- Giftable: A great dish to bring to potlucks or family dinners.
- Crowd-pleasing: Sweet, savory, and packed with flavor everyone loves.
Ingredients
Here’s what you’ll need to create this delicious honey garlic chicken:
- 6 chicken thighs (bone-in or boneless): Bone-in adds extra flavor, but boneless works great too.
- 3 tablespoons honey: Gives that perfect sweet glaze.
- 3 tablespoons soy sauce: Adds savory depth and balances the honey.
- 3 cloves garlic, minced: Garlic is the star of this sauce—don’t skip it!
- 1 tablespoon olive oil: For searing the chicken to golden perfection.
- 1 tablespoon butter: Adds richness and helps caramelize the chicken.
- 1 teaspoon paprika: A subtle smoky note and beautiful color.
- ½ teaspoon black pepper: Just enough kick without overpowering.
- ½ teaspoon salt: To season perfectly.
- 1 teaspoon cornstarch: Thickens the sauce into that irresistible sticky glaze.
- 2 tablespoons water: Used with cornstarch for the sauce.
- 1 tablespoon chopped green onions (for garnish): Adds a pop of fresh color and flavor.
How to Make Honey Garlic Chicken Thighs
Let’s walk through this step-by-step so you can nail this dish every time:
- Preheat your oven to 200°C (400°F). Lightly grease a baking dish or tray so the chicken doesn’t stick.
- Pat the chicken thighs dry with paper towels—this helps get that golden crust. Then season both sides with salt, pepper, and paprika.
- Heat olive oil and butter in a large pan over medium heat. Once the butter melts and the pan is hot, add the chicken thighs. Sear them for about 3–4 minutes on each side until they’re lightly golden. This locks in the juices and creates a fantastic base for the sauce.
- In a small bowl, mix the honey, soy sauce, and minced garlic. Pour this mixture over the chicken in the pan.
- Mix the cornstarch with water until smooth, then add it to the pan. Stir gently to let the sauce thicken just a bit—this will give you that sticky, glossy finish.
- Transfer the pan (if oven-safe) or the chicken with sauce to your greased baking dish. Bake for 20–25 minutes until the chicken is cooked through and the sauce is beautifully caramelized.
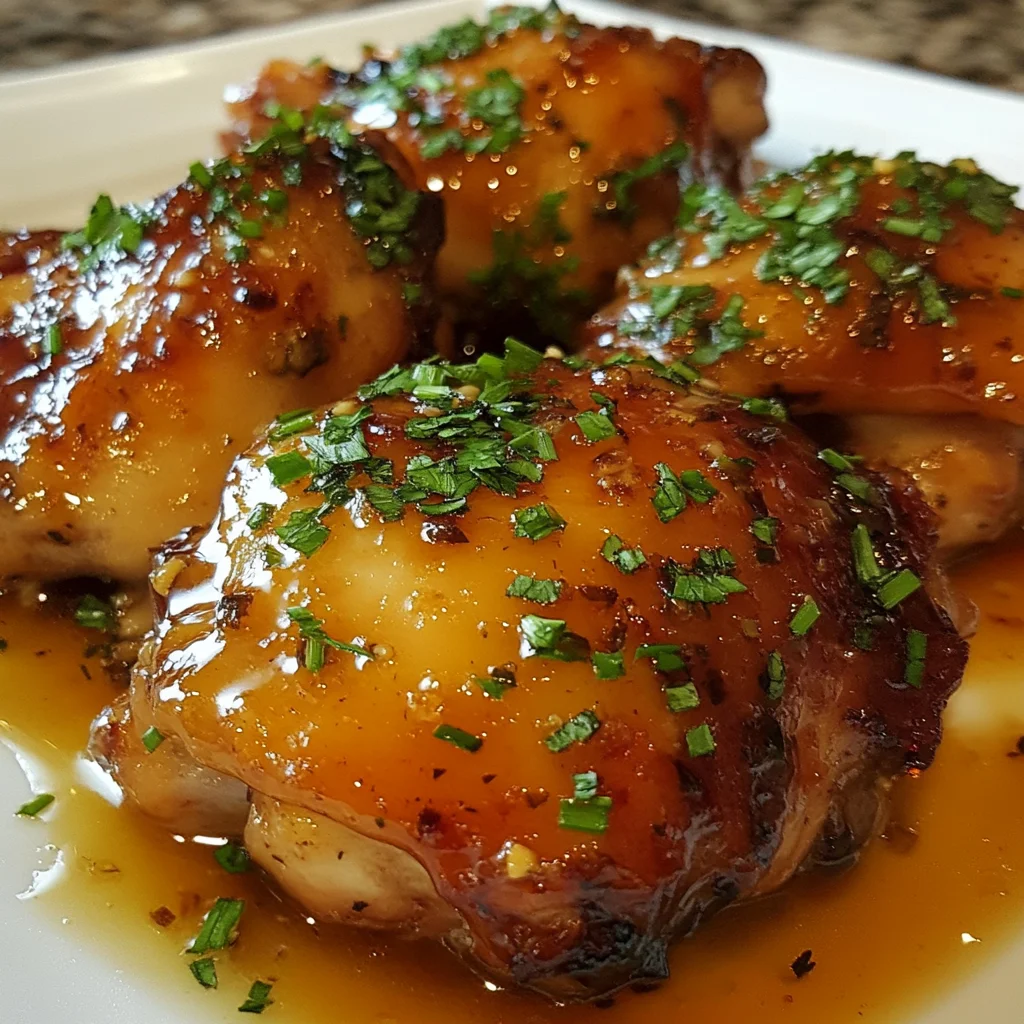
- Once done, sprinkle the chicken with chopped green onions for a fresh, vibrant touch. Serve warm with your favorite sides like rice or steamed veggies.
Substitutions & Additions
Want to switch things up or tailor this recipe to your pantry? Here are some easy swaps and creative ideas:
- Chicken cuts: Use boneless skinless thighs or even chicken breasts if you prefer, but adjust baking time accordingly.
- Soy sauce alternatives: Try tamari or coconut aminos for a gluten-free option.
- Add a little heat: Toss in a pinch of red pepper flakes or a splash of sriracha to the sauce for a spicy kick.
- Herbs and garnish: Fresh cilantro or parsley can be swapped for green onions for a different flavor profile.
- Extra veggies: Bake sliced bell peppers or broccoli alongside the chicken for a one-pan meal.
- Serving ideas: This chicken pairs wonderfully with simple steamed rice, or try it with a flavorful pasta like the lemon ricotta spinach pasta for a fresh twist.
Tips for Success
- Dry the chicken well: Moisture on the skin can prevent a good sear, so patting dry is key.
- Use a heavy pan: A cast iron or stainless steel skillet helps achieve a nice golden crust.
- Don’t skip the cornstarch: It’s what turns the sauce from thin to thick, creating that irresistible glaze.
- Check internal temperature: Chicken thighs should reach 165°F (74°C) to be safely cooked.
- Prep ahead: You can mix the sauce up to a day in advance and marinate the chicken for an even deeper flavor.
How to Store Honey Garlic Chicken Thighs
Got leftovers? No worries! Store your honey garlic chicken in an airtight container in the fridge for up to 3 days. When reheating, warm it gently on the stove or in the oven to keep the sauce glossy and the chicken juicy. You can also freeze the cooked chicken for up to 2 months—just thaw overnight in the fridge before reheating.
FAQs
- Can I make this recipe in an air fryer? Absolutely! Sear the thighs first, then air fry at 400°F for about 18–20 minutes, adding the sauce after cooking for best results. For more air fryer chicken inspiration, check out this helpful guide on air-fried chicken fries.
- What sides go best with honey garlic chicken? This chicken is delicious served with steamed rice, roasted veggies, or a fresh salad. If you love pasta, try pairing it with a creamy lemon ricotta spinach pasta for a meal full of bright flavors.
- Can I use chicken breasts instead of thighs? Yes, but chicken breasts cook faster and can dry out, so keep an eye on them and reduce baking time to about 15–20 minutes.
- How do I get the sauce extra sticky? Make sure to mix the cornstarch with cold water before adding it to the hot pan. Stir well and cook until the sauce thickens and coats the chicken beautifully.
Now that you have this trusty honey garlic chicken thighs recipe in your kitchen arsenal, I promise you’ll reach for it time and time again. It’s the kind of dish that feels fancy but comes together quickly enough for any day of the week. And when you’re ready to treat yourself to something sweet after dinner, don’t miss out on some incredible no-bake desserts like the no-bake orange creamsicle cheesecake—it’s as refreshing as it sounds!
Enjoy cooking, and don’t forget to share your honey garlic chicken creations. For more cozy recipes and kitchen inspiration, follow us on Pinterest.
Honey Garlic Chicken Thighs
Ingredients
Equipment
Method
- Step 1: Preheat oven to 200°C (400°F). Lightly grease a baking dish or tray to prevent sticking.
- Step 2: Pat chicken thighs dry with paper towels. Season both sides with salt, black pepper, and paprika.
- Step 3: Heat olive oil and butter in a large pan over medium heat. Add chicken and sear for 3–4 minutes on each side until golden.
- Step 4: In a small bowl, mix honey, soy sauce, and minced garlic. Pour over chicken in the pan.
- Step 5: Mix cornstarch with water until smooth and add to the pan. Stir gently to thicken the sauce slightly.
- Step 6: Transfer pan (if oven-safe) or chicken with sauce to the greased baking dish. Bake for 20–25 minutes until chicken is cooked through and sauce is caramelized.
- Step 7: Remove from oven, sprinkle with chopped green onions, and serve warm with your favorite sides.