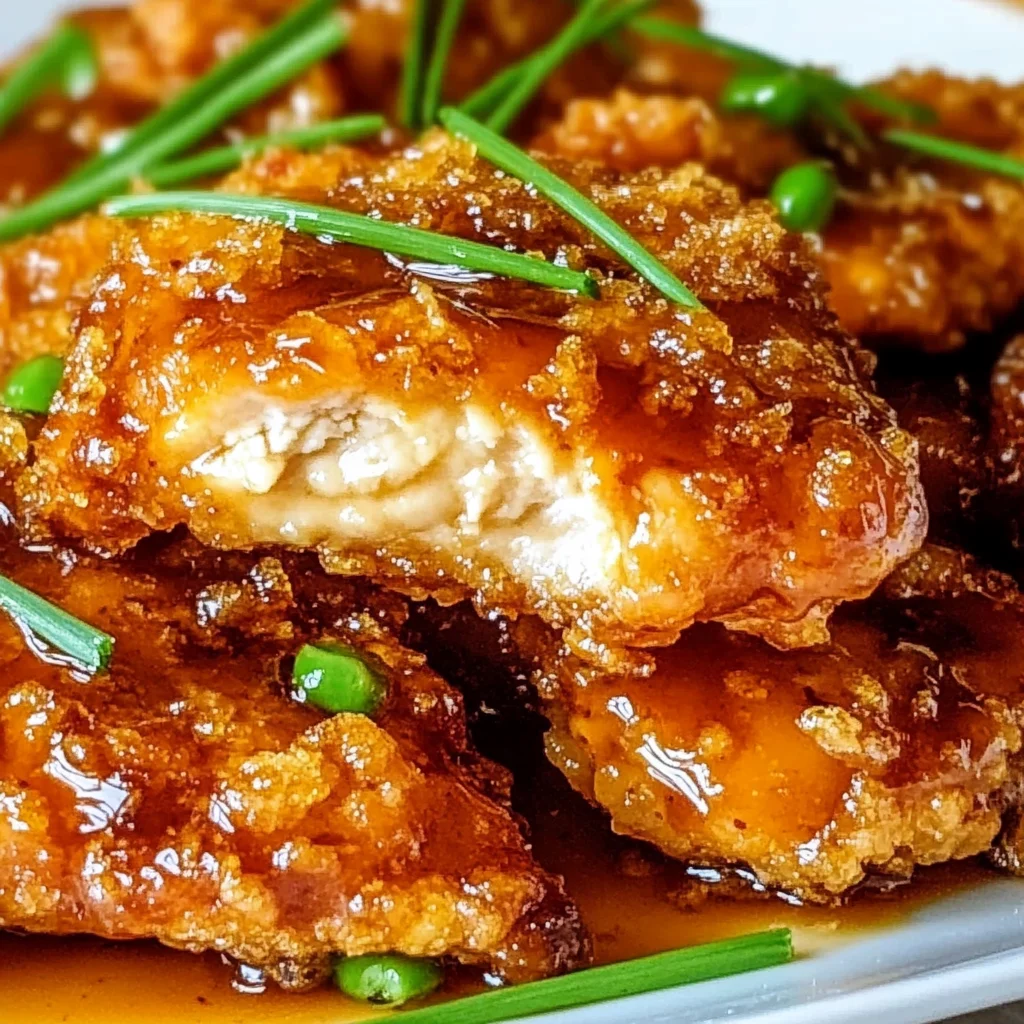
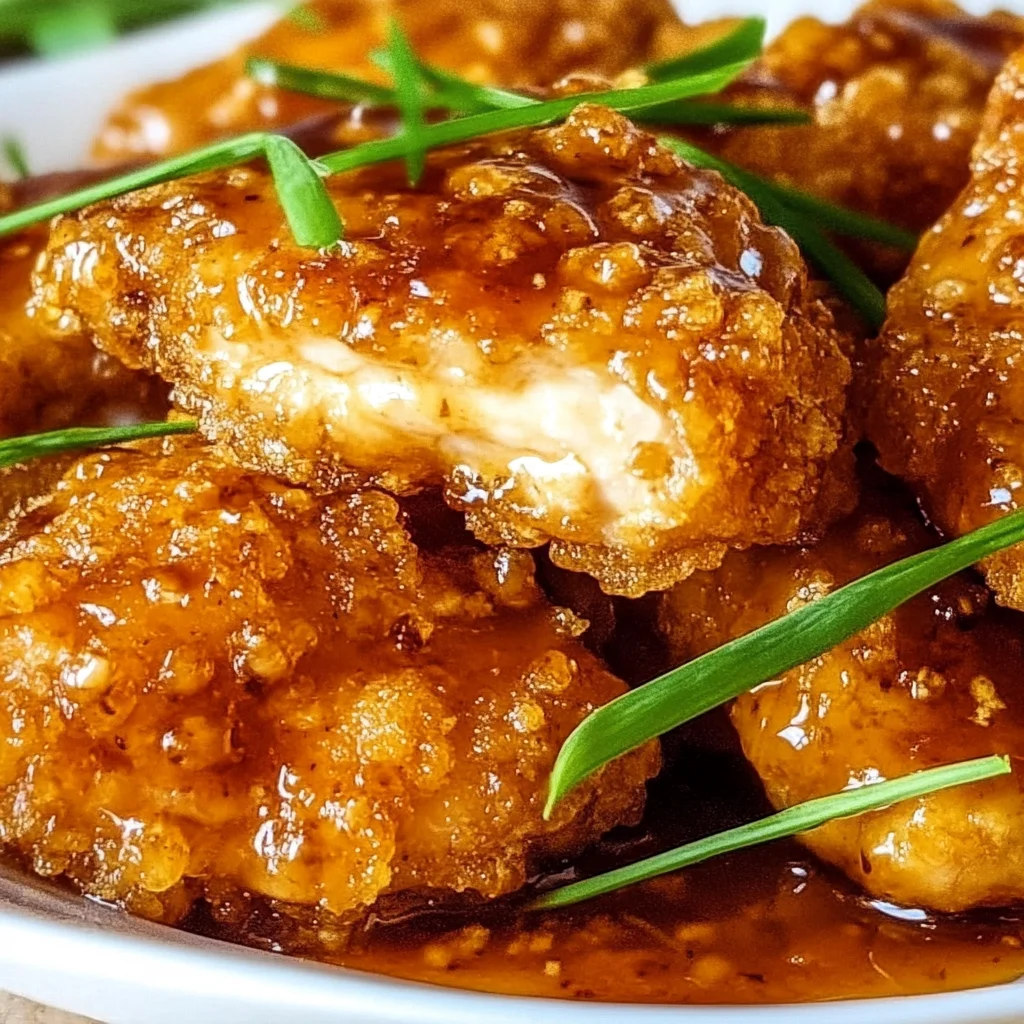
Remember those childhood days when a truly amazing meal felt like a hug? The kind that made you close your eyes in pure bliss? Well, get ready to create that feeling all over again with my Double Crunch Honey Garlic Chicken! This recipe is an absolute showstopper, bringing that irresistible sweet and savory flavor with a crunch that will have everyone asking for seconds. It’s surprisingly simple to whip up, making it perfect for a weeknight treat or a special occasion.
Why You’ll Love Double Crunch Honey Garlic Chicken
- Fast: Quick enough for a weeknight dinner!
- Easy: Simple steps that anyone can follow.
- Giftable: Package leftovers beautifully for a tasty treat for friends.
- Crowd-pleasing: From kids to adults, everyone adores this flavor combo.
Ingredients
Let’s gather everything we need to make this magic happen!
- Chicken Preparation:
- 4 large boneless, skinless chicken breasts: The stars of our show!
- Breading:
- 2 cups all-purpose flour: The base for our crispy coating.
- 4 teaspoons salt: Essential for bringing out all the flavors.
- 4 teaspoons ground black pepper: A little kick to balance the sweetness.
- 3 tablespoons ground ginger: Adds warmth and a lovely aromatic touch.
- 1 tablespoon freshly ground nutmeg: A secret weapon for cozy flavor!
- 2 teaspoons dried thyme: Earthy and herbaceous, it’s a must.
- 2 teaspoons ground sage: Adds a savory depth.
- 1 teaspoon cayenne pepper: Just enough to add a whisper of heat.
- 2 tablespoons paprika: For that beautiful golden color and mild flavor.
- Egg Wash:
- 4 large eggs: The binder that helps the breading stick.
- 8 tablespoons water: To make our egg wash nice and smooth.
- Frying:
- Canola oil, for frying: A neutral oil that gets nice and hot for that perfect crisp.
- Honey Garlic Sauce:
- 2 tablespoons olive oil: Our base for sautéing the garlic.
- 3 cloves garlic, minced: Because garlic makes everything better!
- 1 cup honey: The sweet, sticky goodness we all crave.
- 1/4 cup low sodium soy sauce: For that savory umami punch.
- 1 teaspoon ground black pepper: A final touch to round out the sauce.
How to Make Double Crunch Honey Garlic Chicken
Alright, apron on, let’s get cooking!
-
First, let’s prep our chicken. You want to pound those chicken breasts to about 1/2 inch thickness. You can do this by placing them between two sheets of plastic wrap (this prevents a mess!) and using a meat mallet. If you don’t have a mallet, a rolling pin or even a heavy pan will work in a pinch. Another great option is to simply slice the chicken breasts horizontally to create thinner cutlets.
-
Now, for that amazing breading! In a large bowl, whisk together the flour, salt, black pepper, ground ginger, nutmeg, thyme, sage, paprika, and cayenne pepper. This is your flavor powerhouse! I like to reserve about half of this mixture in an airtight bag and pop it in the freezer. It’s so handy for future recipes, like my guide to perfect air-fried chicken fries!
-
In a separate shallow dish, whisk together the eggs and water until they’re nice and uniform. This is your egg wash, ready to help all that delicious breading stick.
-
Time to bread the chicken! Lightly season your chicken cutlets with a little salt and pepper. Then, dredge each piece in the seasoned flour mixture, making sure it’s fully coated. Next, dip it into the egg wash, letting any excess drip off. Finally, coat it again with the flour mixture, pressing gently to make sure it adheres well. You want a nice, even coating for that ultimate crunch.
-
For Frying: Heat about 1.25 cm (half an inch) of canola oil in a large skillet over medium heat. You want the oil hot but not smoking. Carefully place the breaded chicken into the hot oil, frying about 4–5 minutes per side. Keep an eye on the temperature to ensure it’s not burning. Once they’re golden brown and cooked through, transfer the chicken to a wire rack to drain for a few minutes. This allows any extra oil to drip off, keeping them nice and crispy.
-
For Baking: If frying isn’t your thing, baking is a fantastic alternative! Preheat your oven to 218°C (425°F) and place a baking sheet inside to get hot. Lightly oil the hot baking sheet. Arrange your coated chicken pieces on it, leaving a little space between each one. Give the tops a quick spray with canola oil. Bake for about 15 minutes without peeking! Then, flip each piece and bake for another 10–15 minutes until they are wonderfully crisp and golden. It’s almost as good as frying, and a great option when you want to make something like my crispy oven-baked KFC-style chicken.
-
Now for that irresistible sauce! In a medium saucepan, heat the olive oil over medium heat. Add your minced garlic and sauté it gently until it’s soft and fragrant, but be careful not to let it brown – we don’t want bitter garlic!
-
Stir in the honey, soy sauce, and black pepper. Let this simmer for about 5–10 minutes. You’ll notice it start to foam a little. Keep an eye on it! Once it has thickened slightly, remove it from the heat and let it cool for just a moment.
-
And the grand finale! Dip your perfectly cooked, crispy chicken breasts into that warm, luscious honey garlic sauce just before serving. Serve them immediately so you can experience that double crunch at its finest. This chicken is absolutely divine served alongside some fluffy rice or my garlic butter steak bites with creamy parmesan shells for a complete meal!
Substitutions & Additions
Feeling creative? Let’s jazz this up!
- Spice it Up: For a spicier kick, increase the cayenne pepper in the breading or add a pinch of red pepper flakes to the sauce.
- Sesame Seeds: A sprinkle of toasted sesame seeds over the sauced chicken adds a lovely nutty flavor and visual appeal.
- Garlic Powder: If you’re not a fan of minced garlic, you can swap it for garlic powder in the sauce.
- Different Cutlets: This recipe works wonderfully with chicken tenders or even boneless, skinless chicken thighs!
- Herbs: Feel free to add a pinch of dried rosemary or oregano to the breading for an extra layer of flavor.
Tips for Success
A few little tricks to make your Double Crunch Honey Garlic Chicken absolutely perfect:
- Don’t Overcrowd the Pan: Whether frying or baking, give your chicken pieces some space. This ensures even cooking and maximum crispiness.
- Pounding Evenly: For the most uniform cooking, make sure your chicken cutlets are pounded to an even thickness.
- Oil Temperature is Key: For frying, maintaining the right oil temperature is crucial for a crispy exterior without burning. Use a thermometer if you have one, or test with a small piece of breading.
- Prep Ahead: You can prepare the breading mixture and the honey garlic sauce ahead of time. Store the breading in an airtight container at room temperature, and the sauce in the refrigerator. Just reheat the sauce gently before serving.
- Double Dredge for Extra Crunch: For an even thicker, crunchier coating, dip the chicken in the flour, then the egg wash, then the flour again, then back into the egg wash, and finally into the flour one last time.
How to Store Double Crunch Honey Garlic Chicken
Got leftovers? Lucky you!
Store cooled chicken in an airtight container in the refrigerator for up to 3 days. The crunch might lessen slightly once refrigerated, but it will still be delicious. For the best texture when reheating, I recommend using an oven or an air fryer at around 350°F (175°C) until warmed through. Avoid the microwave if you want to preserve some of that glorious crunch!
FAQs
- Can I make this in an air fryer?
Absolutely! You can follow a similar breading process and air fry at 375°F (190°C) for about 15-20 minutes, flipping halfway through, until golden and cooked through. You might need to work in batches.
- Is the honey garlic sauce sticky?
Yes, the honey makes it naturally sticky and a little thick, which is perfect for coating the chicken. Be sure to dip just before serving to maintain the best crispiness.
- Can I make the sauce ahead of time?
Yes, you can make the sauce a day or two in advance. Store it in an airtight container in the refrigerator. Gently warm it on the stovetop or in the microwave before tossing with the chicken.
- What side dishes pair well with this chicken?
This chicken is amazing with steamed rice, roasted broccoli, a simple side salad, or even creamy mashed potatoes. It’s versatile and pairs well with so many of your favorite comfort foods!
We hope you absolutely love this Double Crunch Honey Garlic Chicken as much as we do! It’s a recipe that’s sure to become a family favorite. If you try it, be sure to share your creations with us!
For more delicious recipes and kitchen inspiration, follow us on Pinterest!
Double Crunch Honey Garlic Chicken
Ingredients
Equipment
Method
- First, let's prep our chicken. You want to pound those chicken breasts to about 1/2 inch thickness. You can do this by placing them between two sheets of plastic wrap (this prevents a mess!) and using a meat mallet. If you don't have a mallet, a rolling pin or even a heavy pan will work in a pinch. Another great option is to simply slice the chicken breasts horizontally to create thinner cutlets.
- Now, for that amazing breading! In a large bowl, whisk together the flour, salt, black pepper, ground ginger, nutmeg, thyme, sage, paprika, and cayenne pepper. This is your flavor powerhouse! I like to reserve about half of this mixture in an airtight bag and pop it in the freezer. It’s so handy for future recipes, like my guide to perfect air-fried chicken fries!
- In a separate shallow dish, whisk together the eggs and water until they're nice and uniform. This is your egg wash, ready to help all that delicious breading stick.
- Time to bread the chicken! Lightly season your chicken cutlets with a little salt and pepper. Then, dredge each piece in the seasoned flour mixture, making sure it's fully coated. Next, dip it into the egg wash, letting any excess drip off. Finally, coat it again with the flour mixture, pressing gently to make sure it adheres well. You want a nice, even coating for that ultimate crunch.
- For Frying: Heat about 1.25 cm (half an inch) of canola oil in a large skillet over medium heat. You want the oil hot but not smoking. Carefully place the breaded chicken into the hot oil, frying about 4–5 minutes per side. Keep an eye on the temperature to ensure it's not burning. Once they're golden brown and cooked through, transfer the chicken to a wire rack to drain for a few minutes. This allows any extra oil to drip off, keeping them nice and crispy.
- For Baking: If frying isn't your thing, baking is a fantastic alternative! Preheat your oven to 218°C (425°F) and place a baking sheet inside to get hot. Lightly oil the hot baking sheet. Arrange your coated chicken pieces on it, leaving a little space between each one. Give the tops a quick spray with canola oil. Bake for about 15 minutes without peeking! Then, flip each piece and bake for another 10–15 minutes until they are wonderfully crisp and golden. It’s almost as good as frying, and a great option when you want to make something like my crispy oven-baked KFC-style chicken.
- Now for that irresistible sauce! In a medium saucepan, heat the olive oil over medium heat. Add your minced garlic and sauté it gently until it’s soft and fragrant, but be careful not to let it brown – we don't want bitter garlic!
- Stir in the honey, soy sauce, and black pepper. Let this simmer for about 5–10 minutes. You’ll notice it start to foam a little. Keep an eye on it! Once it has thickened slightly, remove it from the heat and let it cool for just a moment.
- And the grand finale! Dip your perfectly cooked, crispy chicken breasts into that warm, luscious honey garlic sauce just before serving. Serve them immediately so you can experience that double crunch at its finest. This chicken is absolutely divine served alongside some fluffy rice or my garlic butter steak bites with creamy parmesan shells for a complete meal!