
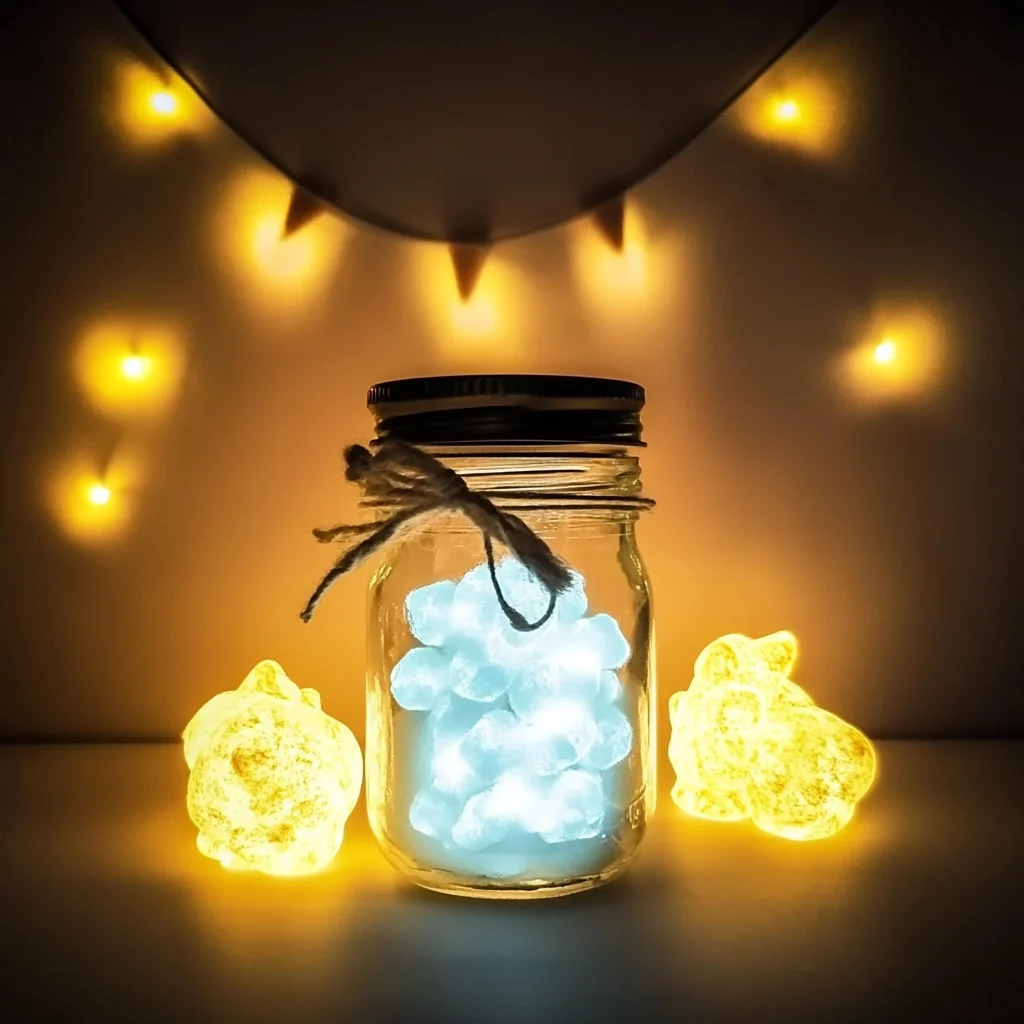
Imagine transforming a simple glass jar into a magical source of light, a glowing beacon that brings warmth and joy to your space. DIY Glow in the Dark Jars are not just a delightful craft; they hold the power to evoke nostalgia, ignite creativity, and create memorable moments with family and friends. As you gather around your crafting table, you can feel the excitement building, imagining the soft glow that will light up your evenings. Whether you plan to adorn your child’s room, create a whimsical centerpiece, or simply enjoy the calming effects of your own handiwork, these jars are sure to bring a smile to your face.
Why You’ll Love DIY Glow in the Dark Jars
- Beginner-friendly
- Budget-friendly
- Creative and fun
- Great for kids and families
- Perfect for gifts or decorations
- Customizable
The Heart Behind This DIY
Crafting is a beautiful journey that fosters connection, mindfulness, and creativity. With each brushstroke or sprinkle of glitter, you immerse yourself in the moment, letting go of the day’s stresses. Creating DIY Glow in the Dark Jars encourages you to explore your artistic side while bonding with loved ones. The tactile sensations of paint and glitter, the exciting surprises when the lights go out, and the pride in making something uniquely yours can uplift your spirit and inspire confidence. It’s more than just a craft; it’s an opportunity to express yourself and connect with those around you.
A Gentle Look at the Process
As you embark on this crafting adventure, you can expect a delightful journey filled with colors and textures. You’ll begin by choosing your materials, whether it’s vibrant glow in the dark paint or bright glow sticks. The process is simple yet satisfying; you’ll create layers of light and sparkle that will transform ordinary jars into extraordinary treasures. Imagine the joy of sealing your creation and waiting in anticipation as it charges under the light, ready to unveil its magic in the dark.
Materials You’ll Need
- Clear glass jars with lids – These will be the canvas for your glowing creation.
- Glow in the dark paint or glow sticks – Choose your vibrant source of light.
- Paintbrush (if using paint) – Perfect for applying that luminous layer inside the jar.
- Water (if using glow sticks) – To help dilute the glow for a softer effect.
- Optional: glitter, decorative elements (e.g., ribbons, stickers) – Add a personal touch to your jars.
Step-by-Step Directions
Step 1
Begin by preparing your jars. If you’re using glow in the dark paint, pour a small amount into the jar. Using a paintbrush, apply a coat to the inside of the glass. Make sure to cover the surface evenly for the best glow effect. Allow it to dry completely according to the manufacturer’s instructions, which usually takes a few hours.
Step 2
If you’re opting for glow sticks, carefully break the glow sticks and pour the contents into the jar. Add a small amount of water to dilute the glow, ensuring it fills the jar without overflowing. The liquid will create a beautiful, swirling effect inside.
Step 3
Now comes the fun part! For added decoration, you can sprinkle a bit of glitter inside the jar or attach ribbons and stickers to the exterior. Let your creativity flow! Once you’re satisfied with your design, seal the jar with its lid.
Step 4
To charge your glow jars, place them in a well-lit area for a few hours. This step is essential as it allows the glow to fully activate.
Step 5
Finally, turn off the lights and enjoy the enchanting glow of your DIY jar. Watch as it illuminates the room, casting a warm, inviting light that is sure to spark joy.
Creative Ways to Use DIY Glow in the Dark Jars
Your glow in the dark jars can serve many purposes! Use them as nightlights in your child’s room, creating a soothing atmosphere as they drift off to sleep. They also make charming decorations for parties or outdoor gatherings, casting a magical glow around your space. Consider gifting them to friends or family—everyone loves a personal touch! You could even create a series of themed jars for different seasons or occasions, adding a bit of wonder to every celebration.
How to Store, Preserve, or Reuse DIY Glow in the Dark Jars
To preserve your glow jars, store them in a cool, dark place when not in use. If you wish to reuse them, simply clean the inside of the jar with warm soapy water and let it dry completely before creating new designs. The glow effect can be refreshed by recharging them in light, ensuring they bring joy time and again.
Creative Variations and Customizations
- Color variations – Use different colors of glow in the dark paint or glow sticks for unique effects.
- Theme ideas – Create jars inspired by nature, holidays, or favorite characters.
- Seasonal adaptations – Make festive jars for Halloween, Christmas, or summer nights.
- Kid-friendly modifications – Let children choose colors and decorations to make it their own.
- Advanced creative upgrades – Use multiple layers of paint or mix in other glow materials for a more dynamic look.
Tips for Success
- Avoid common mistakes like not allowing enough drying time for paint; this can affect the glow.
- Always handle glow sticks with care, as they can break and spill their contents.
- Prepare your workspace beforehand to keep the crafting area tidy and enjoyable.
- Have some paper towels handy for any spills or cleanup.
- Trust your instincts; crafting is about self-expression, so don’t be afraid to experiment!
FAQs About DIY Glow in the Dark Jars
Can beginners make this?
Absolutely! This project is perfect for beginners and requires minimal materials and skills.
Can children participate?
Yes, children can certainly participate, especially with supervision. They will love choosing colors and decorating!
How long does it last?
The glow effect can last for several hours, depending on the quality of the paint or glow sticks used.
Can I customize it?
Definitely! You can personalize your jars with different colors, decorations, and themes to make them truly unique.
A Final Creative Note
As you wrap up your crafting session, take a moment to celebrate the joy of creating something beautiful with your own hands. Each glow in the dark jar is a testament to your creativity and imagination. Remember that crafting is not just about the end result but the journey you take to get there. So, gather your materials, let your creativity shine, and enjoy every moment of this delightful project. For more delicious recipes, check out the easy homemade cream cheese or the no-bake strawberry shortcake cheesecake rolls for treats you will love!
For more DIY inspiration, follow Pinterest.
DIY Glow in the Dark Jars
Ingredients
Equipment
Method
- Step 1: Prepare your jars by applying glow in the dark paint or adding glow stick contents diluted with water.
- Step 2: Add optional decorations like glitter or ribbons and seal the jar.
- Step 3: Charge your glow jars in a well-lit area for a few hours before turning off the lights to enjoy the glow.