
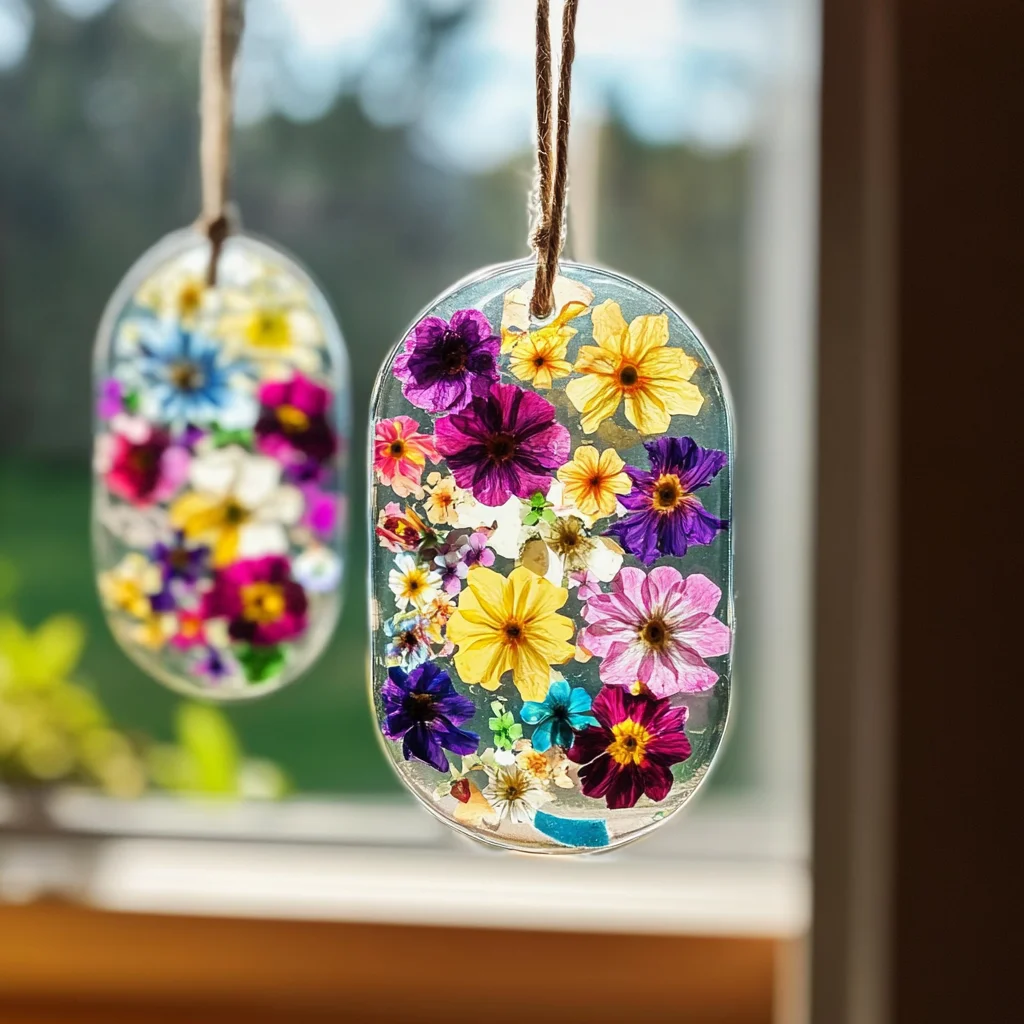
There’s something magical about creating art that dances with light. Have you ever watched how sunlight filters through a stained glass window, painting the room with vibrant colors? Today, I want to share a delightful DIY project that brings that same enchanting experience right into your home: DIY Bioplastic Suncatchers! This project is not only fun but also a wonderful way to connect with your creativity and the natural world. Imagine making beautiful shapes that catch the sunlight and reflect a rainbow of colors across your walls. How lovely does that sound?
Why You’ll Love DIY Bioplastic Suncatchers
- Beginner-friendly
- Budget-friendly
- Creative and fun
- Great for kids and families
- Perfect for gifts or decorations
- Customizable
The Heart Behind This DIY
Crafting is more than just assembling materials; it’s a journey of self-expression and mindfulness. When you create your own bioplastic suncatchers, you engage your senses and let your imagination soar. The soothing sounds of stirring, the textures of your materials, and the vibrant colors you choose come together to create a truly relaxing experience. This project encourages creativity and confidence, making it a perfect activity for families and friends to enjoy together. Plus, there’s a wonderful satisfaction in making something beautiful with your own hands!
A Gentle Look at the Process
As you embark on this crafting adventure, expect a delightful blend of science and art. You’ll start by mixing simple ingredients that transform into a pliable bioplastic. The process is straightforward and calming, allowing you to immerse yourself in the moment. Once your mixture is ready, you can customize it with colors and shapes that reflect your personality. Picture the joy on your child’s face as they help pour and shape the mixture, creating memories that will last a lifetime.
Materials You’ll Need
- 1 cup cornstarch – the main ingredient for our bioplastic base.
- 1 cup water – to combine with cornstarch and create the mixture.
- 1 tablespoon corn syrup – adds a touch of shine and flexibility to the suncatchers.
- Food coloring (optional) – for adding vibrant colors to your creations.
- Wax paper – a non-stick surface for pouring and drying your suncatchers.
- Cookie cutters or molds – to shape your bioplastic into fun designs.
- String or fishing line – for hanging your suncatchers in the window.
Step-by-Step Directions
Step 1
In a saucepan, combine the cornstarch, water, and corn syrup. Stir the mixture over medium heat until it thickens and becomes translucent. This magical transformation is always a joy to witness!
Step 2
Once thickened, remove the saucepan from heat and let it cool slightly. If you want to add a splash of color to your suncatchers, now is the time to mix in your food coloring until evenly incorporated.
Step 3
Pour the mixture onto a sheet of wax paper, spreading it to your desired thickness. A thicker layer will take longer to dry but will give a sturdier suncatcher.
Step 4
Using cookie cutters or molds, create fun shapes in the bioplastic. You can also wait until it has dried a bit and then cut the shapes out. It’s like playing with play dough, but even cooler!
Step 5
Allow the bioplastic to dry completely. Depending on the thickness, this may take several hours or overnight. Enjoy the anticipation as you wait to see your creations come to life!
Step 6
Once dry, carefully peel the shapes off the wax paper. Feel the satisfaction of revealing your colorful suncatchers, ready to shine!
Step 7
Attach string or fishing line to the top of each shape for easy hanging. This simple step adds a lovely touch to your finished suncatchers.
Step 8
Finally, hang your bioplastic suncatchers in a window and watch as the sunlight transforms them into radiant pieces of art. The colorful light effects will brighten up any space!
Creative Ways to Use DIY Bioplastic Suncatchers
Once your suncatchers are complete, the possibilities for display are endless! Hang them in windows to create a beautiful light display, or use them as unique decorations for parties or celebrations. They make wonderful gifts for friends and family, showing that you’ve put time and love into your creation. You can even use them as interactive decorations for children’s rooms, inspiring their creativity every day. What a lovely way to brighten up your home!
How to Store, Preserve, or Reuse DIY Bioplastic Suncatchers
To keep your bioplastic suncatchers looking their best, store them in a cool, dry place away from direct sunlight when not in use. If they become dusty, a gentle rinse with water can help restore their shine. The beauty of bioplastic is that it can also be reused; simply reshape the mixture and start the process over again!
Creative Variations and Customizations
- Color variations – experiment with different food coloring combinations for unique shades.
- Theme ideas – create holiday-themed suncatchers for festive decorations.
- Seasonal adaptations – make flowers for spring or snowflakes for winter.
- Kid-friendly modifications – let kids choose their favorite colors and shapes.
- Advanced creative upgrades – try layering different colors for a stained glass effect.
Tips for Success
- Avoid common mistakes by ensuring your mixture thickens properly to achieve the best results.
- Safety tip: supervise children closely during the heating process.
- Preparation suggestions: clean your workspace before starting for a smooth crafting experience.
- Cleanup recommendations: soak any utensils used in warm, soapy water to make cleaning easier.
- My expert crafting tip is to embrace imperfections; they often lead to the most beautiful creations!
FAQs About DIY Bioplastic Suncatchers
Can beginners make this?
Absolutely! This project is beginner-friendly and perfect for all ages.
Can children participate?
Yes! Kids will love helping with the mixing, pouring, and shaping. Just be sure to supervise during the heating process.
How long does it last?
With proper care, bioplastic suncatchers can last for several months, making them a delightful addition to your decor.
Can I customize it?
Definitely! You can add any colors or shapes you desire, making each suncatcher unique to you.
A Final Creative Note
As you embark on this DIY adventure, remember that the journey of creation is just as important as the final product. Celebrate the joy of self-expression and the beauty of making something with your own hands. I hope this project inspires you to explore more creative endeavors and embrace the art of crafting. For more delicious recipes, check out No-Bake Marshmallow Slice or No-Bake Orange Creamsicle Cheesecake for treats you will love!
If you’re looking for more DIY inspiration, don’t forget to follow us on Pinterest!
DIY Bioplastic Suncatchers
Ingredients
Method
- Step 1: In a saucepan, combine the cornstarch, water, and corn syrup. Stir the mixture over medium heat until it thickens and becomes translucent.
- Step 2: Once thickened, remove the saucepan from heat and let it cool slightly. Mix in your food coloring until evenly incorporated.
- Step 3: Pour the mixture onto a sheet of wax paper, spreading it to your desired thickness.
- Step 4: Using cookie cutters or molds, create fun shapes in the bioplastic.
- Step 5: Allow the bioplastic to dry completely. This may take several hours or overnight.
- Step 6: Once dry, carefully peel the shapes off the wax paper.
- Step 7: Attach string or fishing line to the top of each shape for easy hanging.
- Step 8: Hang your bioplastic suncatchers in a window and watch the sunlight transform them into radiant pieces of art.