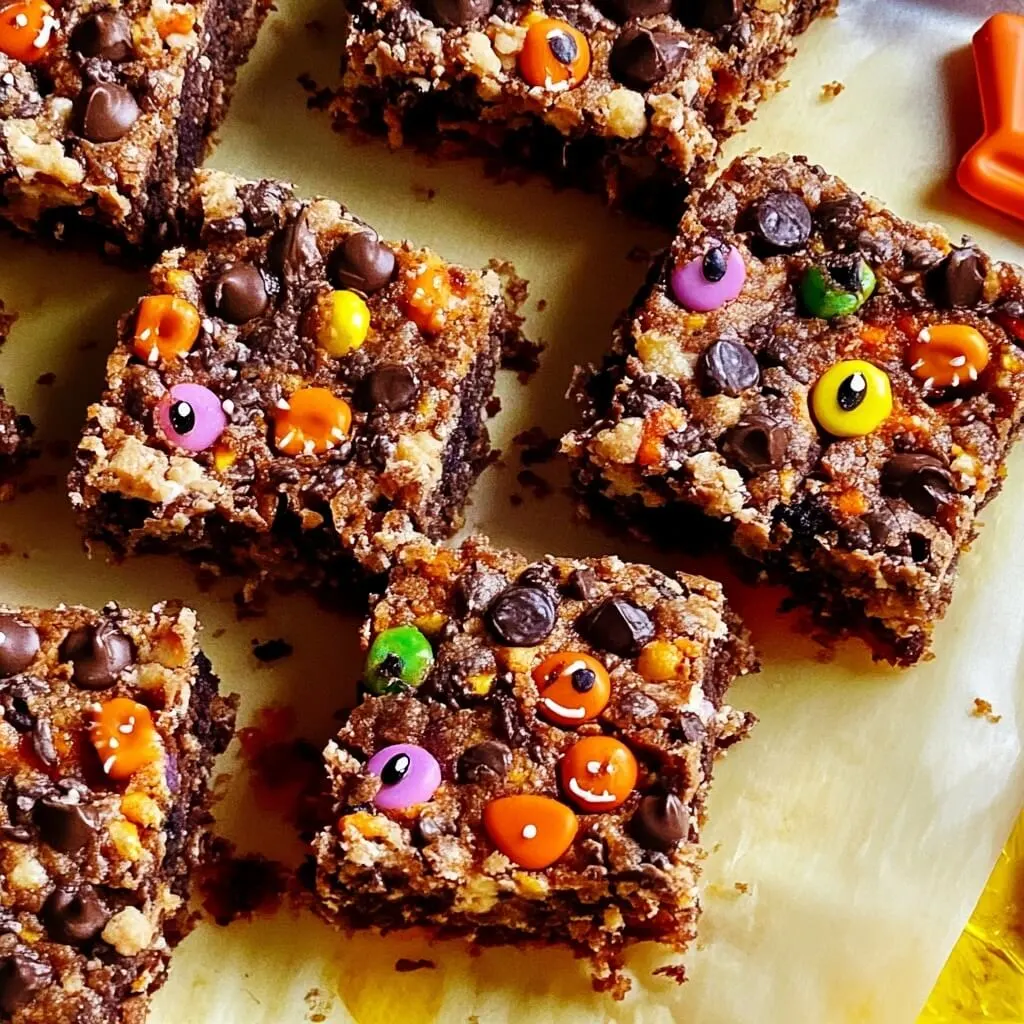
Remember those crisp autumn nights, the rustle of leaves, and the thrill of carving pumpkins? There’s something so magical about Halloween, isn’t there? It’s a time for cozy sweaters, spooky movies, and, of course, delicious treats! Today, I’m so excited to share a recipe that perfectly captures that Halloween spirit – these Chunky Halloween Treat Bars. They’re ridiculously easy, incredibly fun to make, and taste like pure autumn magic. You’ll be whipping these up year after year!
Why You’ll Love Chunky Halloween Treat Bars
- Fast: Perfect for when that sweet craving hits or you need a last-minute party contribution.
- Easy: Seriously, no baking required! Even if you’re new to the kitchen, you can nail these.
- Giftable: Wrap them up in cute cellophane bags and hand them out to friends, neighbors, or your favorite trick-or-treaters.
- Crowd-pleasing: With all those fantastic textures and flavors, everyone from little goblins to grown-up ghouls will adore them.
Ingredients
Let’s gather our goodies! The beauty of these bars is how adaptable they are, but here’s the base recipe I love:
- 14 ounces chopped semisweet chocolate (about 3 cups chopped) – The star of our show! Use good quality chocolate for the best flavor.
- 4 teaspoons vegetable oil or refined coconut oil – This helps make the chocolate extra smooth and pourable.
- Two 3-ounce packages Halloween marshmallow candies (e.g., ghosts, monsters, pumpkins) – These add a delightful chewiness and a fun, festive touch!
- 8 orange-and-black chocolate sandwich cookies (about 4 ounces) – Think Oreos in Halloween colors! They bring a fantastic crunch and chocolatey goodness.
- 1 1/4 cups crispy rice cereal – For that signature crispy texture that makes these bars so satisfying.
- 1/2 cup candy corn – A classic Halloween candy that adds a sweet, familiar flavor.
- 1/2 cup orange, green, and purple candy-coated chocolates – These little gems add pops of color and a delightful crunch.
- 1/4 cup Halloween sprinkles with googly eyes, plus additional for topping – Because what’s Halloween without a little spooky sparkle?
How to Make Chunky Halloween Treat Bars
Alright, let’s get our hands a little sticky (in the best way possible!). This is where the fun really begins.
- First things first, grab a 9-inch square pan. Line it with aluminum foil, making sure you leave about a 2-inch overhang on all sides. This makes lifting your beautiful bars out later a breeze.
- In a medium microwave-safe bowl, combine your chopped semisweet chocolate and the vegetable oil. Pop it in the microwave on high for about 1 to 1 1/2 minutes. Stop and stir with a rubber spatula every 30 seconds or so until it’s all melted and wonderfully smooth. Be patient here – melted chocolate is pure joy!
- Now, let’s prep our chunky bits! Chop up those fun Halloween marshmallow candies and those orange-and-black chocolate sandwich cookies into bite-size pieces. I like to make them a little varied in size for extra texture.
- In a large bowl, gather all your dry ingredients: the chopped marshmallows, chopped cookies, crispy rice cereal, candy corn, candy-coated chocolates, and that first 1/4 cup of Halloween sprinkles. Give it all a good toss to make sure everything is mixed up.
- Pour that luscious melted chocolate mixture over all the goodies in the bowl. Gently toss everything together with your spatula until every single piece is coated in that glossy chocolate. This is where it starts to look like a real treat!
- Carefully transfer this glorious mixture into your prepared pan. Spread it out evenly, pressing it down just a bit so you have a nice, even layer.
- Now for the final festive touch: sprinkle those additional Halloween sprinkles all over the top. Get creative! You can press them in slightly so they don’t fall off.
- This is the hardest part – waiting! Pop the pan into the refrigerator for at least 2 hours, or until the bars are firm and completely set. I know, the temptation is real, but trust me, it’s worth it!
- Once they’re perfectly set, use the foil overhang to lift the entire block of bars out of the pan. Transfer it to a cutting board and slice them into squares. Ta-da! Your homemade Halloween treats are ready to be devoured!
Substitutions & Additions
Feeling inspired to get a little creative? These bars are incredibly forgiving! Here are some ideas:
- Chocolate Swap: Don’t have semisweet? Milk chocolate or dark chocolate would be delicious too. You could even do a swirl of white chocolate for extra visual appeal!
- Cookie Adventures: Feel free to use other chocolate sandwich cookies or even some graham crackers for a different kind of crunch.
- Candy Corn Alternative: Not a fan of candy corn? No problem! Swap it out for other small candies like M&M’s, Reese’s Pieces, or even some chopped pretzels for a salty kick.
- Marshmallow Magic: If you can’t find Halloween-themed marshmallows, regular mini marshmallows will work just fine.
- Nutty Surprise: For a little extra texture and flavor, add in about 1/2 cup of chopped peanuts or almonds.
- Extra Sparkle: Consider adding some edible glitter or edible glitter dust before chilling for an extra magical shimmer.
If you love no-bake recipes, you might also enjoy my No-Bake Marshmallow Slice or these delightful No-Bake Strawberry Shortcake Cheesecake Rolls. They’re always a hit!
Tips for Success
A few little pointers to make your Chunky Halloween Treat Bars absolutely perfect:
- Don’t Overheat the Chocolate: When melting chocolate, it’s better to go low and slow. Overheating can make it seize up and become grainy. Stirring helps distribute the heat evenly.
- Chop Your Candies: Make sure to chop the marshmallows and cookies into manageable, bite-sized pieces. This ensures they’re evenly distributed and easy to bite into.
- Even Coating is Key: When you toss the dry ingredients with the melted chocolate, make sure everything is thoroughly coated. This helps the bars hold their shape.
- Prep Your Pan: Using the foil overhang is a game-changer for easy removal. Don’t skip this step!
- Chill Time is Crucial: While you might be tempted to speed things up, letting the bars chill fully ensures they set up properly and slice cleanly.
If you’re looking for more fun no-bake desserts, you might enjoy my No-Bake Desserts with Our No-Bake Orange Creamsicle Cheesecake. So many delicious options!
How to Store Chunky Halloween Treat Bars
These bars are best enjoyed fresh, but they store beautifully! Once they’re sliced, you can keep them in an airtight container at room temperature for up to 3 days. If your kitchen is particularly warm, or you want them to stay extra firm, you can store them in the refrigerator for up to a week. They also freeze surprisingly well! Wrap individual bars tightly in plastic wrap and then place them in a freezer-safe bag for up to 2 months. Just let them thaw at room temperature for about 15-20 minutes before enjoying.
FAQs
- Can I make these bars ahead of time?
- Absolutely! These bars are perfect for making a day or two in advance. In fact, they’re often even better after the flavors have had a chance to meld together a bit.
- What if I don’t have foil? Can I use parchment paper?
- Parchment paper works too! Just make sure you leave enough overhang to lift the bars out. Parchment paper can sometimes be a little trickier to get a clean lift, but it’s definitely doable.
- Are these safe for nut allergies?
- The base recipe as written is nut-free, assuming your ingredients (chocolate, cookies, marshmallows, etc.) are free from nut cross-contamination. Always double-check ingredient labels if allergies are a concern.
- Can I use a different size pan?
- You can, but it will affect the thickness of your bars. A smaller pan (like an 8×8 inch) will result in thicker bars, and you might need to increase the chilling time. A larger pan (like a 9×13 inch) will make thinner bars, and they may set up faster.
Looking for more delicious baking adventures? Check out my recipe for Baking Brownies in a Bread Pan for a unique twist on a classic, or try my decadent Hot Fudge Brownie Bread!
Happy Halloween baking (or, rather, no-baking)! If you make these Chunky Halloween Treat Bars, be sure to share your creations on Pinterest!
Chunky Halloween Treat Bars
Ingredients
Equipment
Method
- Step 1: Grab a 9-inch square pan. Line it with aluminum foil, making sure you leave about a 2-inch overhang on all sides. This makes lifting your beautiful bars out later a breeze.
- Step 2: In a medium microwave-safe bowl, combine your chopped semisweet chocolate and the vegetable oil. Pop it in the microwave on high for about 1 to 1 1/2 minutes. Stop and stir with a rubber spatula every 30 seconds or so until it’s all melted and wonderfully smooth. Be patient here – melted chocolate is pure joy!
- Step 3: Now, let’s prep our chunky bits! Chop up those fun Halloween marshmallow candies and those orange-and-black chocolate sandwich cookies into bite-size pieces. I like to make them a little varied in size for extra texture.
- Step 4: In a large bowl, gather all your dry ingredients: the chopped marshmallows, chopped cookies, crispy rice cereal, candy corn, candy-coated chocolates, and that first 1/4 cup of Halloween sprinkles. Give it all a good toss to make sure everything is mixed up.
- Step 5: Pour that luscious melted chocolate mixture over all the goodies in the bowl. Gently toss everything together with your spatula until every single piece is coated in that glossy chocolate. This is where it starts to look like a real treat!
- Step 6: Carefully transfer this glorious mixture into your prepared pan. Spread it out evenly, pressing it down just a bit so you have a nice, even layer.
- Step 7: Now for the final festive touch: sprinkle those additional Halloween sprinkles all over the top. Get creative! You can press them in slightly so they don’t fall off.
- Step 8: This is the hardest part – waiting! Pop the pan into the refrigerator for at least 2 hours, or until the bars are firm and completely set. I know, the temptation is real, but trust me, it’s worth it!
- Step 9: Once they’re perfectly set, use the foil overhang to lift the entire block of bars out of the pan. Transfer it to a cutting board and slice them into squares. Ta-da! Your homemade Halloween treats are ready to be devoured!