There’s something truly magical about a rich, chocolate fudge layered cake that instantly brings back memories of family celebrations, birthday parties, and those cozy moments spent sharing dessert with loved ones. If you’ve ever craved a homemade cake that feels both luxurious and comforting, this Chocolate Fudge Layered Cake is exactly what you need. It’s surprisingly easy to make, quick enough to whip up for a last-minute gathering, and guaranteed to impress anyone lucky enough to get a slice.
Why You’ll Love Chocolate Fudge Layered Cake
- Fast – Ready in under an hour for baking and frosting
- Easy – Simple ingredients and straightforward steps
- Giftable – Makes a beautiful and thoughtful homemade gift
- Crowd-pleasing – Perfect for parties, holidays, or just because
Ingredients
Let’s talk about what you’ll need for this show-stopping cake. The ingredients are all pantry staples with a little extra love for that deep chocolate flavor.
- All-purpose flour: The base for your cake layers, giving structure and softness.
- Granulated sugar & powdered sugar: Sweetness comes in two forms—granulated for the cake and powdered for the frosting’s silky texture.
- Unsweetened cocoa powder: This adds that rich, chocolaty depth both in the cake and frosting.
- Baking powder & baking soda: Your leavening agents to ensure fluffy, tender layers.
- Buttermilk: Adds moisture and slight tang to balance the sweetness beautifully.
- Vegetable oil: Keeps the cake moist and tender.
- Eggs: Bind everything together with richness.
- Vanilla extract: A subtle flavor booster that complements the chocolate.
- Hot coffee (or hot water): Enhances the cocoa flavor without overpowering.
- Unsalted butter: The star of the frosting, creating that creamy, luscious texture.
- Heavy cream: Makes the frosting extra fluffy and smooth.
- Pinch of salt: Balances sweetness and intensifies chocolate flavor.
- Melted chocolate and chocolate decorations: For that beautiful drip effect and decadent finishing touch.
How to Make Chocolate Fudge Layered Cake
Ready to get your hands deliciously messy? Follow these steps and you’ll have a stunning layered cake that tastes just as dreamy as it looks.
1. Bake the Cake Layers
Start by preheating your oven to 350°F (175°C). Grease and line your baking pans or get ready to bake in batches if you don’t have multiple pans. In a large bowl, sift together the flour, sugar, cocoa powder, baking powder, baking soda, and salt. This ensures everything is nicely combined and aerated.
Next, add the buttermilk, vegetable oil, eggs, and vanilla extract. Mix on medium speed for about 2 minutes until your batter is smooth. Now pour in the hot coffee gradually, mixing until the batter is silky and thin—don’t worry, that’s exactly how it should be.
Divide the batter evenly into your prepared pans and bake for 18 to 22 minutes. You’ll know they’re done when a toothpick inserted in the center comes out clean. Let the layers cool completely before you move on. Patience here means perfect layers later!
2. Prepare the Chocolate Fudge Frosting
While the cake cools, it’s frosting time! Beat the softened butter in a large bowl until creamy. Slowly add powdered sugar and cocoa powder, beating as you go until it’s well combined. Then pour in the heavy cream, vanilla extract, and a pinch of salt. Turn your mixer to high and beat until the frosting is fluffy and smooth, perfect for layering and decorating your cake.
3. Assemble the Cake
Place your first cake layer on a cake board or serving plate. Spread a generous and even layer of your chocolate fudge frosting on top. Repeat with the remaining layers and frosting until your cake is stacked high, looking like a chocolate lover’s dream come true.
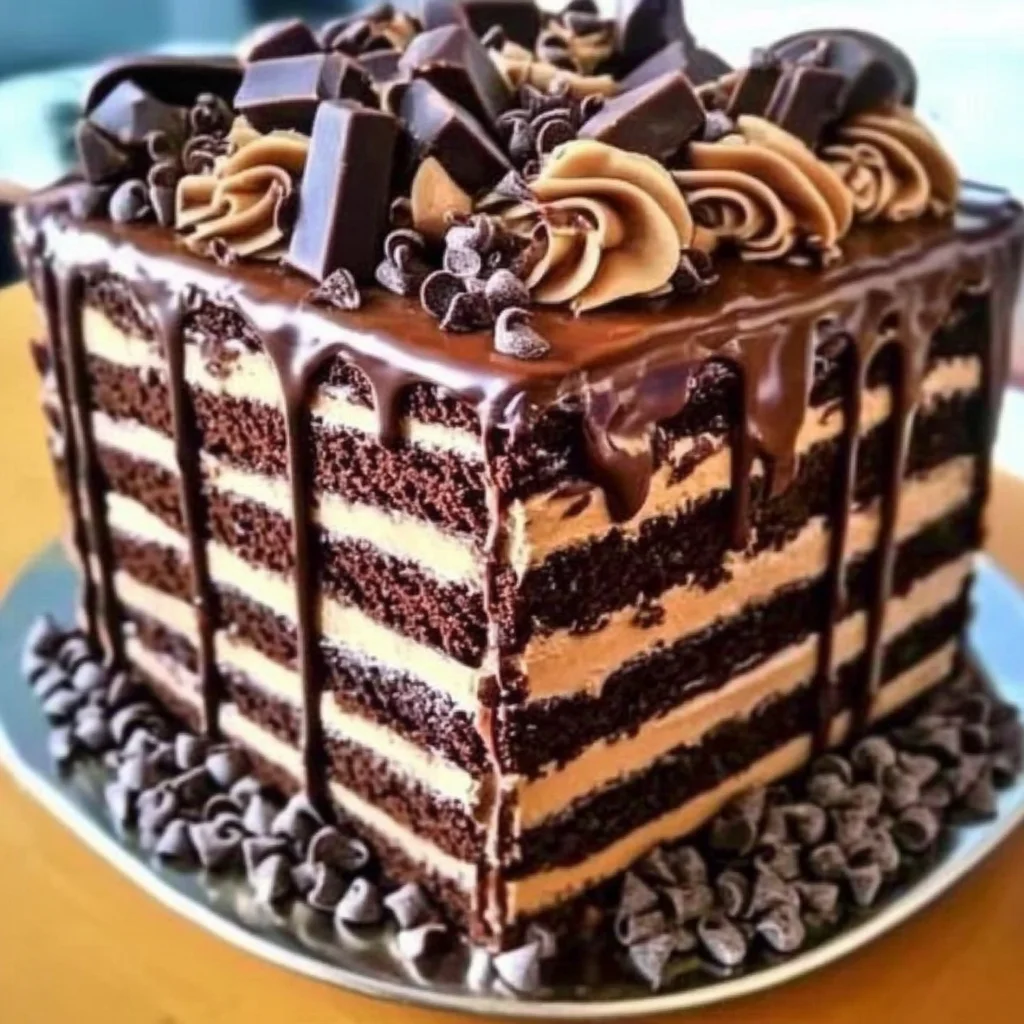
4. Drip and Decorate
Now for the fun part! Pour the slightly cooled melted chocolate over the top of your assembled cake, letting it drip naturally down the sides for that elegant, homemade look. Use a piping bag to add frosting swirls on top, then crown your creation with chocolate truffles, chopped chocolate bars, curls, and crumbs. This extra touch makes your cake a real centerpiece.
5. Chill
Pop your cake into the fridge for at least one hour before slicing. This helps the layers set nicely and makes cutting much cleaner. Trust me, the wait is totally worth it!
Substitutions & Additions
If you want to switch things up or work with what you have on hand, here are some ideas:
- Buttermilk swap: Use regular milk mixed with a tablespoon of vinegar or lemon juice for a quick substitute.
- Oil alternative: Melted coconut oil works beautifully and adds a subtle flavor twist.
- Dairy-free option: Substitute dairy butter and cream with plant-based versions or try a recipe like this dairy-free chocolate coconut milk ice cream for inspiration on creamy dairy-free treats.
- Extra crunch: Add chopped nuts or chocolate chips between layers for texture.
- Flavor boost: A teaspoon of espresso powder in the batter enhances the chocolate depth even more.
Tips for Success
- Room temperature ingredients: Make sure eggs and buttermilk are room temp for even mixing and better rise.
- Don’t overmix: Mix your dry and wet ingredients until just combined to keep the cake tender.
- Thin batter is okay: The hot coffee thins the batter but it’s what makes the cake moist and rich.
- Chill frosting if too soft: If your frosting feels too soft to pipe or spread, pop it in the fridge for 10-15 minutes.
- Prep ahead: You can bake the cake layers a day before and store them wrapped tightly in the fridge. This helps with clean layering and less stress on the day you’re assembling.
How to Store Chocolate Fudge Layered Cake
This cake loves the fridge! Store it covered with cake dome or plastic wrap to keep it fresh for up to 5 days. For longer storage, you can freeze the cake (wrapped well in plastic wrap and foil) for up to 2 months. Just thaw overnight in the fridge before serving.
FAQs
Can I use regular milk instead of buttermilk?
Yes! Just add a tablespoon of vinegar or lemon juice to a cup of milk and let it sit for 5 minutes to create a buttermilk substitute.
How many layers does this recipe make?
It depends on your pan size, but this recipe works great for 3 to 4 thin layers.
Can I make this cake gluten-free?
Absolutely! Use a 1:1 gluten-free baking flour blend in place of all-purpose flour for a delicious gluten-free version.
What’s the best way to achieve the chocolate drip effect?
Make sure your melted chocolate is warm but not hot. Pour slowly over the chilled cake, letting gravity do the work for natural drips.
If you love creating luscious desserts, you might also enjoy discovering unique treats like this no-bake marshmallow slice or learning how to bake brownies in a bread pan for a fun twist on a classic, found right here.
Thanks for stopping by the kitchen today! Don’t forget to follow us on Pinterest for more delicious recipes and baking inspiration.
Chocolate Fudge Layered Cake
Ingredients
Equipment
Method
- Step 1: Preheat oven to 350°F (175°C). Grease and line cake pans. In a large bowl, sift together flour, sugar, cocoa powder, baking powder, baking soda, and salt.
- Step 2: Add buttermilk, vegetable oil, eggs, and vanilla extract to dry ingredients. Mix on medium speed for about 2 minutes until smooth.
- Step 3: Gradually pour in hot coffee while mixing until batter is silky and thin.
- Step 4: Divide batter evenly into prepared pans and bake for 18 to 22 minutes or until a toothpick inserted comes out clean. Let layers cool completely.
- Step 5: For frosting, beat softened butter until creamy. Gradually add powdered sugar and cocoa powder, beating until combined.
- Step 6: Add heavy cream, vanilla extract, and a pinch of salt. Beat on high until frosting is fluffy and smooth.
- Step 7: Assemble cake by layering cake and frosting evenly. Repeat until stacked high.
- Step 8: Pour slightly cooled melted chocolate over top for drip effect. Use piping bag to add frosting swirls and decorate with chocolate truffles, curls, bars, and crumbs.
- Step 9: Chill cake in fridge for at least 1 hour before slicing for clean cuts.