There’s something truly magical about a cheesecake that brings back all those cozy memories of sharing sweets with family and friends. If you’re craving a dessert that’s both nostalgic and indulgently creamy, this Milkybar Cheesecake hits all the right notes. It’s not only deliciously smooth but surprisingly easy to make—perfect for those moments when you want to impress without spending hours in the kitchen.
Why You’ll Love Milkybar Cheesecake
- Fast: You’ll have this dessert ready in just a few hours, most of which is chilling time.
- Easy: No complicated steps or fancy techniques—just simple mixing and chilling.
- Giftable: This cheesecake makes a perfect homemade gift that’s bound to wow anyone lucky enough to get a slice.
- Crowd-pleasing: The sweet, creamy Milkybar flavor combined with a buttery biscuit base is a winning combo everyone will adore.
Ingredients
Before you start, gather these ingredients. Each one plays a special role in creating that iconic creamy texture and sweet, white chocolate flavor:
- 250g scotch finger biscuits: These make the perfect crunchy, buttery base.
- 125g butter, melted: Helps bind the biscuit base together for a firm crust.
- 1 tbsp gelatine powder: Essential for setting the cheesecake without baking.
- 500g cream cheese, chopped and at room temperature: The creamy heart of the cheesecake.
- 70g (1/3 cup) caster sugar: Just enough sweetness without overpowering the Milkybar flavor.
- 2 tsp vanilla extract: Adds a warm, comforting depth.
- 2 x 180g blocks Nestlé Milkybar, melted and cooled: The star ingredient that gives this cheesecake its signature white chocolate taste.
- 300ml thickened cream: Whipped into the mix for that light, airy finish.
How to Make Milkybar Cheesecake
Ready to whip up this dreamy dessert? Let’s walk through it step-by-step—you’ll see how simple it is to create something truly special.
- Prepare your pan and molds: Lightly grease the base of a 20 x 30 cm slice pan. Line the base and sides with baking paper, making sure the paper overhangs on the long sides for easy lifting later. Next, line each compartment of four 6-compartment giant silicone ice-cube trays with wide baking paper strips, also allowing the sides to overhang. Place the trays on a sturdy tray or board for stability.
- Make the biscuit base: Pop the scotch finger biscuits into a food processor and pulse until you have coarse crumbs. Add the melted butter and blend until combined. Press this mixture evenly into the base of your prepared slice pan. Pop it in the fridge while you prepare the filling.
- Dissolve the gelatine: Pour 125 ml (½ cup) water into a bowl and gradually sprinkle the gelatine powder over it. Let it sit for a minute or two so it absorbs the water. Microwave on high for 20 seconds, then whisk with a fork until completely dissolved. Set this aside to cool to room temperature.
- Make the creamy filling: Using electric beaters, whip the cream cheese, caster sugar, and vanilla extract together until light and creamy. With the mixer running, slowly pour in the cooled gelatine mixture. Add the melted Milkybar chocolate and thickened cream, then continue beating until everything is well combined and smooth. Transfer this luscious mixture to a jug for easy pouring.
- Assemble and chill: Pour 1 cup of the cream cheese mixture over the biscuit base and smooth it out evenly. Divide the remaining mixture evenly among the lined ice-cube trays, but don’t fill the compartments all the way to the top. Refrigerate both the slice pan and ice-cube trays for at least 4 hours, or until fully set.
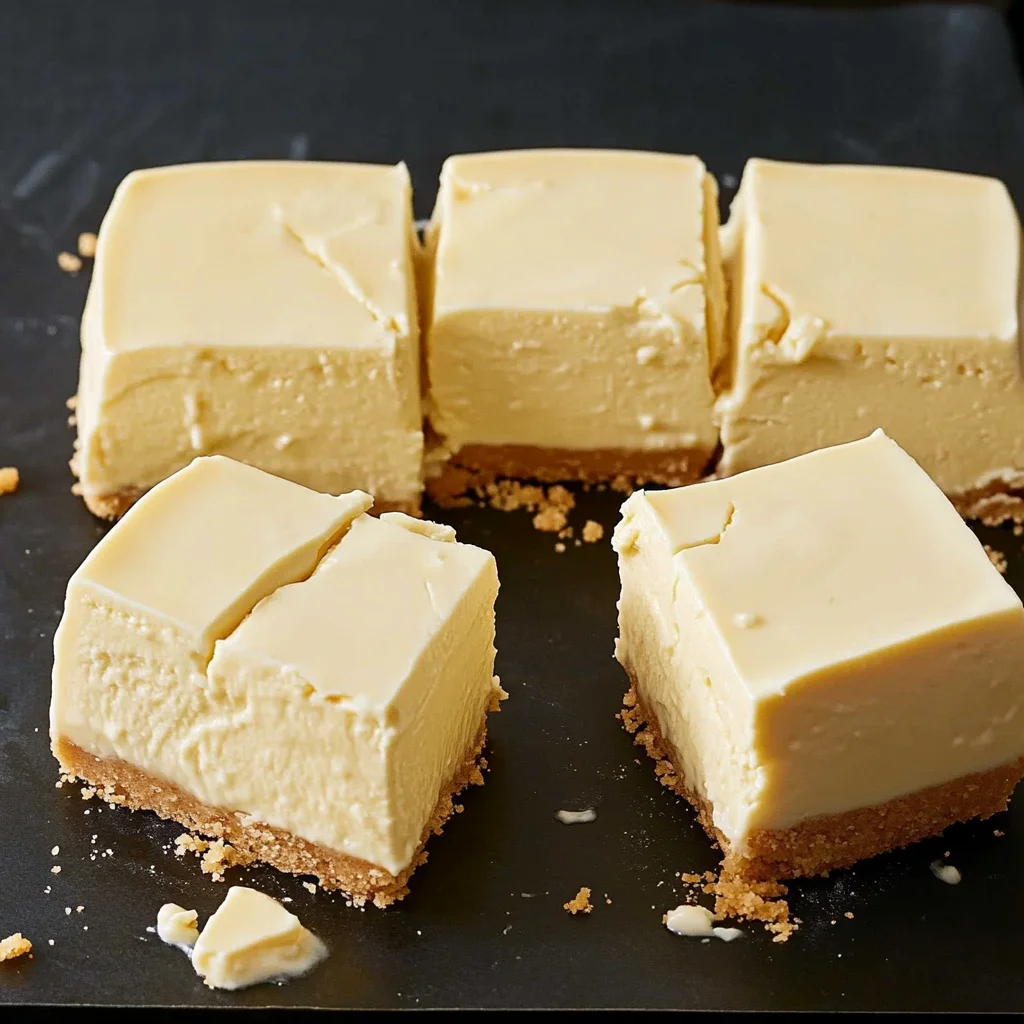
- Finishing touches: Once set, lift the cheesecake base out of the pan using the overhanging baking paper and place it on a serving board. Carefully remove the cheesecake blocks from the ice-cube trays—if they’re stuck, use a knife to gently loosen the edges. Arrange the blocks neatly over the base in rows to create a fun giant Milkybar look. Trim any rough edges and cut the entire cheesecake into 24 pieces. Now it’s ready to serve and enjoy!
Substitutions & Additions
Feel free to get creative with this cheesecake! Here are some ideas for mixing things up:
- Biscuit base swap: Try graham crackers or digestive biscuits if you want a different flavor or a gluten-free option.
- Gelatine alternatives: Use agar-agar for a vegetarian-friendly setting agent, but follow the package instructions carefully.
- Chocolate variations: Swap the Milkybar for white chocolate chunks or add a swirl of raspberry sauce for a fruity twist.
- Extra toppings: Sprinkle crushed Milkybar pieces, toasted coconut, or even a drizzle of caramel sauce on top for added texture and flavor.
Tips for Success
- Room temperature cream cheese: Make sure your cream cheese is soft before mixing to avoid lumps and ensure a silky texture.
- Don’t rush the gelatine: Let it cool to room temperature before adding to the cream cheese mix to prevent clumping.
- Line your molds well: Using baking paper with overhangs makes unmolding the cheesecake blocks so much easier.
- Prep ahead: This cheesecake tastes even better after chilling overnight, so make it a day ahead for a stress-free dessert.
How to Store Milkybar Cheesecake
Once assembled, store your Milkybar Cheesecake in an airtight container in the refrigerator. It will keep beautifully for up to 4 days, making it perfect for parties or treats throughout the week. If you want to keep it longer, you can freeze it for up to 2 months—just thaw in the fridge overnight before serving to preserve that creamy texture.
FAQs
Can I make this cheesecake without a food processor?
Absolutely! You can crush the biscuits by placing them in a sealed bag and using a rolling pin to break them into crumbs. It just takes a bit more elbow grease.
What if I don’t have silicone ice-cube trays?
Any small container or mold lined with baking paper will work. Just make sure you can easily remove the cheesecake blocks without breaking them.
Can I use low-fat cream cheese or cream?
For best results and that rich, creamy texture, stick with full-fat versions. Low-fat alternatives might affect the cheesecake’s consistency and flavor.
Is it possible to make this cheesecake vegan?
This recipe relies on dairy and gelatine, so it’s tricky to make vegan without significant substitutions. However, you could experiment with vegan cream cheese, coconut cream, and agar-agar as a setting agent.
If you love discovering sweet treats like this, be sure to follow my Pinterest for more cozy recipes and kitchen inspiration!
Milkybar Cheesecake
Ingredients
Equipment
Method
- Step 1: Lightly grease a 20 x 30 cm slice pan and line base and sides with baking paper, leaving overhangs for easy lifting. Line each compartment of four 6-compartment giant silicone ice-cube trays with wide baking paper strips with overhangs. Place trays on a sturdy tray or board for stability.
- Step 2: Place scotch finger biscuits in a food processor and pulse to coarse crumbs. Add melted butter and blend until combined. Press mixture evenly into base of prepared slice pan. Refrigerate while preparing filling.
- Step 3: Pour 125 ml water into a bowl and sprinkle gelatine powder over it. Let sit 1–2 minutes to absorb water. Microwave on high for 20 seconds, then whisk until completely dissolved. Set aside to cool to room temperature.
- Step 4: Using electric beaters, whip cream cheese, caster sugar, and vanilla extract until light and creamy. With mixer running, slowly pour in cooled gelatine mixture. Add melted Milkybar chocolate and thickened cream; continue beating until smooth and well combined. Transfer mixture to a jug for easy pouring.
- Step 5: Pour 1 cup of cream cheese mixture evenly over biscuit base and smooth out. Divide remaining mixture evenly among lined ice-cube tray compartments, filling them partially. Refrigerate slice pan and trays for at least 4 hours or until fully set.
- Step 6: Once set, lift cheesecake base from pan using baking paper overhang and place on serving board. Carefully remove cheesecake blocks from ice-cube trays; use a knife to loosen edges if stuck. Arrange blocks neatly over base in rows to create giant Milkybar look. Trim rough edges and cut entire cheesecake into 24 pieces. Serve and enjoy!