
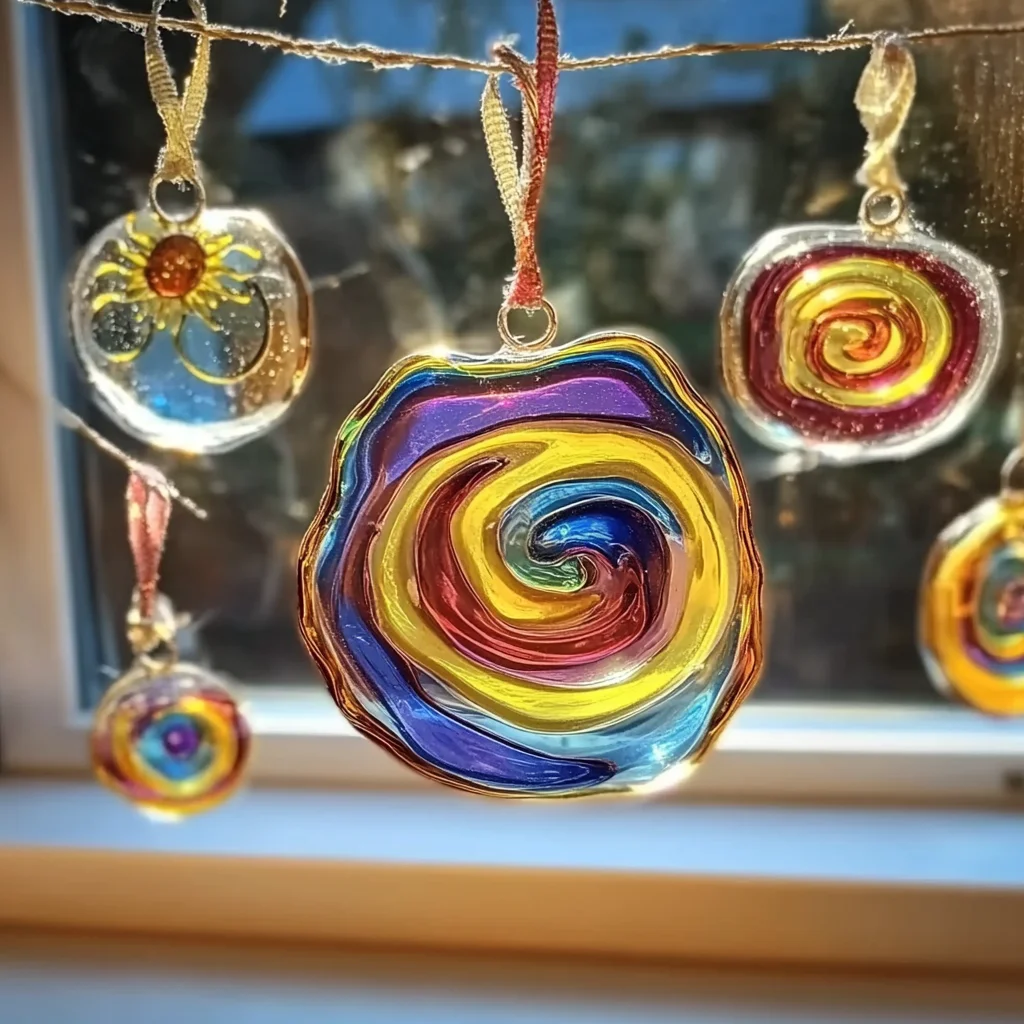
Remember those magical afternoons spent crafting, where simple materials transformed into something beautiful? There’s something so special about creating things with your own hands, and today, I’m bringing back a classic that’s guaranteed to brighten your day and your windows – DIY Glue Suncatchers! These little pieces of stained-glass magic are incredibly easy to make, perfect for a rainy afternoon, a fun kids’ activity, or even a charming handmade gift. Get ready to fill your home with a kaleidoscope of color!
Why You’ll Love Glue Suncatchers
- Fast: Once you’ve got your supplies, you can start creating in minutes!
- Easy: Seriously, if you can squeeze glue, you can make these. No fancy skills needed.
- Giftable: These make adorable, personalized gifts for teachers, friends, or family.
- Crowd-pleasing: Kids and adults alike will have a blast making and displaying them.
Ingredients
Gathering your supplies is half the fun! Here’s what you’ll need to bring these colorful suncatchers to life:
- White school glue: The trusty old standby. Make sure it’s the washable kind for easy cleanup!
- Plastic lid or clear plastic sheet: This is your canvas. Think old takeout container lids, a piece of clear acetate, or even a sturdy Ziploc baggie carefully cut open.
- Food coloring or liquid watercolors: This is where the magic happens! Choose vibrant colors that will shine in the sunlight.
- Toothpicks or small brushes: Perfect for swirling those beautiful colors together.
- Black glue (optional): If you want to add those classic stained-glass outlines, black glue is your best friend.
- Tape: To secure your plastic surface while you work.
- Scissors: For any trimming needed.
- Hole punch: To create a loop for hanging.
- String, ribbon, or suction cup hooks: To hang your finished masterpieces!
How to Make Glue Suncatchers
Let’s get crafting! This is where the real fun begins. I love this process because it’s so forgiving and allows for so much creativity.
-
Prep your surface: Start by securing your plastic lid or clear plastic sheet to your work surface with tape. This will keep it from sliding around while you’re busy creating.
-
Design with black glue (optional): If you’re using black glue for outlines, now’s the time! Carefully draw your desired design onto the plastic surface. Think flowers, stars, abstract shapes – whatever your heart desires! Let this black glue outline dry completely. This is crucial so the colors don’t bleed together when you add them.
-
Fill with white glue: Next, it’s time to fill in your design or cover the entire surface with white school glue. You want a nice, even layer.
-
Add a splash of color: Now for the really fun part! Add drops of your food coloring or liquid watercolors directly onto the white glue. Don’t be shy with the colors! Then, grab your toothpick or small brush and gently swirl and blend the colors together. You can create beautiful marbling effects or just a vibrant wash of color. It’s amazing how easily you can achieve such pretty patterns!
-
Patience is key: Drying time! This is the hardest part – waiting! Place your glue creation in a warm, dry place and let it dry completely. This can take anywhere from 24 to 48 hours, depending on the thickness of the glue. You’ll know it’s ready when it’s no longer sticky and has become clear and glossy.
-
Reveal your creation: Once totally dry, carefully peel your beautiful glue suncatcher from the plastic surface. It should peel off like a flexible piece of plastic itself! Then, use your hole punch to create a small hole at the top. Thread through some string, ribbon, or attach a suction cup hook, and hang it in your favorite window to catch the sun’s rays!
Substitutions & Additions
Feeling adventurous? Here are a few ways to customize your glue suncatchers:
- Glitter: Add a sprinkle of fine glitter into the wet glue for some extra sparkle!
- Different glues: While school glue is classic, you could experiment with clear glue for a different effect.
- Shapes: Instead of freehand designs, you can trace around cookie cutters on the plastic surface before adding the glue.
- Layering: Once your first layer of glue is partially dry, you can add more colored glue to create depth and more intricate designs.
Tips for Success
A few little tricks to make your suncatcher experience even smoother:
- Don’t make it too thick: While you want good coverage, excessively thick layers can take a very long time to dry and might not become as clear.
- Work in a well-ventilated area: Especially if you’re using a lot of glue or if young children are involved, good airflow is always a plus.
- Clean up is easy: If you get glue on your hands or surfaces, warm water and soap usually do the trick.
- Prep ahead: If you’re doing this with a group, you can have the plastic surfaces taped down and ready to go, making the process even quicker.
How to Store Glue Suncatchers
These suncatchers are surprisingly durable once dry, but they can be a bit delicate. Store them flat in a container or between pieces of parchment paper to prevent them from sticking together or getting bent. They should last for a long time, bringing joy to your windows for months to come!
FAQs
What kind of glue works best?
White school glue is the most common and works wonderfully. Clear school glue can also be used for a slightly different transparency.
Can I use markers instead of food coloring?
While markers might seem like an option, they tend to dry out or smudge. Food coloring or liquid watercolors are designed to mix with liquids and will give you the best results.
How long does it take for the glue to dry completely?
It typically takes 24 to 48 hours. Make sure it’s completely dry and clear before attempting to peel it off.
Can I make these into magnets?
Absolutely! Once dry, you can attach a small magnet to the back with strong craft glue.
These DIY Glue Suncatchers are such a simple yet rewarding craft. They’re a fantastic way to get creative and add a touch of handmade charm to your home. If you enjoyed making these, you might also love other fun craft projects like our DIY Clear Glue Flower Suncatcher or perhaps exploring some creative kitchen projects such as making your own easy homemade cream cheese! Happy crafting!
For more creative ideas and delicious recipes, be sure to follow us on Pinterest!
DIY Glue Suncatchers
Ingredients
Equipment
Method
- Step 1: Secure your plastic lid or clear plastic sheet to your work surface with tape.
- Step 2 (Optional): If using black glue, carefully draw your desired design onto the plastic surface. Let the black glue outline dry completely.
- Step 3: Fill in your design or cover the entire surface with a nice, even layer of white school glue.
- Step 4: Add drops of food coloring or liquid watercolors onto the white glue. Use a toothpick or small brush to gently swirl and blend the colors.
- Step 5: Let the glue creation dry completely in a warm, dry place. This can take 24 to 48 hours. It's ready when it's no longer sticky and has become clear and glossy.
- Step 6: Carefully peel the dried glue suncatcher from the plastic surface. Use a hole punch to create a small hole at the top. Thread string, ribbon, or attach a suction cup hook to hang it in a window.
I don’t think the title of your article matches the content lol. Just kidding, mainly because I had some doubts after reading the article. https://www.binance.info/register?ref=IHJUI7TF
Thank you for your sharing. I am worried that I lack creative ideas. It is your article that makes me full of hope. Thank you. But, I have a question, can you help me? https://www.binance.bh/register?ref=IHJUI7TF
Mình thường online buổi tối và thấy mã nhận thưởng 888slot vẫn hoạt động khá mượt. TONY06-01