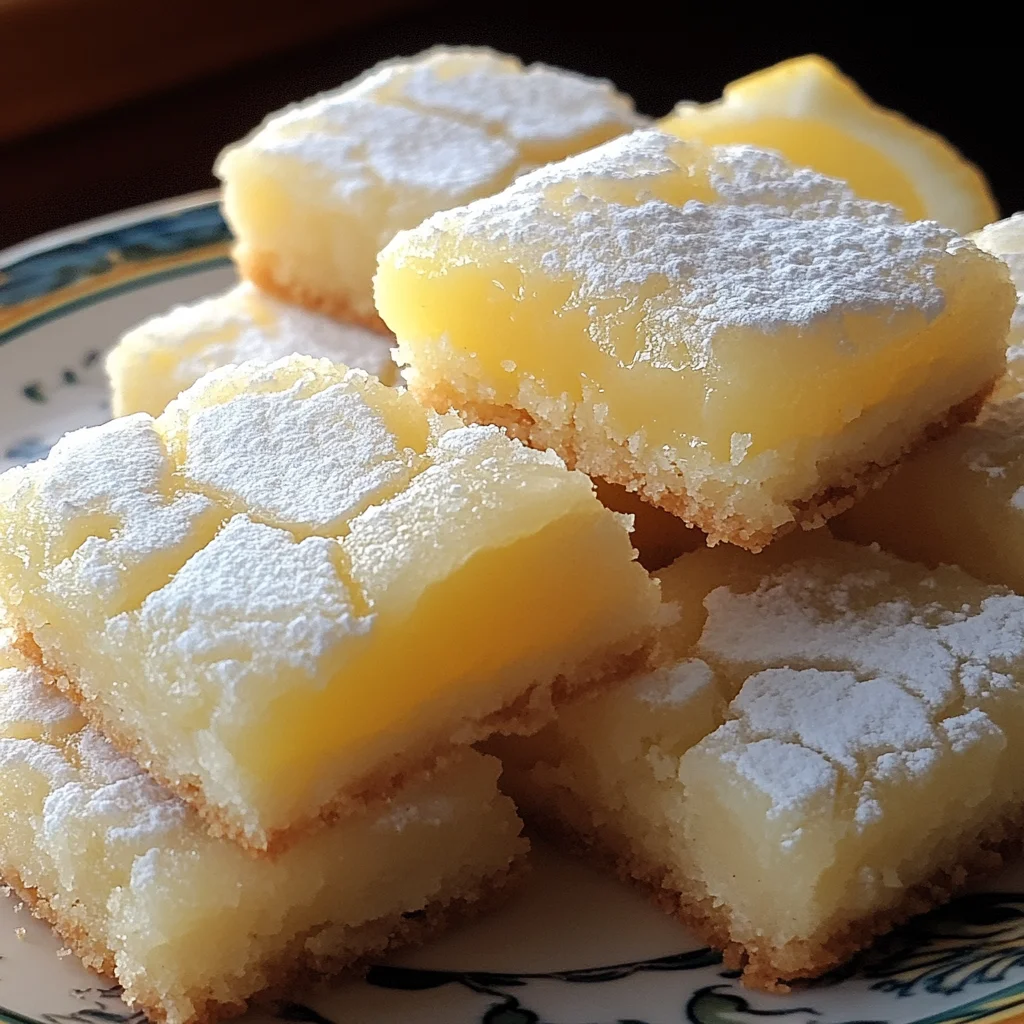
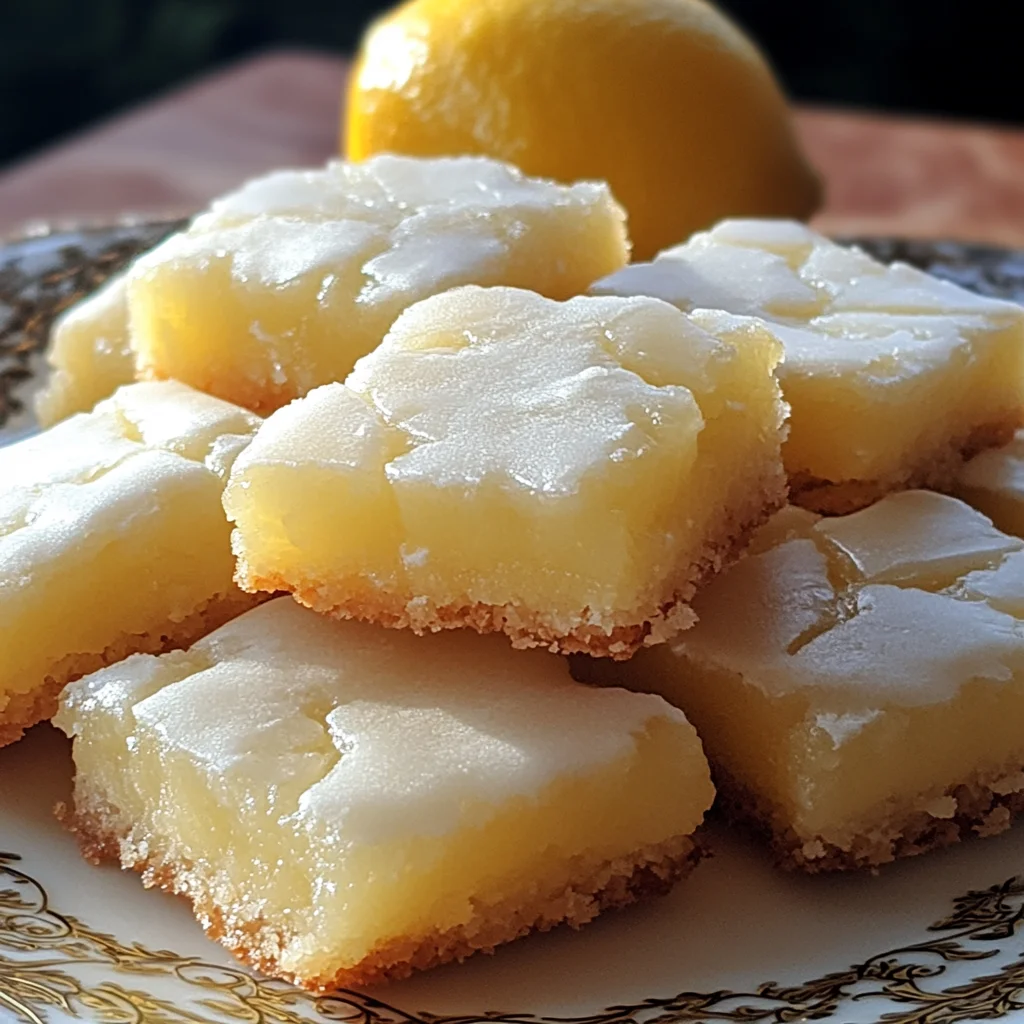
Oh, the joy of a perfectly baked cookie! There’s something incredibly nostalgic about a homemade treat, isn’t there? For me, it brings back memories of sunny afternoons and happy kitchen moments. Today, we’re diving into a recipe that’s sure to bring a little burst of sunshine to your day: Zesty Lemon-Filled Cookies! These little gems are not only incredibly delicious but surprisingly simple to whip up. Whether you’re looking for a delightful afternoon pick-me-up or a charming treat to share, these cookies have got you covered.
Why You’ll Love Zesty Lemon-Filled Cookies
- Fast: Perfect for when you need a sweet treat without a huge time commitment.
- Easy: Even if you’re new to baking, you can totally master this recipe!
- Giftable: Pack them up in a pretty tin, and you’ve got a thoughtful, homemade gift.
- Crowd-pleasing: That bright lemon flavor is universally loved and always a hit.
Ingredients
Let’s gather our goodies for these cheerful cookies!
For the Cookies:
- 1 cup unsalted butter, softened (Make sure it’s nice and soft, but not melted!)
- 1 cup granulated sugar (For that perfect cookie sweetness.)
- 1 large egg (The binder that holds everything together.)
- 1 teaspoon vanilla extract (A classic flavor enhancer.)
- 2 ½ cups all-purpose flour (The base of our delightful dough.)
- ½ teaspoon baking powder (To give our cookies a little lift.)
- ¼ teaspoon salt (Balances all the sweetness.)
- Zest of 1 lemon (This is where the magic starts – all that citrusy goodness!)
For the Lemon Filling:
- ½ cup lemon juice (Freshly squeezed from about 2 lemons is best for that vibrant flavor!)
- Zest of 1 lemon (More lemon zest = more zesty power!)
- ½ cup granulated sugar (To sweeten up that tart lemon.)
- 3 tablespoons cornstarch (Our thickening agent for a luscious filling.)
- 3 egg yolks (Adds richness and helps the filling set.)
- 2 tablespoons unsalted butter (For a smooth, glossy finish.)
For Decoration:
- Powdered sugar, for dusting (optional, but it makes them look so pretty!)
How to Make Zesty Lemon-Filled Cookies
Alright, chef, let’s get baking! Don’t worry, it’s a straightforward process that’s totally doable.
For the Lemon Filling:
- In a medium saucepan, whisk together your lemon juice, lemon zest, sugar, and cornstarch until everything is nice and smooth. No lumps allowed here!
- Now, add in those egg yolks and give it another good whisk until everything is beautifully combined.
- Place the saucepan over medium heat. Keep whisking constantly! You’ll notice it start to thicken up. This usually takes about 5–7 minutes. You’re looking for a consistency that coats the back of a spoon.
- Once it’s thickened, take it off the heat. Stir in the butter until it’s all melted and makes your filling wonderfully smooth and glossy.
- Pour the filling into a bowl. To prevent a skin from forming, gently press a piece of plastic wrap directly onto the surface of the filling. Then, pop it into the refrigerator to cool completely.
For the Cookies:
- Grab a large bowl and cream together your softened butter and sugar until the mixture is light and fluffy. This is key for tender cookies!
- Add in your egg, vanilla extract, and that glorious lemon zest. Mix it all up until it’s really well combined. The aroma is already amazing!
- In a separate bowl, give your flour, baking powder, and salt a little whisk together. This ensures the leavening agent and salt are evenly distributed.
- Now, gradually add the dry ingredients to your wet ingredients. Mix until a lovely dough forms. It should hold together nicely.
- Divide your dough into two equal discs. Wrap them up snugly in plastic wrap and let them chill in the refrigerator for about 30 minutes. This makes the dough easier to handle.
- Preheat your oven to 350°F (175°C). While the oven heats up, line your baking sheets with parchment paper. Parchment paper is a baker’s best friend for preventing sticking!
- Roll out your chilled dough to about ¼-inch thick. Use your favorite cookie cutters to cut out your shapes. Now, for the fun part: take half of your cookies and cut a small hole in the center – this is where our delicious filling will peek through!
- Carefully place your cookies onto the prepared baking sheets. Bake them for about 10–12 minutes, or until they’re just lightly golden around the edges. We don’t want them too brown!
- Let the cookies cool on the baking sheets for a couple of minutes before transferring them to a wire rack to cool completely. Patience is a virtue here, especially before filling!
Assemble the Cookies:
- Once everything is cooled, it’s time to bring these beauties together! Spread about 1 teaspoon of that wonderful lemon filling onto the bottom of one of your full cookies.
- Gently place one of the “cut-out” cookies on top to create a lovely sandwich.
- If you like a little extra flair, dust them with powdered sugar. It gives them that extra special touch, almost like a dusting of snow on a sunny day!
Substitutions & Additions
Want to put your own spin on these lemony delights? I love experimenting in the kitchen, and here are a few ideas!
- For the Filling: If you don’t have cornstarch, you could try a similar amount of all-purpose flour, but cornstarch generally gives a smoother texture. You could also add a tiny drop of yellow food coloring to make the filling even brighter if you like.
- For the Cookies: Feel free to add a pinch of cinnamon or cardamom to the cookie dough for a warmer flavor profile. For a really decadent treat, try adding some white chocolate chips to the dough before chilling.
- Decorations: Instead of powdered sugar, you could make a simple glaze with powdered sugar and a little lemon juice. Or, for a fun twist, dip the edges of the filled cookies into some melted white chocolate! If you’re a fan of lemon and berry flavors, you might enjoy my recipe for Strawberry Lemonade Cupcakes.
- Flavor Boost: A touch of almond extract in the cookie dough can add a lovely complementary flavor to the lemon.
Tips for Success
A few little tricks can make all the difference to ensure your Zesty Lemon-Filled Cookies turn out perfectly every time.
- Don’t Overmix: Once you add the dry ingredients to the wet, mix just until the dough comes together. Overmixing can lead to tough cookies.
- Chill the Dough: Don’t skip the chilling step! Cold dough is much easier to roll out and cut without it spreading too much during baking.
- Even Baking: Make sure your baking sheets aren’t overcrowded. Give the cookies a little space so they bake evenly.
- Cool Completely: It’s crucial that both the cookies and the filling are completely cool before assembling. Warm filling will melt and make a mess!
- Prep Ahead: You can make the lemon filling a day or two in advance and store it in the refrigerator. The cookie dough can also be made ahead and chilled for up to 2 days.
How to Store Zesty Lemon-Filled Cookies
Once your masterpieces are assembled, you’ll want to keep them tasting their best.
Store your Zesty Lemon-Filled Cookies in an airtight container at room temperature. They should stay wonderfully fresh for about 3-4 days. If you live in a very warm or humid climate, you might want to store them in the refrigerator to prevent the filling from getting too soft. I find they are still delicious even a few days later, perfect for those unexpected cookie cravings!
FAQs
Here are a few questions you might have about these delightful cookies:
Q: Can I make these cookies gluten-free?
A: Yes, you can! Simply substitute a good quality gluten-free all-purpose flour blend for the regular flour. You might need to adjust the amount slightly, so start with a little less and add more if needed to reach the right dough consistency.
Q: How long does the lemon filling last?
A: The lemon filling, when stored properly in an airtight container in the refrigerator, should last for about a week. You can also freeze any extra filling for later use.
Q: Can I freeze the assembled cookies?
A: It’s generally best to freeze the baked and cooled cookies before filling them. Once filled, they can get a bit soggy when thawed. Freeze the unfed cookies in an airtight container, and then assemble them with the filling once thawed.
Q: My cookies spread a lot, what did I do wrong?
A: This often happens if your butter was too soft or if the dough wasn’t chilled enough. Make sure your butter is softened but not melty, and give the dough that 30-minute chill time (or even a bit longer) before rolling!
Happy Baking! I hope you absolutely adore these Zesty Lemon-Filled Cookies as much as I do. They’re truly a little taste of sunshine! Don’t forget to check out my other delightful recipes and baking inspiration over on Pinterest!
Zesty Lemon-Filled Cookies
Ingredients
Equipment
Method
- For the Lemon Filling:1. In a medium saucepan, whisk together your lemon juice, lemon zest, sugar, and cornstarch until everything is nice and smooth. No lumps allowed here!
- 2. Now, add in those egg yolks and give it another good whisk until everything is beautifully combined.
- 3. Place the saucepan over medium heat. Keep whisking constantly! You’ll notice it start to thicken up. This usually takes about 5–7 minutes. You’re looking for a consistency that coats the back of a spoon.
- 4. Once it’s thickened, take it off the heat. Stir in the butter until it’s all melted and makes your filling wonderfully smooth and glossy.
- 5. Pour the filling into a bowl. To prevent a skin from forming, gently press a piece of plastic wrap directly onto the surface of the filling. Then, pop it into the refrigerator to cool completely.
- For the Cookies:6. Grab a large bowl and cream together your softened butter and sugar until the mixture is light and fluffy. This is key for tender cookies!
- 7. Add in your egg, vanilla extract, and that glorious lemon zest. Mix it all up until it’s really well combined. The aroma is already amazing!
- 8. In a separate bowl, give your flour, baking powder, and salt a little whisk together. This ensures the leavening agent and salt are evenly distributed.
- 9. Now, gradually add the dry ingredients to your wet ingredients. Mix until a lovely dough forms. It should hold together nicely.
- 10. Divide your dough into two equal discs. Wrap them up snugly in plastic wrap and let them chill in the refrigerator for about 30 minutes. This makes the dough easier to handle.
- 11. Preheat your oven to 350°F (175°C). While the oven heats up, line your baking sheets with parchment paper. Parchment paper is a baker’s best friend for preventing sticking!
- 12. Roll out your chilled dough to about ¼-inch thick. Use your favorite cookie cutters to cut out your shapes. Now, for the fun part: take half of your cookies and cut a small hole in the center – this is where our delicious filling will peek through!
- 13. Carefully place your cookies onto the prepared baking sheets. Bake them for about 10–12 minutes, or until they’re just lightly golden around the edges. We don’t want them too brown!
- 14. Let the cookies cool on the baking sheets for a couple of minutes before transferring them to a wire rack to cool completely. Patience is a virtue here, especially before filling!
- Assemble the Cookies:15. Once everything is cooled, it’s time to bring these beauties together! Spread about 1 teaspoon of that wonderful lemon filling onto the bottom of one of your full cookies.
- 16. Gently place one of the “cut-out” cookies on top to create a lovely sandwich.
- 17. If you like a little extra flair, dust them with powdered sugar. It gives them that extra special touch, almost like a dusting of snow on a sunny day!