Remember those thrilling science fair projects that made your heart race with anticipation? Or maybe you’re just looking for a super simple, incredibly engaging activity to do with the kids (or, let’s be honest, for yourself!) that doesn’t require a ton of fancy ingredients? Well, get ready to create a little bit of magic right in your own kitchen! This Mini Volcano in a Jar is a classic for a reason – it’s astonishingly easy, incredibly fun, and the result is pure, bubbly excitement.
Why You’ll Love Mini Volcano in a Jar
- Fast: You can whip this up in minutes!
- Easy: Seriously, if you can measure, you can make this.
- Giftable: Assemble the dry ingredients in a cute jar with instructions for a unique gift.
- Crowd-pleasing: Perfect for parties, rainy days, or just a spontaneous bit of fun.
Ingredients
Here’s what you’ll need for your very own erupting volcano. It’s so simple, you probably have everything in your pantry right now!
- 1 small jar (a mason jar, an old jam jar, or even a sturdy glass works perfectly!)
- 2 tablespoons baking soda
- 1/4 cup vinegar (white vinegar is great for this, but apple cider vinegar works too!)
How to Make Mini Volcano in a Jar
Get ready for some bubbly fun! This is where the magic happens.
First things first, you’ll want to set yourself up for success (and minimal mess!). Find a tray or a baking dish to place your jar on. This will catch any overflow from the exciting eruption. I like to use a sturdy metal baking tray for this, as it’s easy to wipe down.
Step 1: Prep Your Volcano Base
Carefully place your small jar in the center of the tray. This is the foundation of your mini volcano!
Step 2: Add the Baking Soda Power
Now, spoon your 2 tablespoons of baking soda directly into the jar. This is the secret ingredient that reacts with the vinegar.
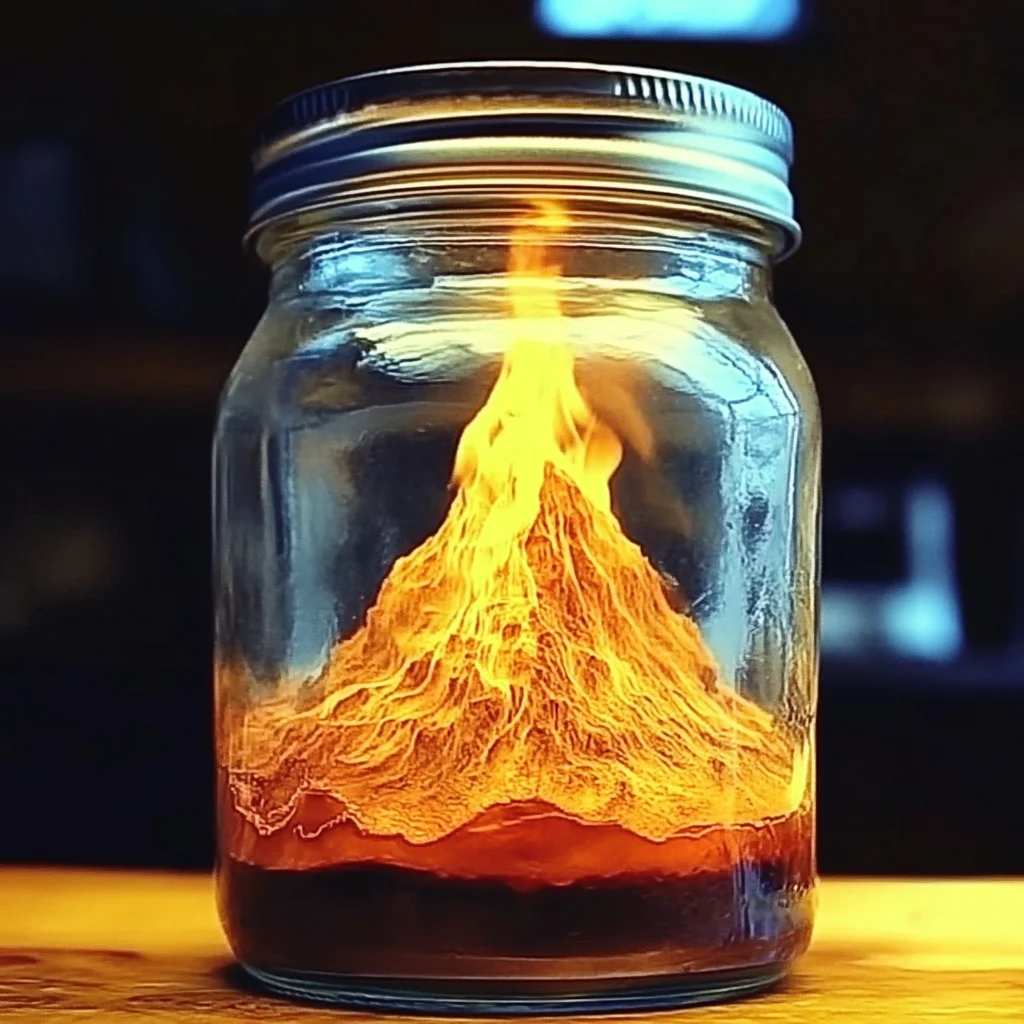
Step 3: Unleash the Eruption!
It’s time for the grand finale! Slowly and carefully, pour the 1/4 cup of vinegar into the jar, right on top of the baking soda. Don’t rush this part – the suspense is part of the fun!
Step 4: Watch the Magic!
Stand back and observe as your mini volcano erupts with a satisfying fizz and foam. It’s a fantastic visual demonstration of a chemical reaction.

Substitutions & Additions
Want to make your volcano even more spectacular? Here are a few ideas!
- Color Blast: Add a drop or two of food coloring (red or orange looks great!) to the vinegar before pouring it into the jar for a vibrant eruption.
- Glitter Volcano: A tiny pinch of biodegradable glitter added with the baking soda can make for a sparkling surprise.
- Scented Lava: A tiny drop of essential oil (like orange or cinnamon) in the vinegar can add a subtle, pleasant scent.
- More Baking Soda/Vinegar: You can experiment with slightly larger quantities, but be prepared for a bigger mess! It’s always best to start with these measurements.
Tips for Success
A few little tricks to ensure your volcano experiment is a blast!
- Mess Management: As mentioned, always use a tray or a larger container. You can even do this outside on a warm day for zero mess concerns!
- Vinegar Temperature: While it doesn’t make a huge difference, slightly warmer vinegar can sometimes result in a slightly more vigorous reaction.
- Experimenting: Once you’ve mastered the basic recipe, try varying the amounts of baking soda and vinegar to see how it affects the eruption. It’s a great way to learn about cause and effect. For more scientific fun, explore other exciting science experiments like our DIY Baking Soda Dinosaur Eggs.
- Prep Ahead: While the recipe is quick, you can have your jar, baking soda, and vinegar ready to go. Just before you’re ready to erupt, measure out the vinegar.
How to Store Mini Volcano in a Jar
This is more of an immediate-reaction activity, so there’s not really a “storage” component for the volcano itself once it’s erupted. However, you can easily store your ingredients for future volcanic adventures!
Keep your baking soda in an airtight container in a cool, dry place. Vinegar can be stored in its original bottle. You can reuse your jar for another eruption or for other kitchen purposes. If you’re looking for more fun jar-based projects, you might enjoy our easy homemade cream cheese, which uses a jar for a different kind of delicious transformation!
FAQs
Here are some quick answers to common questions:
Is this safe for kids?
Yes, with adult supervision! The ingredients are non-toxic, but it’s important to prevent children from ingesting the mixture and to ensure they have a tray to contain the fizz.
Why does the volcano erupt?
It’s a chemical reaction! Baking soda (sodium bicarbonate) is a base, and vinegar (acetic acid) is an acid. When they mix, they create carbon dioxide gas, which causes the bubbling and “eruption.”
Can I add anything else to the eruption?
You can add food coloring or glitter, as mentioned above. However, avoid adding anything that could clog the jar or make a sticky mess, like sugar or flour, unless you’re prepared for cleanup!
We hope you have a fantastic time creating your Mini Volcano in a Jar! It’s a wonderful way to spark curiosity and have some hands-on fun. For more delightful recipes and creative ideas, be sure to follow us on Pinterest!
Mini Volcano in a Jar
Ingredients
Equipment
Method
- Find a tray or a baking dish to place your jar on. This will catch any overflow from the exciting eruption.
- Carefully place your small jar in the center of the tray. This is the foundation of your mini volcano!
- Spoon your 2 tablespoons of baking soda directly into the jar. This is the secret ingredient that reacts with the vinegar.
- Slowly and carefully, pour the 1/4 cup of vinegar into the jar, right on top of the baking soda. Don’t rush this part – the suspense is part of the fun!
- Stand back and observe as your mini volcano erupts with a satisfying fizz and foam. It’s a fantastic visual demonstration of a chemical reaction.
Just searching for this unique trend and your take
on stitched fashion is spot on. Appreciate the detail!