
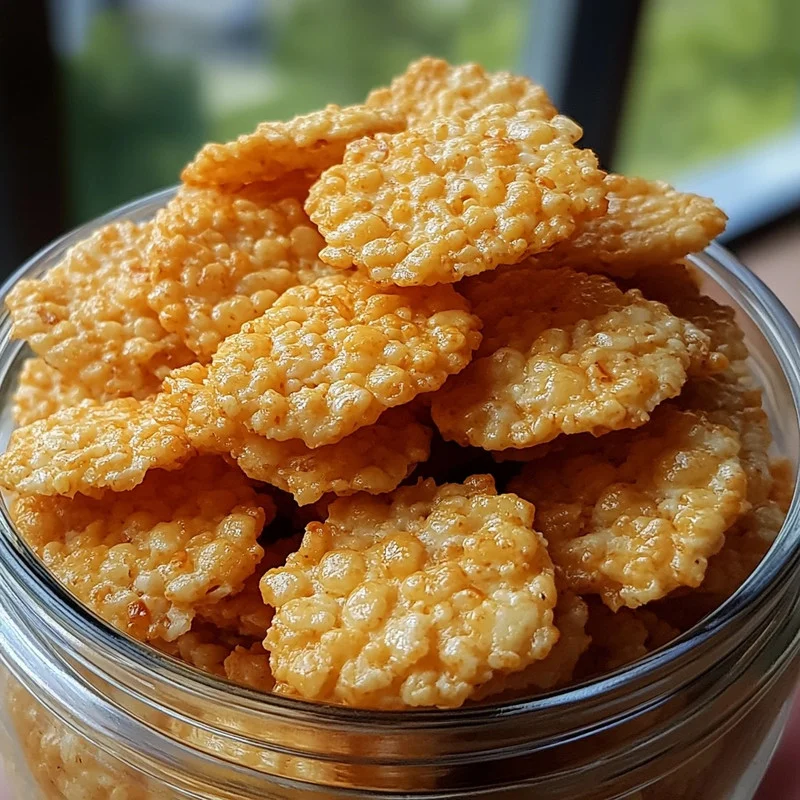
Hey there, snack lovers! Get ready for a little trip down memory lane, or maybe just a cozy afternoon treat that’s about to become your new obsession. Remember those classic cheesy crackers? Well, we’re adding a secret ingredient that takes them from simply delicious to absolutely irresistible. We’re talking about homemade cheddar crackers with a surprising, delightful crunch from… wait for it… Rice Krispies! Trust me on this one. They’re so easy to whip up, disappear even faster, and the best part? Making them is just as fun as eating them.
Why You’ll Love This Recipe
- Fast: Quick prep means you’re snacking sooner!
- Easy: No complicated steps, perfect for beginners.
- Giftable: Package these up for a thoughtful homemade treat.
- Crowd-pleasing: Everyone, young and old, devours these!
- Unique Crunch: The Rice Krispies add a fantastic texture nobody expects.
Ingredients
Gather ’round the pantry! Here’s what you’ll need to make these magical little bites:
- 1 cup all-purpose flour: Just your standard flour to bring it all together.
- 1/2 teaspoon salt: To enhance that cheesy goodness.
- 1/4 teaspoon paprika or cayenne pepper (optional): A little warmth (paprika) or a kick (cayenne)! Totally up to your spice preference.
- 1/2 cup unsalted butter, softened: Make sure it’s lovely and soft, not melted. This is key for creaming properly.
- 2 cups shredded sharp cheddar cheese: The star of the show! Use a good quality sharp cheddar for the best flavor. Pre-shredded is okay, but shredding it yourself often gives you a better melt.
- 1 cup Rice Krispies cereal: Our secret weapon! They add that amazing, light crispness.
How to Make It
Okay, let’s get baking! You’ll be surprised how quickly these come together.
- First things first, preheat your oven to 350°F (175°C). Go ahead and grab two baking sheets and line them with parchment paper. This makes cleanup a breeze!
- In a medium bowl, whisk together your dry ingredients: the flour, salt, and that optional paprika or cayenne. Just a quick whisk to make sure everything is combined.
- Now, in a larger bowl, we’re going to cream the butter and cheese. Add your softened unsalted butter and the shredded sharp cheddar. Beat them together until they’re wonderfully creamy and smooth. An electric mixer works great here, but you can totally do this with a sturdy spoon and some elbow grease too.
- Gradually add the dry flour mixture into your creamy cheese and butter mixture. Mix on low speed or stir by hand until a lovely dough starts to form. Don’t overmix here!
- This is where the fun begins! Gently fold in the Rice Krispies cereal. You want to mix them in evenly, but try not to crush them too much. They’re delicate little things!
- Time to shape! Roll the dough into little balls, about 1 inch in diameter. Place them about 1 inch apart on your prepared baking sheets.
- Give each ball a gentle flatten. You can use the back of a fork (this gives them classic cracker marks!) or the bottom of a glass. Just flatten them slightly so they bake evenly.
- Pop them into the preheated oven for 15–18 minutes. Keep an eye on them! You’re looking for the edges to be lightly golden and the crackers to look firm.
- Once they’re done, carefully take them out of the oven. Let them cool right there on the baking sheet for about 5 minutes. This helps them set up.
- After 5 minutes, transfer the crackers to a wire rack to cool completely. This step is important for getting that perfect crispy texture.
Substitutions & Additions
Want to play around a bit? Great! Here are some ideas:
- Cheese Swap: Not feeling sharp cheddar? Try mild cheddar, white cheddar, or even a mix with a bit of Parmesan for a different flavor profile. Pepper Jack would add a nice spicy kick!
- Spice It Up: Increase the cayenne for extra heat, or try adding a pinch of garlic powder, onion powder, or even a tiny bit of dried mustard powder to the dry ingredients.
- Herbs & Seeds: Before baking, sprinkle the tops of the flattened crackers with sesame seeds, poppy seeds, or flaky sea salt for extra flavor and texture. You could also mix in a tiny bit of dried chives or dill into the dough.
- Butter: If you only have salted butter, you can use it, but you might want to reduce the added salt in the recipe slightly (maybe down to 1/4 teaspoon).
Tips for Success
Follow these simple tips to make sure your Rice Krispie cheddar crackers turn out perfect every single time!
- Softened Butter is Key: Don’t skip this! Cold butter won’t cream properly with the cheese, and melted butter will make a greasy mess. Softened butter mixes smoothly and helps create a good dough structure.
- Don’t Overwork the Dough: Once the flour is just combined, stop mixing. Overworking can lead to tougher crackers.
- Handle Rice Krispies Gently: When folding them in, be careful not to crush them all. The goal is to have those little pockets of crispiness within the cracker.
- Flatten Evenly: Making the crackers a uniform thickness helps them bake at the same rate.
- Watch Your Oven: Oven temperatures can vary! Start checking around 15 minutes and bake until they are golden brown on the edges.
- Cool Completely: Patience here is rewarded! Letting them cool fully on the wire rack is essential for achieving that desired crisp snap.
- Prep Ahead: You can make the dough ahead of time! Roll it into a log, wrap it tightly in plastic wrap, and refrigerate for up to 3 days or freeze for up to 3 months. When ready to bake, let it sit at room temperature for about 10-15 minutes (if frozen, thaw in the fridge first), then slice into 1/4-inch rounds and bake as directed, possibly adding a minute or two to the baking time.
How to Store It
These crackers are best enjoyed fresh, but they store pretty well too!
Once they are completely cooled, store your Rice Krispie Cheddar Crackers in an airtight container at room temperature. They should stay nice and crisp for up to 5 days. If they lose a little crunch over time, you can pop them back on a baking sheet in a 300°F oven for a few minutes to crisp them back up, then let them cool again.
FAQs
Got questions? I’ve got answers!
Q: Why add Rice Krispies?
A: They add an amazing, light, crispy texture that’s totally unexpected and makes these crackers uniquely delicious!
Q: Can I use a different kind of cheese?
A: Absolutely! Sharp cheddar is classic, but feel free to experiment with other hard or semi-hard cheeses like Monterey Jack, Gouda, or a blend.
Q: My dough is too crumbly, what did I do wrong?
A: This might mean your butter wasn’t soft enough, or the dry ingredients weren’t fully incorporated. Try mixing a tiny bit longer until the dough just comes together. If it’s still very crumbly, add a tiny splash (start with 1/2 teaspoon) of milk or water and mix until it holds together, but be careful not to add too much.
Q: Can I make these gluten-free?
A: You could try substituting the all-purpose flour with a gluten-free all-purpose blend. Also, ensure the Rice Krispies cereal you use is certified gluten-free, as not all brands are. Baking time might vary slightly.
Easy Homemade Rice Krispie Cheddar Crackers
Ingredients
Equipment
Method
- Preheat your oven to 350°F (175°C). Grab two baking sheets and line them with parchment paper.
- In a medium bowl, whisk together the flour, salt, and optional paprika or cayenne.
- In a larger bowl, cream the softened unsalted butter and shredded sharp cheddar cheese until creamy and smooth using an electric mixer or sturdy spoon.
- Gradually add the dry flour mixture into the cheese and butter mixture. Mix on low speed or stir by hand until a dough starts to form. Do not overmix.
- Gently fold in the Rice Krispies cereal, mixing evenly but trying not to crush them.
- Roll the dough into little balls, about 1 inch in diameter. Place them about 1 inch apart on your prepared baking sheets.
- Give each ball a gentle flatten using the back of a fork or the bottom of a glass.
- Bake in the preheated oven for 15–18 minutes, until the edges are lightly golden and the crackers look firm.
- Carefully remove from the oven and let them cool on the baking sheet for about 5 minutes to set up.
- Transfer the crackers to a wire rack to cool completely for a perfect crispy texture.
Notes
- Cheese: Try mild cheddar, white cheddar, Parmesan, or Pepper Jack.
- Spice: Add garlic powder, onion powder, or dried mustard powder. Increase cayenne for more heat.
- Texture: Sprinkle tops with sesame seeds, poppy seeds, or flaky sea salt before baking. Mix in dried chives or dill into the dough.
- Butter: If using salted butter, slightly reduce added salt (e.g., to 1/4 teaspoon). Tips for Success:
- Use softened butter for proper creaming.
- Do not overwork the dough once flour is added.
- Handle Rice Krispies gently when folding.
- Flatten crackers evenly for uniform baking.
- Watch your oven as temperatures vary; check around 15 minutes.
- Cool completely on a wire rack for crispness.
- Prep Ahead: Dough can be rolled into a log, refrigerated for up to 3 days, or frozen for up to 3 months. Thaw in the fridge if frozen, then slice and bake. Storage:
- Store completely cooled crackers in an airtight container at room temperature for up to 5 days.
- To re-crisp, bake on a baking sheet at 300°F for a few minutes, then cool. FAQs:
- Crumbly dough: Ensure butter was soft enough, or try mixing a tiny bit longer. Add a splash (start with 1/2 teaspoon) of milk or water if needed.
- Gluten-free: Substitute with GF all-purpose blend and certified GF Rice Krispies. Baking time may vary slightly.
Thanks for sharing. I read many of your blog posts, cool, your blog is very good. https://accounts.binance.bh/el/register?ref=DB40ITMB
Your article helped me a lot, is there any more related content? Thanks!
Can you be more specific about the content of your article? After reading it, I still have some doubts. Hope you can help me.
Can you be more specific about the content of your article? After reading it, I still have some doubts. Hope you can help me.
Can you be more specific about the content of your article? After reading it, I still have some doubts. Hope you can help me. https://www.binance.bh/futures/ref?code=L4EUT9FG