Remember those bright red, sticky, sweet candy apples from your childhood fairs or Halloween parties? They felt so magical, like a little edible jewel on a stick! Well, get ready to conjure up some serious Halloween spirit with a twist on that classic. We’re diving into making “Poison” Candy Apples – not actual poison, of course! – but dramatically black and swirling beauties that look like they came straight out of a fairytale forbidden forest. Don’t let the name scare you; these are surprisingly easy and SO much fun to make. They’re the perfect spooky treat that looks impressive but won’t have you spending hours in the kitchen.
Why You’ll Love This Recipe
- Fast: Whip up the candy coating in minutes!
- Easy: Simple steps, even for candy-making beginners.
- Giftable: Wrap them up for a truly unique Halloween party favor.
- Crowd-pleasing: Both kids and adults will be wowed by their look and taste.
- Spooky Fun: Perfect for Halloween parties, haunted houses, or just getting into the festive spirit!
Ingredients
Gathering your ingredients is the first step to creating these mystical treats. Here’s what you’ll need:
- 6 medium apples (Granny Smith or Honeycrisp): Granny Smith gives you that classic tart contrast to the sweet candy coating, while Honeycrisp is lovely if you prefer a sweeter, super-crisp bite. Choose firm, unblemished apples!
- 2 cups granulated sugar: The sweet foundation for our candy shell.
- ½ cup light corn syrup: This is key! It helps prevent the sugar from crystallizing, giving you a smooth, glossy coating.
- ½ cup water: Just helps dissolve the sugar initially.
- ½ teaspoon black gel food coloring: You need gel coloring here! Liquid can mess with the candy’s consistency. Black is essential for that “poison” look.
- ¼ teaspoon purple gel food coloring: This adds a hint of mysterious depth and helps create that cool swirled effect.
- ½ teaspoon vanilla extract: A classic flavor that pairs perfectly with the sweet apple.
- ½ teaspoon cinnamon extract (optional): If you love that warm cinnamon apple flavor, add this in! It’s totally optional but highly recommended for a little extra cozy spice.
- Candy apple sticks: You can find these at most craft stores or online. Make sure they’re sturdy enough to hold the apple!
How to Make It
Alright, let’s turn these simple ingredients into spooky masterpieces! Follow these steps carefully, and remember, hot sugar is serious business, so be cautious.
Step 1: Prep Your Apples. First things first, you need super clean and dry apples. Wash them thoroughly. Many commercial apples have a waxy coating, which will make the candy slide right off. To remove it, dip each apple in boiling water for just a few seconds, then dry them completely with a clean towel. Any moisture will ruin the candy coating. Once they’re dry, firmly insert a candy apple stick into the core of each apple.
Step 2: Start the Candy Base. In a heavy-bottomed saucepan (this helps distribute heat evenly and prevents burning), combine the granulated sugar, light corn syrup, and water. Place it over medium heat and stir gently until all the sugar has dissolved. Don’t worry about stirring much after this initial step.
Step 3: Bring to Temperature. Increase the heat to medium-high. Here’s where your candy thermometer comes in! Let the mixture boil without stirring. Stirring at this stage can encourage crystallization. Watch the temperature carefully. You want it to reach precisely 300°F (which is called the hard-crack stage). This temperature is crucial for the candy to harden properly on the apple.
Step 4: Add Color and Flavor. As soon as the candy reaches 300°F, immediately remove the saucepan from the heat. Quickly but carefully stir in the black gel food coloring, purple gel food coloring, vanilla extract, and the optional cinnamon extract. Give it a gentle swirl to incorporate the colors – you don’t need to mix it perfectly if you want a more defined swirl.
Step 5: Dip and Swirl. This is the fun part! Working quickly while the candy is still hot (be very careful!), tilt the saucepan slightly. Take an apple by its stick and carefully dip it into the hot candy mixture. Swirl and rotate the apple to coat it evenly all the way around. Lift the apple out, letting any excess candy drip back into the pot. Hold it for a few seconds to catch drips.
Step 6: Let Them Set. Place the dipped apples on a baking sheet that you’ve lined with parchment paper or a silicone baking mat. This prevents them from sticking as they cool and harden. Let them sit undisturbed at room temperature until the candy coating is completely firm and glossy. This usually takes about 20-30 minutes.

Substitutions & Additions
- Different Extracts: Feel free to swap the vanilla or cinnamon extract for others! A little almond extract gives it a cherry-like depth, or maybe a touch of maple extract for a different fall vibe. Just be sure they are oil-based or candy-specific extracts.
- Edible Glitter or Sprinkles: For extra spooky flair, you can sprinkle your dipped apples with black or purple edible glitter, spooky sprinkles, or even some fine black sanding sugar immediately after dipping, while the coating is still wet.
- Chocolate Drizzle: Once the candy coating is completely hard, you could melt some black or white candy melts and drizzle over the apples for another layer of decoration.
- Different Apples: While Granny Smith and Honeycrisp are top picks, you could try other firm varieties like Fuji or Gala, keeping in mind they might be sweeter.
Tips for Success
- Dry Apples are KEY: I really can’t stress this enough! Any water left on the apple surface will cause the candy to seize or become grainy. Dry them thoroughly after washing and dipping in boiling water.
- Use a Candy Thermometer: Don’t try to eyeball the temperature. Getting to 300°F is critical for the hard-crack stage, ensuring the candy coating is hard and brittle, not sticky and chewy.
- Don’t Stir While Boiling: Once the sugar has dissolved and the mixture starts boiling, resist the urge to stir. This helps prevent those pesky sugar crystals from forming.
- Work Quickly: The candy hardens fast once removed from the heat. Have everything ready (apples prepped, baking sheet lined) before you start boiling the sugar.
- Handle with Care: Hot sugar is dangerous. Use oven mitts if needed and keep children and pets away from the hot pot and freshly dipped apples.
- Prep Ahead: You can wash and dry the apples and insert the sticks a few hours in advance. Just keep them covered lightly at room temperature. The candy coating needs to be made fresh right before dipping.
How to Store It
Once your bewitching apples are completely hardened, the best way to store them is individually wrapped in cellophane bags (the kind meant for candy apples or baked goods) at cool room temperature. Keep them away from direct sunlight or heat, which can make them sticky. Avoid refrigerating them, as the humidity inside the fridge is the arch-nemesis of hard candy coatings – it will make them sticky!
Stored properly, these candy apples will last for about 3-5 days, though they are definitely best enjoyed within a day or two for peak crunchiness.
FAQs
Here are a few questions folks often ask when making candy apples:
Q: Why did my candy apples turn out sticky?
A: This is usually due to one of two reasons: the candy didn’t reach the full 300°F (hard-crack stage) on the thermometer, or the apples weren’t completely dry, or you stored them in a humid environment (like the fridge).
Q: Can I use liquid food coloring instead of gel?
A: It’s not recommended. Liquid food coloring adds too much extra moisture to the candy mixture, which can prevent it from reaching the correct temperature and hardening properly.
Q: How can I get a better swirl effect?
A: Don’t overmix the colors after adding them. A quick stir is enough to incorporate them. When dipping the apple, give it a gentle turn or two in the pot to pick up the streaks of color without blending them too much.
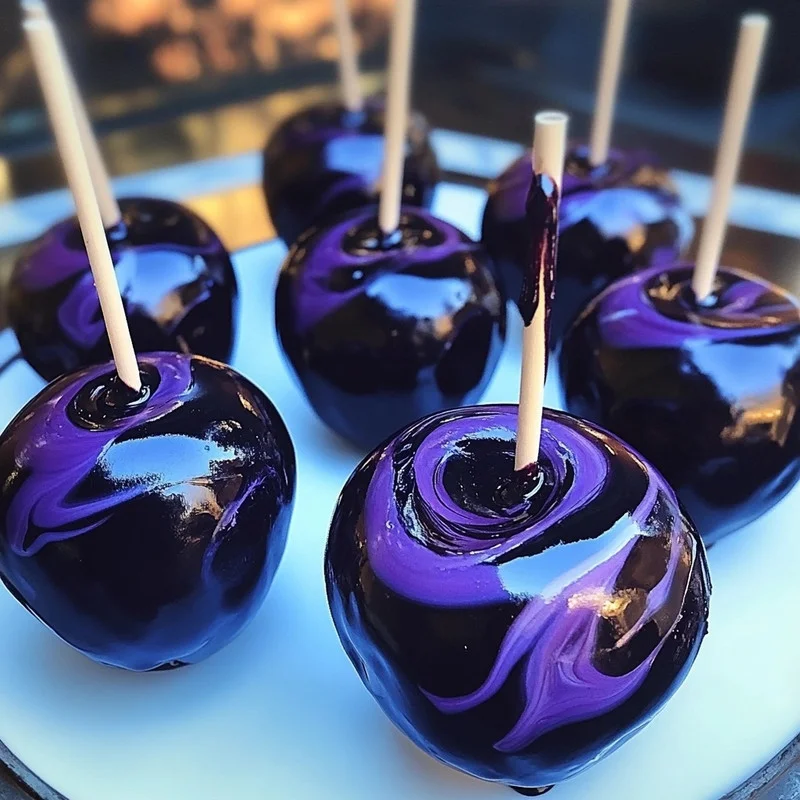
Making these Black Swirl “Poison” Candy Apples is such a fun way to embrace the spooky season! They’re a showstopper treat that tastes delicious and adds a touch of dark magic to any gathering. Give them a try, and happy haunting!
Bewitching Black Swirl Candy Apples
Ingredients
Equipment
Method
- Prep Your Apples: Wash apples thoroughly. To remove wax, dip each apple in boiling water for a few seconds, then dry completely with a clean towel. Insert a candy apple stick into the core of each apple.
- Start the Candy Base: In a heavy-bottomed saucepan, combine the granulated sugar, light corn syrup, and water. Place over medium heat and stir gently until all the sugar has dissolved.
- Bring to Temperature: Increase heat to medium-high. Let the mixture boil without stirring. Watch temperature carefully using a candy thermometer until it reaches 300°F (hard-crack stage).
- Add Color and Flavor: As soon as candy reaches 300°F, immediately remove saucepan from heat. Quickly stir in black gel food coloring, purple gel food coloring, vanilla extract, and optional cinnamon extract. Give a gentle swirl.
- Dip and Swirl: Working quickly while candy is hot (be very careful!), tilt the saucepan slightly. Take an apple by its stick and carefully dip it into the hot candy mixture. Swirl and rotate to coat evenly. Lift apple out, letting excess drip back into the pot. Hold for a few seconds to catch drips.
- Let Them Set: Place dipped apples on a baking sheet lined with parchment paper or a silicone baking mat. Let sit undisturbed at room temperature until candy coating is completely firm and glossy (approx. 20-30 minutes).
Notes
Use a candy thermometer to ensure the candy reaches the critical 300°F (hard-crack stage) for proper hardening.
Avoid stirring the candy mixture while it is boiling to prevent crystallization.
Work quickly once the candy is ready, as it hardens fast.
Handle hot sugar with extreme care; use oven mitts and keep children and pets away.
Store hardened apples individually wrapped in cellophane at cool room temperature, away from direct sunlight or heat. Avoid refrigeration, as humidity makes them sticky. Best enjoyed within 1-2 days, will last 3-5 days.
Your article helped me a lot, is there any more related content? Thanks!
Can you be more specific about the content of your article? After reading it, I still have some doubts. Hope you can help me. https://www.binance.bh/register?ref=QCGZMHR6