
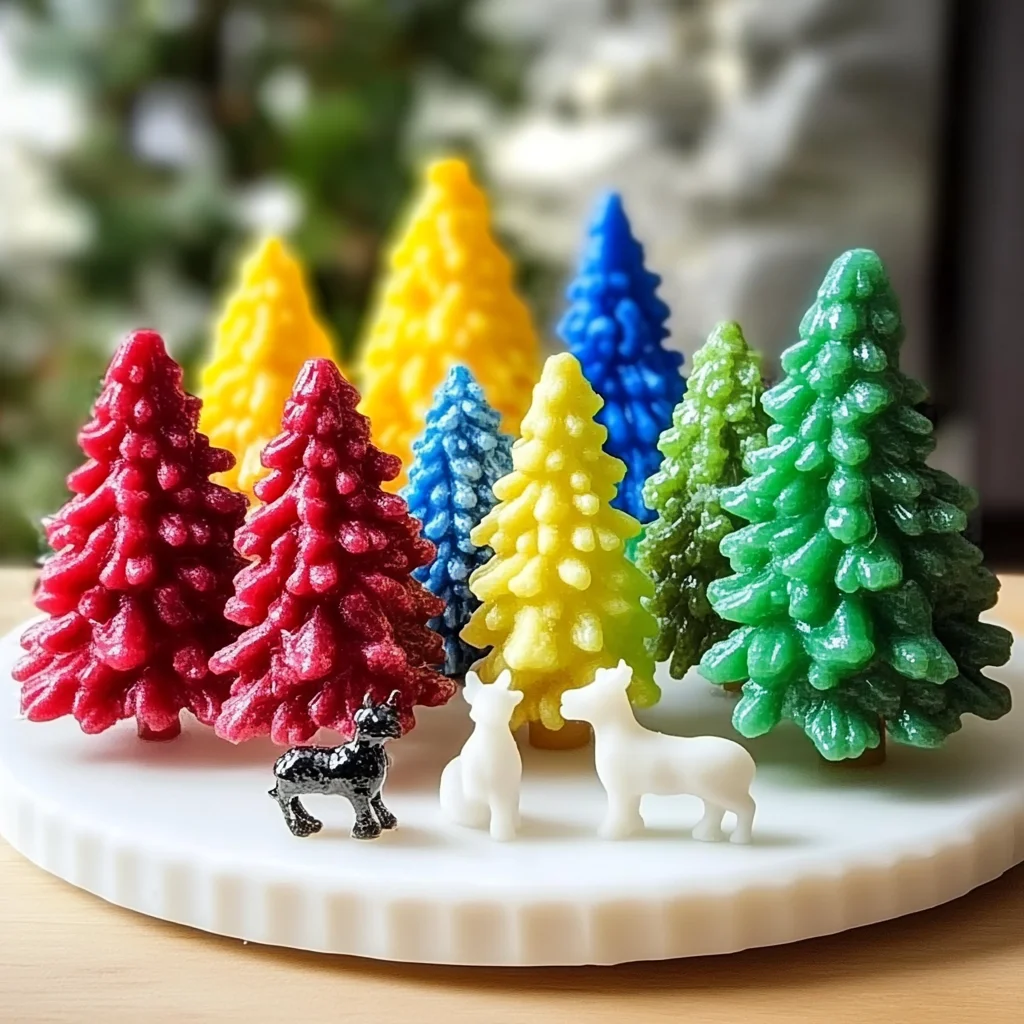
Have you ever watched a tiny seed sprout into a beautiful plant and felt that rush of joy and wonder? That’s the magic of creation, and today, we’re going to dive into a delightful DIY project that captures that same feeling! Imagine crafting your very own Crystal Growing Trees Village, where each branch sparkles with shimmering crystals that catch the light just right. This project is not only a feast for the eyes but also a soothing journey for your hands and mind. As you watch the crystals form, you can savor the satisfaction of creating something truly beautiful and unique.
Why You’ll Love Crystal Growing Trees Village
- Beginner-friendly
- Budget-friendly
- Creative and fun
- Great for kids and families
- Perfect for gifts or decorations
- Customizable
The Heart Behind This DIY
There’s something incredibly special about crafting your own decorations from scratch. The act of creating allows you to express your personality, spark your creativity, and engage your senses. As the warm steam from the boiling water rises, and the Epsom salt dissolves, you’ll find yourself in a meditative state, fully absorbed in the process. This project is an educational experience too, as you learn about crystallization and the science behind it. It’s a delightful way to bond with family and friends, sharing laughter and stories as you marvel at the beauty of your creations.
A Gentle Look at the Process
Creating your Crystal Growing Trees Village is a calming experience that begins with boiling water and ends with beautiful, shimmering crystals. You’ll start by making a simple solution of Epsom salt and water, which is the heart of your crystal-growing adventure. As you place your branches in the solution, imagine the tiny crystals beginning to form, slowly transforming your ordinary twigs into a magical forest. The anticipation of waiting for the crystals to grow will fill your crafting space with excitement and joy!
Materials You’ll Need
- Epsom salt (1 cup): This is the star of the show, as it forms the beautiful crystals.
- Water (2 cups): Essential for creating your crystal solution.
- Food coloring (optional): Add a splash of color to personalize your trees.
- Small branches or twigs: These will become the foundation for your crystal trees.
- A shallow dish or tray: To hold your solution and branches.
- A heat source (e.g., stove or microwave): To boil the water and mix your solution.
Step-by-Step Directions
Step 1
Begin by bringing 2 cups of water to a boil in a saucepan. As the water heats up, listen to the soothing sound of the bubbles dancing against the metal, a gentle reminder that something magical is about to happen.
Step 2
Once the water is boiling, carefully add 1 cup of Epsom salt. Stir continuously until the salt is completely dissolved. The water will become clear, and you may notice a lovely shimmer as the salt disappears. If you’re feeling adventurous, add a few drops of food coloring to the mixture for a vibrant touch!
Step 3
Remove the saucepan from the heat and let the solution cool slightly for a few minutes. While it cools, gather your small branches or twigs and arrange them in a shallow dish or tray. This is where your crystal trees will begin to take shape.
Step 4
Once the solution has cooled a bit, pour it over the branches until they are fully submerged. Imagine the crystals beginning to form and picture how stunning your finished creation will be.
Step 5
Now, let the solution sit undisturbed at room temperature for several hours or overnight. This is the exciting part, as you witness the magic of crystallization happening right before your eyes.
Step 6
After the waiting period, carefully remove the branches from the solution. You’ll see the beautiful crystals clinging to the twigs, each unique and sparkling in the light. Allow the branches to dry completely before displaying your masterpiece.
Creative Ways to Use Crystal Growing Trees Village
Your Crystal Growing Trees Village can transform any space into a whimsical wonderland. Use them as stunning centerpieces for your dining table, or display them on shelves to add a touch of sparkle to your home. These crystal trees also make exquisite gifts for friends and family, bringing a bit of nature’s beauty indoors. You can even encourage imaginative play by creating a fairy garden around your trees, allowing children to explore their creativity and storytelling skills.
How to Store, Preserve, or Reuse Crystal Growing Trees Village
To keep your crystal trees looking their best, store them in a cool, dry place away from direct sunlight. If you’re planning to reuse the branches, gently rinse them with water to remove any dust or residue. Just be careful not to remove the crystals in the process. With a little care, your beautiful creations can last for months!
Creative Variations and Customizations
- Color variations: Experiment with different shades of food coloring to create vibrant trees.
- Theme ideas: Create a winter wonderland with white and blue crystals or a summer forest with greens and yellows.
- Seasonal adaptations: Make a spooky Halloween version with dark colors or a festive holiday theme with red and green.
- Kid-friendly modifications: Use larger branches for easier handling by little hands.
- Advanced creative upgrades: Add glitter or metallic paint to the branches for extra sparkle!
Tips for Success
- Common mistakes to avoid: Ensure the Epsom salt is fully dissolved for the best crystal growth.
- Safety tips: Be cautious when handling boiling water to prevent burns.
- Preparation suggestions: Gather all materials before you start to keep the process smooth and enjoyable.
- Cleanup recommendations: Use warm soapy water to clean any residue from your utensils and dishes.
- Expert crafting tips: If you’re not seeing crystal growth, try adjusting the temperature or adding more salt to your solution.
FAQs About Crystal Growing Trees Village
Can beginners make this?
Absolutely! This project is perfect for beginners and families looking to explore their creativity together.
Can children participate?
Yes! Kids can help with the mixing and pouring, but adult supervision is recommended when handling boiling water.
How long does it last?
With proper care, your crystal trees can last for several months, making them a delightful addition to your home.
Can I customize it?
Definitely! Feel free to experiment with colors and themes, and make it your own!
A Final Creative Note
As we wrap up this enchanting journey of creating a Crystal Growing Trees Village, I hope you feel inspired to dive into this project and let your creativity shine. Remember, every creation is a reflection of your unique self, and each crystal carries a piece of your experience. So gather your materials, invite your loved ones, and enjoy the joy of crafting together. For more delicious recipes, check out simple and delightful treats or fun family-friendly meals that you will love!
For even more DIY inspiration, make sure to follow our Pinterest page!
Create Your Own Magical Crystal Growing Trees Village
Ingredients
Equipment
Method
- Step 1: Begin by bringing 2 cups of water to a boil in a saucepan.
- Step 2: Once the water is boiling, carefully add 1 cup of Epsom salt. Stir continuously until the salt is completely dissolved.
- Step 3: Remove the saucepan from the heat and let the solution cool slightly for a few minutes.
- Step 4: Once the solution has cooled a bit, pour it over the branches until they are fully submerged.
- Step 5: Let the solution sit undisturbed at room temperature for several hours or overnight.
- Step 6: After the waiting period, carefully remove the branches from the solution and allow them to dry completely before displaying your masterpiece.