
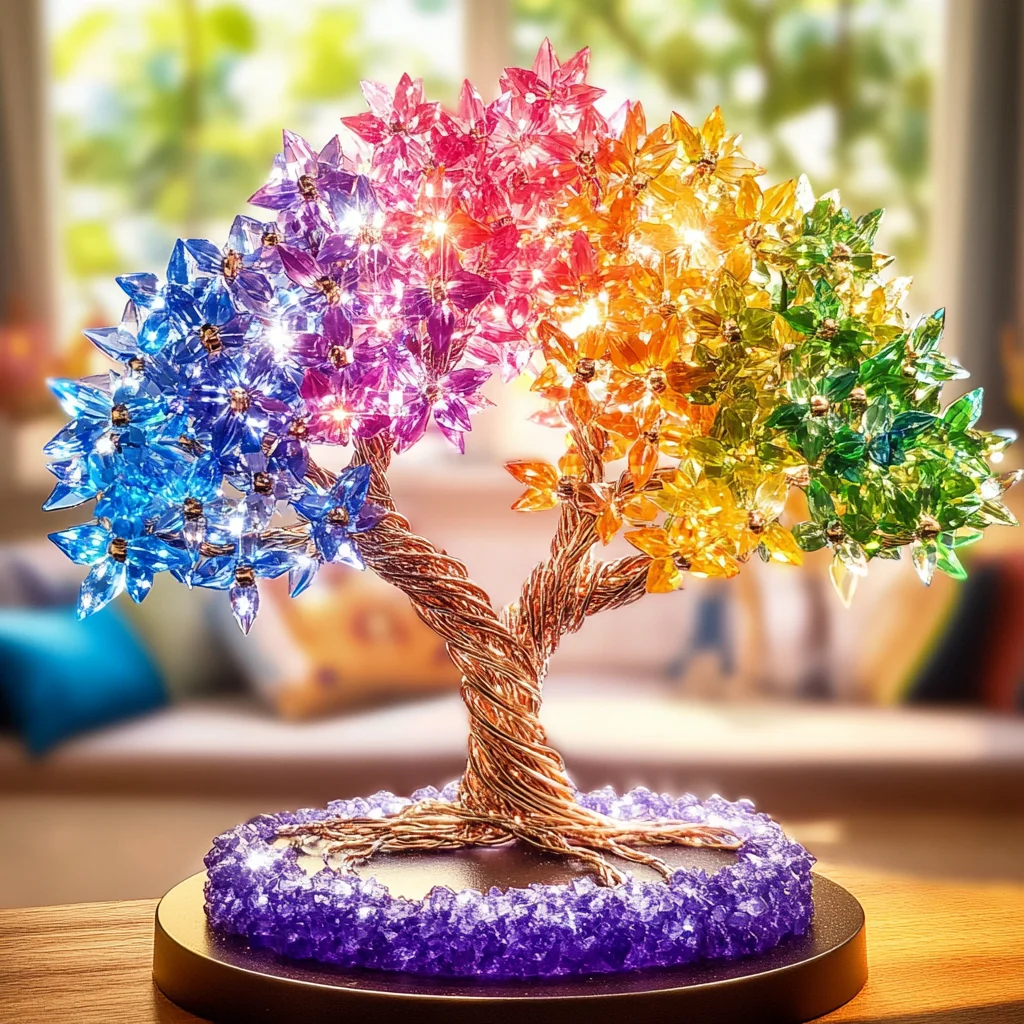
Have you ever watched a tree sparkle in the sunlight, its branches adorned with glimmering colors? Imagine creating your very own Rainbow Crystal Tree, a vibrant masterpiece that brings a touch of magic to your home. This project is not just about crafting; it’s a delightful journey into creativity, science, and the joy of making something special with your own hands. As you watch the crystals grow and flourish, you’ll feel a sense of wonder and accomplishment that makes every moment spent crafting worthwhile.
Why You’ll Love Rainbow Crystal Tree
- Beginner-friendly
- Budget-friendly
- Creative and fun
- Great for kids and families
- Perfect for gifts or decorations
- Customizable
The Heart Behind This DIY
Crafting is a wonderful way to express yourself, and the Rainbow Crystal Tree project is no exception. This activity encourages mindfulness as you focus on each step, allowing your worries to melt away. The excitement of watching the crystals form is not just educational but also deeply satisfying. As you engage in this creative process, you cultivate confidence and connection with those around you. Whether you’re crafting alone or with family, this project will surely bring laughter, joy, and a sense of togetherness.
A Gentle Look at the Process
As you embark on your Rainbow Crystal Tree adventure, expect to experience a lovely blend of colors, textures, and anticipation. You’ll start by mixing your magical solution, then transforming simple pipe cleaners into charming tree shapes. As you dip them into your colorful concoctions, you’ll be amazed to see how nature’s beauty unfolds right before your eyes. This project is a delightful reminder that crafting is not just about the end result; it’s about relishing each moment along the way.
Materials You’ll Need
- 1 cup of water – the base for our crystal solution.
- 3 tablespoons of Epsom salt – this is what will create the beautiful crystals.
- 3 tablespoons of corn syrup – it helps the crystals form and adds a lovely shine.
- Food coloring (various colors) – to make your tree vibrant and fun.
- Pipe cleaners – these will be shaped into your tree structure.
- A small container or jar – to hold your crystal solution.
- String or fishing line (optional) – for hanging your sparkling creation.
Step-by-Step Directions
Step 1
In a small container, combine 1 cup of water, 3 tablespoons of Epsom salt, and 3 tablespoons of corn syrup. Stir well until the Epsom salt is completely dissolved. Take a moment to enjoy the soothing sound of mixing, and visualize the beautiful crystals that will soon emerge.
Step 2
Divide the solution into several smaller containers. Add a few drops of different food coloring to each container to create a variety of colors. Let the colors swirl and mix; it’s like painting with nature!
Step 3
Take a pipe cleaner and shape it into a tree structure, ensuring it has branches for the crystals to grow on. You can twist and turn the pipe cleaner to make it uniquely yours. Let your creativity flow and imagine how each branch will look when adorned with sparkling crystals.
Step 4
Place the shaped pipe cleaner into the colored solutions, ensuring that the branches are submerged. This is where the magic begins! As you watch your tree soak up the vibrant colors, you can almost feel the excitement in the air.
Step 5
Allow the containers to sit undisturbed for several hours or overnight to let the crystals form. This waiting period is the perfect time to reflect and dream about the finished project. You might even want to prepare a cozy spot to display your creation.
Step 6
Once the crystals have formed, carefully remove the pipe cleaner from the solution and let it dry on a paper towel. Admire the stunning transformation that has taken place. Each crystal represents a moment of patience and creativity.
Step 7
Optionally, tie a string or fishing line to the top of the tree for hanging. Imagine how beautiful it will look dancing in the light, spreading joy and color wherever it goes.
Creative Ways to Use Rainbow Crystal Tree
Your Rainbow Crystal Tree can serve many purposes! Use it as a stunning centerpiece for your dining table or as a colorful decoration for a child’s room. It also makes a thoughtful gift for friends and family that showcases your creativity. You could even create a whole forest of crystal trees for a whimsical holiday display. The possibilities are truly endless!
How to Store, Preserve, or Reuse Rainbow Crystal Tree
To preserve your beautiful creation, store it in a cool, dry place away from direct sunlight to prevent fading. If you ever decide to refresh your tree, simply soak it in warm water to dissolve the crystals and start the process anew. It’s a fun way to relive the magic whenever you want!
Creative Variations and Customizations
- Color variations – try using pastel colors for a soft look or neon colors for a vibrant pop.
- Theme ideas – create a winter wonderland with white and blue crystals or a summer garden with bright greens and yellows.
- Seasonal adaptations – make a Halloween tree with orange and purple or a Christmas tree with red and green.
- Kid-friendly modifications – use pipe cleaners of different lengths for a whimsical forest.
- Advanced creative upgrades – experiment with glitter or sequins for extra sparkle on your tree.
Tips for Success
- Common mistakes to avoid – ensure the Epsom salt is fully dissolved for the best crystal formation.
- Safety tips – supervise young children during the crafting process, especially when using scissors for the pipe cleaners.
- Preparation suggestions – gather all materials before starting to keep the process smooth and enjoyable.
- Cleanup recommendations – use warm soapy water to clean up any spills or residue from the Epsom salt.
- Expert crafting tips – be patient during the drying process; some crystals take longer to form than others, so enjoy the wait!
FAQs About Rainbow Crystal Tree
Can beginners make this?
Absolutely! This project is perfect for beginners and is a fantastic way to learn about science while crafting.
Can children participate?
Yes, children can definitely join in! Just make sure to assist them with any cutting or handling of materials.
How long does it last?
With proper care, your Rainbow Crystal Tree can last for several weeks. Just keep it away from moisture to prevent the crystals from dissolving.
Can I customize it?
Definitely! You can experiment with different colors, shapes, and themes to make your tree uniquely yours.
A Final Creative Note
As you step back and admire your Rainbow Crystal Tree, remember that this project is more than just a craft; it’s a celebration of creativity, self-expression, and the joy of making something beautiful. So gather your supplies, invite a friend or family member to join you, and let your imagination soar. For more delicious recipes, check out wholesome treats or easy desserts for treats you will love! And don’t forget to follow our Pinterest for more DIY inspiration.
Rainbow Crystal Tree
Ingredients
Equipment
Method
- Step 1: Place a clean glass or ceramic dish on a stable surface. Set the plastic tree or wire tree structure upright in the center and make sure it will remain stable while the crystals grow.
- Step 2: Prepare the crystal-growing solution according to the instructions supplied with your specific compound. Measure the recommended amount of compound and water carefully and stir until properly incorporated and free of visible lumps.
- Step 3: Divide the prepared solution among several small containers if creating multiple colors. Add a few drops of food coloring to each portion and stir gently until the colors are evenly distributed.
- Step 4: Carefully pour the colored solutions around the base of the tree. Place different colors in different areas to create a rainbow-inspired pattern while avoiding unnecessary splashing.
- Step 5: Leave the setup completely undisturbed for the recommended growing period, commonly around 24 to 48 hours. Avoid moving or shaking the container while crystals develop around the tree.
- Step 6: Carefully remove the crystal-covered tree after the growing period. Allow excess solution to drain and let the finished tree dry completely if required by the product instructions before displaying it.
I’ve tried a few other platforms but the stability here is impressive. No lags during my gaming sessions which is a huge plus. Love jili95login.
Such a chill vibe on this site. I love how easy it is to navigate through the different sections. Keep up the good work guys! ph22niceph
The loading speed is amazing and the graphics are top notch. I had a lucky streak yesterday thanks to pkm555.