
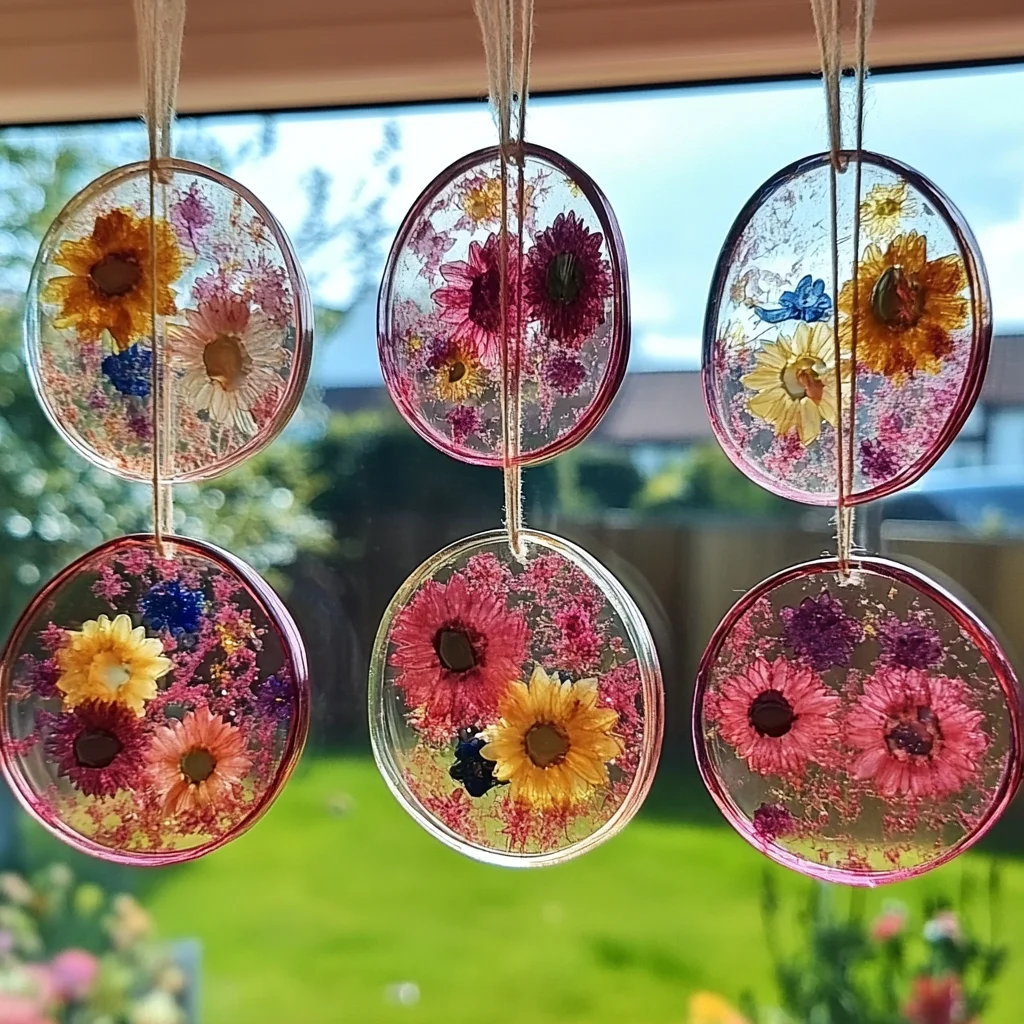
Imagine a sunlit room filled with the gentle glow of colorful suncatchers dancing in the light. Each one, a unique creation made with your own hands, brings joy and warmth to your home. DIY bioplastic suncatchers are not just a fun project; they are a delightful way to express your creativity while enjoying a wonderful sensory experience. The process is simple, and the results are absolutely enchanting. You’ll love the way these suncatchers catch the sunlight, filling your space with vibrant colors and a sense of accomplishment. So, let’s dive into this magical crafting adventure together!
Why You’ll Love DIY Bioplastic Suncatchers
- Beginner-friendly
- Budget-friendly
- Creative and fun
- Great for kids and families
- Perfect for gifts or decorations
- Customizable
The Heart Behind This DIY
Crafting bioplastic suncatchers is not just about creating a beautiful piece of art; it’s about the joy and relaxation that comes with the process. As you mix, mold, and shape the materials, you’ll find a sense of mindfulness washing over you. This project encourages creativity, allowing you to experiment with colors and shapes. It’s a chance to connect with your inner artist and perhaps even involve your kids, making it a wonderful family activity. The tactile experience of working with the mixture and seeing your ideas come to life is incredibly rewarding, and I promise it will leave you smiling.
A Gentle Look at the Process
As you embark on this crafting journey, you can expect a delightful blend of mixing, shaping, and waiting. The initial steps involve combining simple ingredients in a saucepan, then allowing your imagination to take flight as you mold the bioplastic into beautiful shapes. The anticipation builds as you wait for your creations to dry, and the joy of peeling them off the wax paper will feel like unwrapping a special gift. Each step is filled with its own little moments of magic.
Materials You’ll Need
- 1 cup cornstarch: This is the main ingredient that will give your suncatchers their bioplastic quality.
- 1 cup water: Essential for creating the right consistency for your mixture.
- 1 tablespoon vinegar: This helps to enhance the durability of your suncatchers.
- Food coloring (optional): Add some vibrant hues to your creations.
- Wax paper: A non-stick surface to shape and dry your suncatchers.
- Scissors: For cutting your suncatchers into fun shapes.
- Cookie cutter (optional): Use these to create perfect shapes with ease.
Step-by-Step Directions
Step 1
In a saucepan, combine the cornstarch, water, and vinegar. Over medium heat, stir the mixture constantly until it thickens and becomes translucent. This is where the magic begins as the ingredients meld together into a delightful gooey texture.
Step 2
Once the mixture has thickened, remove it from the heat and allow it to cool slightly. If you want to add a splash of color, now is the time! Add a few drops of food coloring and mix well until you achieve your desired shade.
Step 3
When the mixture is cool enough to handle, place it onto a sheet of wax paper. Using your hands or a rolling pin, flatten the mixture to about 1/4 inch thickness. Don’t worry about making it perfect; each suncatcher will have its unique charm.
Step 4
If you’re using a cookie cutter, press it into the flattened mixture to create fun shapes. Alternatively, grab your scissors and cut out shapes according to your design. Let your creativity shine!
Step 5
Now, let your suncatchers dry for 24-48 hours, or until they are completely hardened. You’ll be amazed at how they transform during this time!
Step 6
Once dry, carefully peel the suncatchers off the wax paper. The anticipation of seeing your creations is so exciting!
Step 7
Finally, hang your suncatchers in a sunny window and enjoy the vibrant light effects they create. Watching the sunlight filter through them is truly a rewarding experience.
Creative Ways to Use DIY Bioplastic Suncatchers
Your finished bioplastic suncatchers can be displayed in various ways! Hang them in windows, use them to decorate a child’s room, or even string them together to create a colorful mobile. They make delightful gifts for friends and family, bringing a personal touch that’s hard to resist. You can also use them in outdoor spaces, like on a porch or in a garden, where they can twinkle in the sunlight and create a magical atmosphere.
How to Store, Preserve, or Reuse DIY Bioplastic Suncatchers
To preserve your suncatchers, store them in a cool, dry place away from direct sunlight when not in use. If you’d like to reuse them, you can carefully cut them into new shapes or even combine multiple suncatchers to create a layered effect. With a little creativity, they can continue to bring joy for years to come.
Creative Variations and Customizations
- Color variations: Experiment with different colors or even create ombre effects.
- Theme ideas: Make holiday-themed suncatchers for festive decorations.
- Seasonal adaptations: Create spring flowers, summer suns, autumn leaves, or winter snowflakes.
- Kid-friendly modifications: Let kids choose their favorite shapes and colors for a personalized touch.
- Advanced creative upgrades: Layer multiple colors for a more complex design or add glitter for some sparkle.
Tips for Success
- Common mistakes to avoid: Ensure the mixture is thick enough before removing it from heat; it should be translucent.
- Safety tips: Always supervise children while crafting, especially when using scissors.
- Preparation suggestions: Gather all materials before starting to make the process smoother.
- Cleanup recommendations: Clean any spills immediately for easy cleanup, as the mixture can harden.
- Expert crafting tips: Don’t rush the drying process; letting them dry thoroughly ensures they hold their shape.
FAQs About DIY Bioplastic Suncatchers
Can beginners make this?
Absolutely! This project is perfect for beginners, and the steps are simple to follow.
Can children participate?
Yes! Kids will love getting involved, especially in choosing colors and cutting shapes.
How long does it last?
With proper care, these suncatchers can last for several months, brightening your space.
Can I customize it?
Definitely! You can play with colors, shapes, and even add personal touches to make them unique.
A Final Creative Note
As you wrap up your crafting session, take a moment to appreciate your beautiful creations. Each suncatcher is a testament to your creativity and a small piece of joy you can bring into your home. Remember, crafting is all about self-expression and the joy of making something with your own hands. For more delicious recipes, check out Lana Recipes or fun DIY projects that will inspire you!
Don’t forget to follow our Pinterest for more DIY inspiration. Happy crafting!
DIY Bioplastic Suncatchers
Ingredients
Equipment
Method
- Step 1: Combine 1 cup of cornstarch, 2 tablespoons of vinegar, and 2 tablespoons of corn oil in a cooking pan. Stir thoroughly until the mixture becomes smooth and relatively free of lumps.
- Step 2: Place the pan over low heat and stir continuously until the mixture thickens and develops a soft, workable consistency. Do not leave the mixture unattended while heating.
- Step 3: Remove the pan from the heat and stir in a few drops of food coloring. Divide the mixture into portions first if you want to create multiple colors.
- Step 4: Place wax paper or a silicone mat on a flat surface. Position cookie cutters or flexible molds and carefully spoon the warm bioplastic mixture into them. Spread the mixture evenly for a smooth finish.
- Step 5: Transfer the shaped pieces to a baking sheet and allow them to dry at room temperature for at least 24 hours, or until they are completely hard.
- Step 6: Once completely dry, apply a thin coat of clear varnish if desired for a glossy finish. Allow the coating to dry completely.
- Step 7: Attach string or ribbon if desired and hang the finished suncatchers in a sunny window or another bright location where the colors can be illuminated by natural light.