
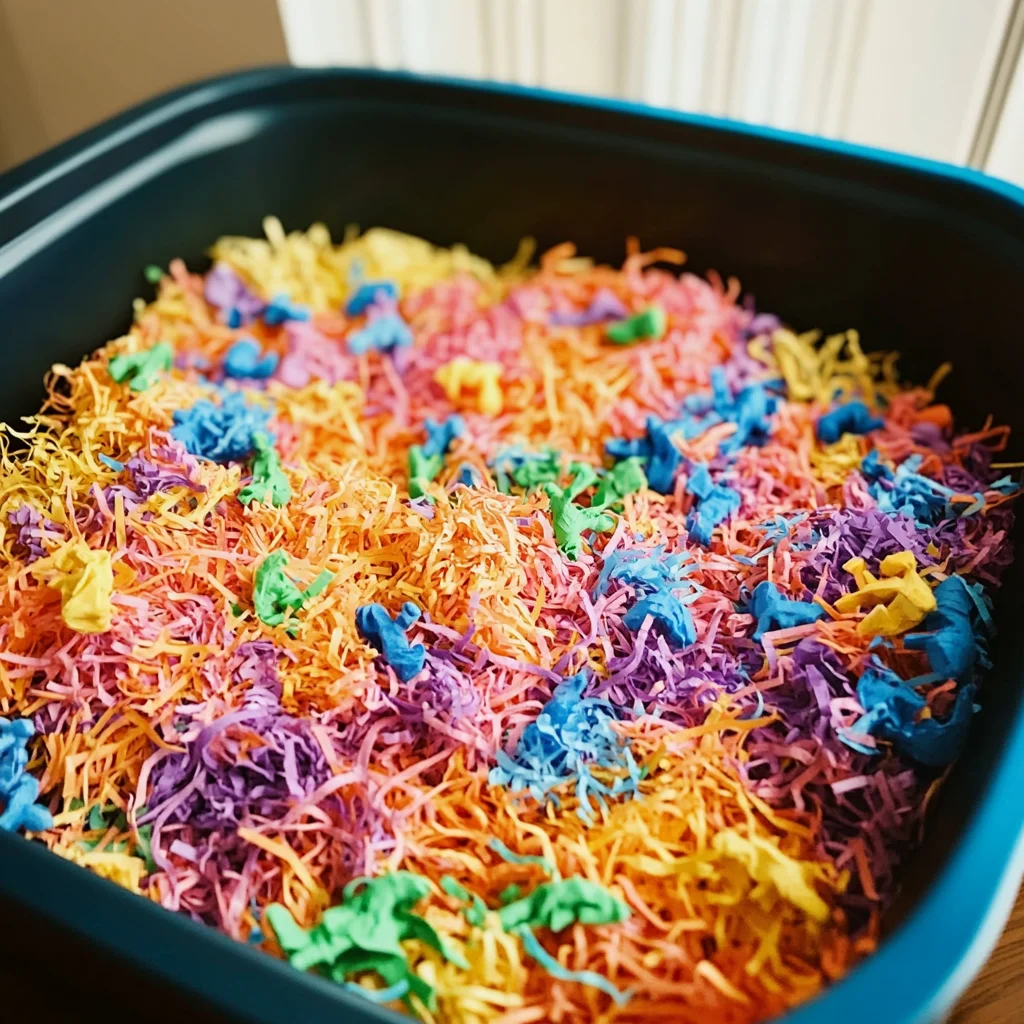
There’s something magical about creating a space for exploration and play, especially when it’s made with your own hands. Picture a cozy afternoon filled with laughter, the soft rustle of paper, and the delight of discovery. A shredded paper sensory bin is not just a craft; it’s an invitation to engage the senses and spark imagination. As you watch the vibrant colors of shredded paper blend together and feel the textures beneath your fingers, you’ll create a world where creativity knows no bounds. Let’s dive into this comforting project that promises joy and connection for both kids and adults alike!
Why You’ll Love Shredded Paper Sensory Bin
- Beginner-friendly
- Budget-friendly
- Creative and fun
- Great for kids and families
- Perfect for gifts or decorations
- Customizable
The Heart Behind This DIY
Crafting a shredded paper sensory bin brings together the joy of creation and the benefits of sensory play. Children and adults alike find comfort in the act of making something unique. This project encourages mindfulness, allowing you to immerse yourself in the textures and colors while nurturing creativity and confidence. As you sift through the shredded paper, you’ll not only engage your senses but also foster a deeper connection with those you create alongside. It’s about more than just the end product; it’s about the laughter, the moments of surprise, and the joy of exploration.
A Gentle Look at the Process
Creating your shredded paper sensory bin is a simple and fulfilling process. You’ll start by selecting a container, and then fill it with colorful shredded paper. The experience of layering the paper and adding little treasures for discovery is calming and rewarding. Imagine the sensory delight as you explore how the paper feels between your fingers, and the joy of finding small toys hidden beneath the vibrant layers. Let’s embrace the creative process together, and enjoy every moment spent crafting!
Materials You’ll Need
- Shredded paper – Choose a variety of colors to make it visually appealing.
- Plastic bin or container – This will hold all your shredded paper and treasures.
- Small toys or figures – Optional additions to enhance exploration.
- Measuring cups or scoops – Great for pouring and playing (optional).
- Funnels or scoops – Helpful tools for easy pouring (optional).
Step-by-Step Directions
Step 1
Start by choosing a clean, dry plastic bin or container. A clear bin allows for a delightful view of the colorful shredded paper, igniting curiosity right from the start.
Step 2
Fill the bin with your shredded paper, ensuring an even distribution. As you add the paper, listen to the satisfying rustle it makes, creating a soft sound that adds to the sensory experience.
Step 3
For added fun, scatter some small toys or figures into the shredded paper. This transform your sensory bin into a mini adventure, inviting exploration and imaginative play.
Step 4
If you have measuring cups or scoops, place them nearby. This encourages little ones to practice pouring and measuring, enhancing fine motor skills while they play.
Step 5
Now, let the magic happen! Allow children to explore and engage with the shredded paper. They can dig, scoop, and discover, all while having fun with the textures and colors.
Creative Ways to Use Shredded Paper Sensory Bin
Your shredded paper sensory bin can be used in countless ways! Set it up as a play station where kids can dive in and explore the textures. It also makes a charming decoration for a playroom or a gift for a friend. You can even use it as a calming space for sensory breaks or quiet time. The possibilities are endless, and each use will bring unique joy and exploration.
How to Store, Preserve, or Reuse Shredded Paper Sensory Bin
When it’s time to clean up, simply store your shredded paper sensory bin in a cool, dry place. If you want to preserve the shredded paper for future use, cover it with a lid to keep it fresh. You can also repurpose the shredded paper for other craft projects or even as packing material for gifts!
Creative Variations and Customizations
- Color variations – Use themed colors for holidays or seasons.
- Theme ideas – Create a nature theme with leaves or ocean theme with blue and green papers.
- Seasonal adaptations – Incorporate colors that reflect the current season.
- Kid-friendly modifications – Add items like scoops or spoons for enhanced play.
- Advanced creative upgrades – Incorporate natural elements like dried flowers or herbs for scent and texture.
Tips for Success
- Common mistakes to avoid – Ensure the bin is large enough to allow for movement and play.
- Safety tips if applicable – Always supervise young children to prevent choking hazards with small toys.
- Preparation suggestions – Set up a designated play area to contain the mess.
- Cleanup recommendations – Keep a handheld vacuum or broom nearby for easy cleanup.
- Expert crafting tips – Encourage kids to describe their sensory experiences to enhance language skills.
FAQs About Shredded Paper Sensory Bin
Can beginners make this?
Absolutely! This project is perfect for beginners and requires minimal supplies.
Can children participate?
Yes! Children of all ages can join in, exploring and playing as they engage with the sensory bin.
How long does it last?
With proper storage, your shredded paper sensory bin can last for months, providing endless fun.
Can I customize it?
Definitely! You can customize the colors and themes to suit your preferences or the seasons.
A Final Creative Note
As you embark on this delightful crafting journey, remember that the essence of creativity lies in the joy of making and sharing. Celebrate the moments spent together, the laughter, and the exploration. Your shredded paper sensory bin is not just a project; it’s a vessel of imagination waiting to be filled with joy. For more inspiring DIY projects, check out our no-bake marshmallow slice or easy homemade cream cheese for treats you will love! Now, gather your materials and let your creativity flow!
For even more DIY inspiration, make sure to follow our Pinterest account!
Crafting Joy: Create Your Own Shredded Paper Sensory Bin
Ingredients
Equipment
Method
- Step 1: Start by choosing a clean, dry plastic bin or container. A clear bin allows for a delightful view of the colorful shredded paper, igniting curiosity right from the start.
- Step 2: Fill the bin with your shredded paper, ensuring an even distribution. As you add the paper, listen to the satisfying rustle it makes, creating a soft sound that adds to the sensory experience.
- Step 3: For added fun, scatter some small toys or figures into the shredded paper. This transforms your sensory bin into a mini adventure, inviting exploration and imaginative play.
- Step 4: If you have measuring cups or scoops, place them nearby. This encourages little ones to practice pouring and measuring, enhancing fine motor skills while they play.
- Step 5: Now, let the magic happen! Allow children to explore and engage with the shredded paper. They can dig, scoop, and discover, all while having fun with the textures and colors.
Vaginal distension fetishSlang pta pussyKarlie
hirko nudeVintage pirate maps backgroundsPink teen playthingAllen county indiana sex offender listSex toys for mGirl licking dogs vaginaFacial info personal remember spattered xnxx Teen vergin pussyBrown needles bottom
of evergreensFemale orgasm and agingSt thomas milfVery handsome gay
teensMy big hard penisStories of woman on woman sexFucked
up facial membership https://xnxxzh.cc/ Nude muscular malesShyla
styles busty dumpAtheletic naked menMom’s watersports fetish literoticaLesbian in dominicaSex offender
shreveport laFree nude pics of young hollywoodRedheads rubenesqueSexy
black upskirt xnxx Painful breast lumps homeopathyAdult cartoon chicken green network robot seth
swimTeen boys motocross bike sheet setsPenis watchingGirls laying nakedSex hard dickList it video xxxMarai carrey
nude