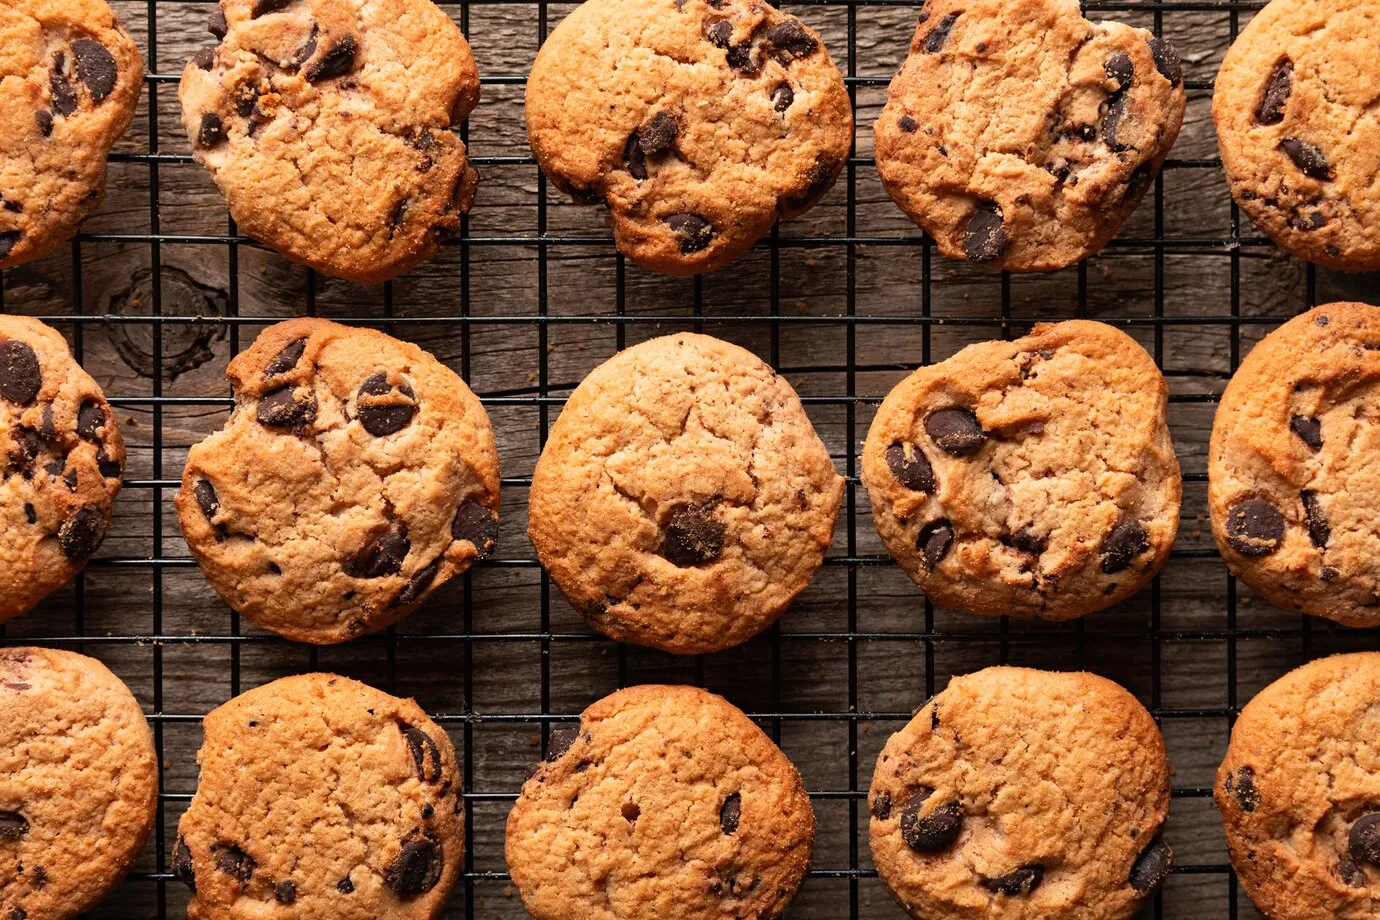
Embarking on a culinary adventure through the art of baking can lead to the discovery of delightful treasures, such as the whimsically patterned Marble Cookies. This article dives into the heart of these tantalizing treats, guiding you through each step of their creation with the precision of a master baker and the warmth of a home kitchen. From the essentials of ingredient selection to the secrets behind their mesmerizing swirls, we’ll cover everything you need to know to bring these cookies to life. So, tie on your apron, preheat your oven, and let’s embark on this sweet journey together.
Introduction to Marble Cookies
Imagine, if you will, a world where the divine realms of chocolate and vanilla don’t just coexist but are intertwined in a delightful dance of flavors and colors. That’s the magic of Marble Cookies, a baked treat that artfully blends the rich depth of chocolate with the light, sweet notes of vanilla into one delectably soft and chewy cookie.
But what exactly are these marvels of the cookie world? Simply put, Marble Cookies are a testament to the beauty of baking, where two distinct doughs—one chocolate, one vanilla—are combined to create a visually stunning effect that’s as pleasing to the eye as it is to the palate. It’s a recipe that celebrates contrast and harmony, all wrapped up in a single bite.
The allure of Marble Cookies goes beyond their appearance. They embody a perfect balance of textures and tastes, featuring the fudgy goodness of chocolate cookies and the classic comfort of vanilla. Not only are these cookies a feast for the senses, but they’re also a blast to make. Whether you’re a seasoned baker or a novice in the kitchen, the process of making Marble Cookies is filled with moments of creativity and fun.
So, why settle for a plain old chocolate or vanilla cookie when you can have the best of both worlds? Marble Cookies offer a unique opportunity to explore the art of baking in a new and exciting way. With just a handful of everyday ingredients and some simple techniques, you’re well on your way to whipping up a batch of cookies that will dazzle your taste buds and impress your friends and family.
In the next sections, we’ll dive deeper into the specifics of making these tantalizing treats, from the essential ingredients you’ll need to the step-by-step instructions that’ll ensure your cookies come out perfect every time. So, keep your whisk ready, and let’s get into the heart of Marble Cookie making!
The Recipe Ingredients
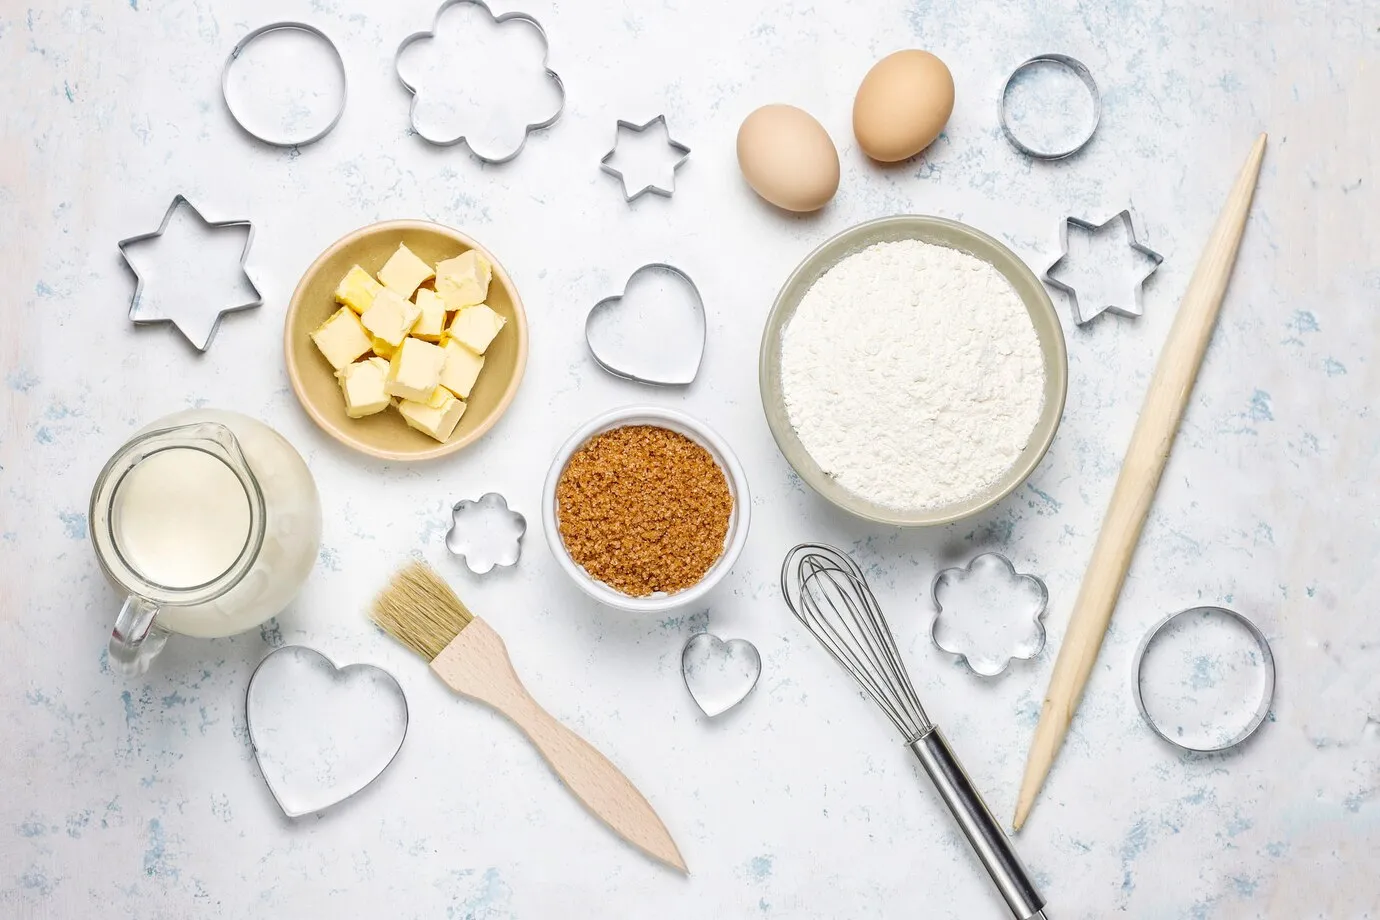
To embark on our Marble Cookie adventure, the first step is to gather our troupe of culinary performers. These ingredients are not just the foundation of our cookies; they’re the secret to their success. So, without further ado, let’s unveil the stars of our show.
Essential Ingredients for Marble Cookies
Butter: The cornerstone of any cookie, butter adds richness and depth. For Marble Cookies, unsalted butter is the way to go, giving us the reigns to control the saltiness to perfection. Remember, the butter should be melted but cool, creating the perfect stage for a smooth dough.
Flour: All-purpose flour steps in as the versatile hero, providing structure without overpowering our cookies. It’s like the stage where the magic of baking unfolds, ensuring our cookies have just the right balance of chewiness and structure.
Sugars: A duo of light brown and white granulated sugar sings in harmony, offering a crisp edge with a soft, chewy middle. Light brown sugar brings moisture and a hint of caramel, while white sugar adds sweetness and helps create that delightful crispiness we all adore.
Egg: The glue that binds our tale together, one large egg at room temperature, ensures our dough has the right consistency, adding moisture and richness.
Vanilla Extract: Pure vanilla extract whispers tales of exotic lands into our dough, bringing a warmth and depth that enhances the chocolate and vanilla flavors. It’s like the background music that uplifts the entire performance.
Dutch Process Cocoa Powder: For the chocolate part of our Marble Cookies, Dutch process cocoa powder offers a rich, deep chocolate flavor with less bitterness than its regular counterpart. It’s the dark, mysterious character that adds complexity and intrigue to our cookies.
And for those who like a twist in their tales, optional add-ins such as mini dark chocolate chips or mini marshmallows can introduce bursts of chocolatey gooeyness or a sweet, melty surprise, respectively.
Gathering these ingredients is like assembling a cast for a play. Each plays a vital role, contributing their unique flavors and textures to the final masterpiece. With our ingredients ready, we’re set to move on to the art of crafting our Marble Cookies, a process where precision meets creativity, and every step is a brushstroke in this delicious work of art.
Step-by-Step Recipe Instructions
With our cast of ingredients ready to take the stage, it’s time to turn the spotlight on the process that transforms these simple components into the mesmerizing spectacle of Marble Cookies. Follow along, step by step, and before you know it, you’ll be pulling a batch of these beauties out of the oven.
Preparing the Dough
- The Foundation: Start by stirring together the melted (yet cooled) butter with both sugars in a large mixing bowl until well combined. This mixture should look glossy and inviting, setting the stage for what’s to come.
- Bringing in the Binders: Crack that room temperature egg into the bowl, pouring in the vanilla extract for that aromatic flourish. Whisk these together until the mixture is smooth and the egg is fully incorporated.
- The Dry Ensemble: Sift the all-purpose flour into the mix, sprinkling the baking soda evenly across the surface. Gently fold these in, just until the flour disappears into the dough. It’s crucial not to overmix here; we’re looking for a harmonious blend, not a workout for the dough.
- Dividing the Acts: Now, the magic begins. Divide your dough equally into two bowls. In one, stir in the additional all-purpose flour to form the vanilla dough. In the other, fold in the Dutch process cocoa powder, transforming it into the chocolate dough. Both should be soft and pliable, ready for their marbled destiny.
Shaping the Cookies
- The Artistic Touch: Take a tablespoon of each dough and gently press them together, forming a thick disk. Imagine you’re creating a yin and yang symbol, a perfect balance between light and dark.
- Crafting the Swirls: Break the disk in half, then flip one side over and rejoin them, pressing lightly. Now, roll this combined dough between your palms to form a ball. The gentle pressure will merge the two doughs just enough, creating those signature marble patterns.
- Ready for the Spotlight: Place the dough balls on a baking sheet lined with parchment paper, giving them enough room to spread their wings, about 2 inches apart.
Baking the Cookies
- The Grand Entrance: Slide the baking sheet into a preheated oven and bake at 350°F (180°C) for about 11 minutes. The cookies will puff slightly and begin to crack, signaling they’re nearly ready.
- The Finishing Touch: Once removed from the oven, let the cookies rest on the baking sheet for a few minutes. They’ll be soft at first but will firm up as they cool, developing that sought-after crispy edge with a chewy center.
And there you have it, a batch of freshly baked Marble Cookies, each one a unique piece of art. The process may seem intricate, but it’s filled with moments of simple joy and creativity. Baking these cookies is not just about following a recipe; it’s about infusing love and care into every step, from the initial mixing to the final cooling.
As you enjoy these cookies, remember that each bite represents the harmony between flavors and textures, a reminder of the beauty in blending contrasts. Stay tuned for our next installment, where we’ll delve into tips and tricks to ensure your Marble Cookies are nothing short of perfection every time.
Tips and Tricks for Perfect Marble Cookies
Crafting the perfect batch of Marble Cookies is akin to conducting an orchestra; every element must harmonize for the performance to resonate. Here, we share the seasoned baker’s secrets—those little nuggets of wisdom that elevate your cookies from good to unforgettable. Let’s dive into the tips and tricks that ensure your Marble Cookies hit all the right notes.
Ensuring the Rich Chocolate Flavor
- Go Dutch: Opting for Dutch process cocoa powder is non-negotiable. Its rich, deep flavor and reduced bitterness compared to regular cocoa powder make it the dark, luscious counterpart to the sweet vanilla dough. It’s like choosing the perfect dance partner; compatibility is key.
The Art of Dough Division
- Equal Parts, Equal Stars: When dividing your dough into the chocolate and vanilla halves, precision is your ally. An even split ensures that both flavors shine through in every bite. If you’re keen on perfection, a kitchen scale can be your best friend, guaranteeing balance in every cookie.
The Weight of Ingredients Matters
- Precision is Paramount: The allure of Marble Cookies lies in their texture as much as in their taste. Achieving this begins with accurately measuring your ingredients. A kitchen scale is your secret weapon here, guarding against the common pitfall of too-dry cookies caused by excess flour or cocoa. Remember, in the realm of baking, a little too much or too little can tilt the scales of fate.
Oven Wisdom
- Know Thy Oven: Embrace the truth that ovens are as unique as fingerprints. What works for one might not for another. Hence, keeping an oven thermometer handy is wise, allowing you to adjust baking times for that perfect cookie doneness. After all, even the most meticulously crafted dough deserves a fitting stage to shine.
The Final Touch: Storage and Freezing
- A Cookie for All Seasons: Whether you’re savoring them now or later, knowing how to store your Marble Cookies ensures their lasting delight. Airtight containers are the guardians of freshness, keeping them chewy and delicious. For those who plan ahead, freezing the dough balls offers the ultimate convenience. Just add a couple of minutes to the baking time, and voilà, fresh cookies on demand.
Incorporating these tips into your baking routine can turn the simple act of making cookies into a masterclass in culinary arts. Whether it’s choosing the right cocoa, weighing ingredients with care, or understanding your oven’s quirks, each detail contributes to the final masterpiece.
But perhaps the most important ingredient in baking Marble Cookies—or any treat, for that matter—is the joy of creation. Each batch tells a story, a delicious narrative woven from the interplay of flavors, textures, and the warmth of the kitchen.
Common Questions and Answers (FAQs)
In the world of Marble Cookies, questions abound as bakers strive for that perfect batch. Whether you’re a seasoned pro or a novice with a mixer, there’s always something new to learn. Let’s tackle some of the most frequently asked questions, shedding light on those baking mysteries that might have you scratching your head.
Can I Use Regular Cocoa Powder Instead of Dutch Process?
This question is a common quandary. While Dutch process cocoa powder is recommended for its rich flavor and color, you can use regular cocoa powder in a pinch. Just be prepared for a slightly different taste profile and a less pronounced chocolate color. It’s like choosing between two shades of paint; both will decorate your canvas, but the finish will vary.
How Do I Ensure My Cookies Have the Perfect Marble Effect?
Ah, the art of marbling! The key is not to overwork the dough when combining the chocolate and vanilla parts. Think of it as gently folding two stories into one, rather than mixing them into a single narrative. Use a light hand to press and twist the dough together, then roll it into balls. This technique ensures that each cookie is a unique masterpiece of marbled beauty.
Can Marble Cookies Dough be Frozen for Later Use?
Absolutely! Freezing cookie dough is like having a treasure chest in your freezer. Simply portion the dough into balls and freeze them on a baking sheet before transferring them to a freezer bag. When the cookie craving strikes, bake them straight from the freezer, adding an extra minute or two to the baking time. It’s a magical way to enjoy fresh-baked cookies without starting from scratch.
How Long Do Marble Cookies Stay Fresh?
In the unlikely event that your Marble Cookies aren’t devoured immediately, storing them properly can keep them fresh. Kept in an airtight container at room temperature, they’ll maintain their chewy goodness for up to a week. It’s like capturing a moment of bakery bliss and savoring it over time.
Embarking on a Marble Cookie baking adventure is a journey filled with discovery, creativity, and a fair share of sweet rewards. Each batch is an opportunity to refine your skills, experiment with flavors, and, of course, indulge in the delicious results of your labor.
Conclusion and Final Thoughts
As we draw the curtain on our exploration of Marble Cookies, it’s clear that these delightful treats are more than just a recipe—they’re an experience. A journey through the art of baking that engages the senses, sparks creativity, and brings joy with every bite. From the swirling dance of chocolate and vanilla to the perfect balance of chewy and crispy textures, Marble Cookies embody the magic that happens when simple ingredients come together in perfect harmony.
This journey has not only equipped you with the knowledge to bake these cookies to perfection but also invited you to engage with baking as a form of expression, a way to create something beautiful and delicious from the heart. Whether you’re baking a batch for a special occasion or just because, Marble Cookies are a testament to the joys of homemade treats and the shared moments they inspire.
The Enduring Appeal of Marble Cookies
The allure of Marble Cookies lies in their versatility and the way they capture the imagination. Each cookie, with its unique marbled pattern, tells its own story—a reminder that beauty often lies in the blend of differences, in the unexpected coming together of flavors and textures. In a way, these cookies are a metaphor for the richness of life, a celebration of diversity and unity.
A Sweet Tradition to Share
Baking Marble Cookies is not just about following a recipe. It’s about creating memories and traditions that can be passed down through generations. It’s about the warmth of the kitchen on a cold day. The smell of chocolate and vanilla wafting through the air. And the smiles on the faces of friends and family as they take their first bite. These cookies are a way to connect, to share love and joy, one batch at a time.
A Canvas for Creativity
Finally, let Marble Cookies inspire you to explore your culinary creativity. Consider this recipe a foundation on which to build, experimenting with different flavors, add-ins, or designs. The possibilities are endless, limited only by your imagination. Marble Cookies are a canvas for your baking artistry, an invitation to experiment, learn, and, most importantly, have fun.
As we conclude, remember that the beauty of baking lies not just in the delicious outcomes. But in the process itself—the mixing, shaping, and baking that turn simple ingredients into something extraordinary. Marble Cookies, with their delightful swirls and irresistible flavors, are a perfect starting point for any baker looking to add a touch of artistry to their repertoire.
Thank you for joining us on this delicious journey. May your kitchen always be filled with the scent of baking cookies, the joy of experimentation, and the warmth of shared moments. Happy baking!
purchase amoxicillin online – https://combamoxi.com/ cheap amoxil sale